
After installing our package, you need to follow these detailed steps to configure your eCommerce store on WedgeCommerce.
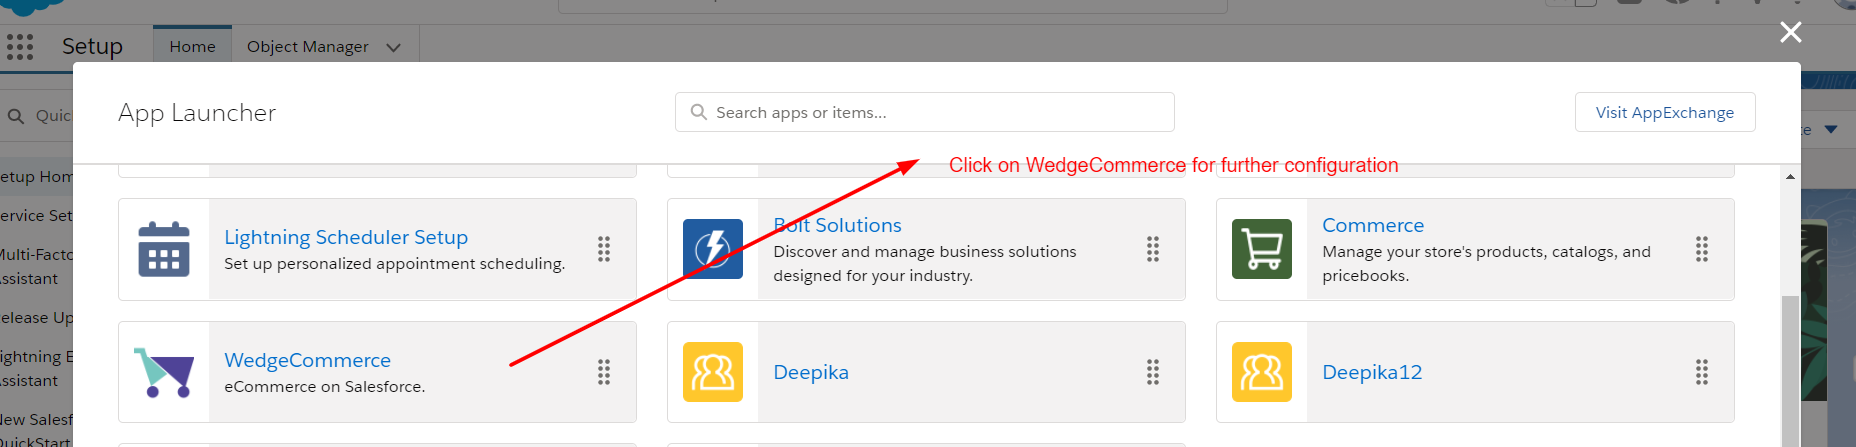
First, you need to login into your Salesforce Account and then from the App Launcher section, Select WedgeCommerce to proceed further.
Once you click on the application, you will see the backend dashboard as shown below.

Now, let’s begin to configure our store on WedgeCommerce. The first section to configure is Shipping & Taxes.
Click on Shipping & Taxes to configure. When you click on Shipping & Taxes, you need to click on the Location to configure the location. In this section, you can add a location as per your preference.
Please check out the screenshot below for this configuration:
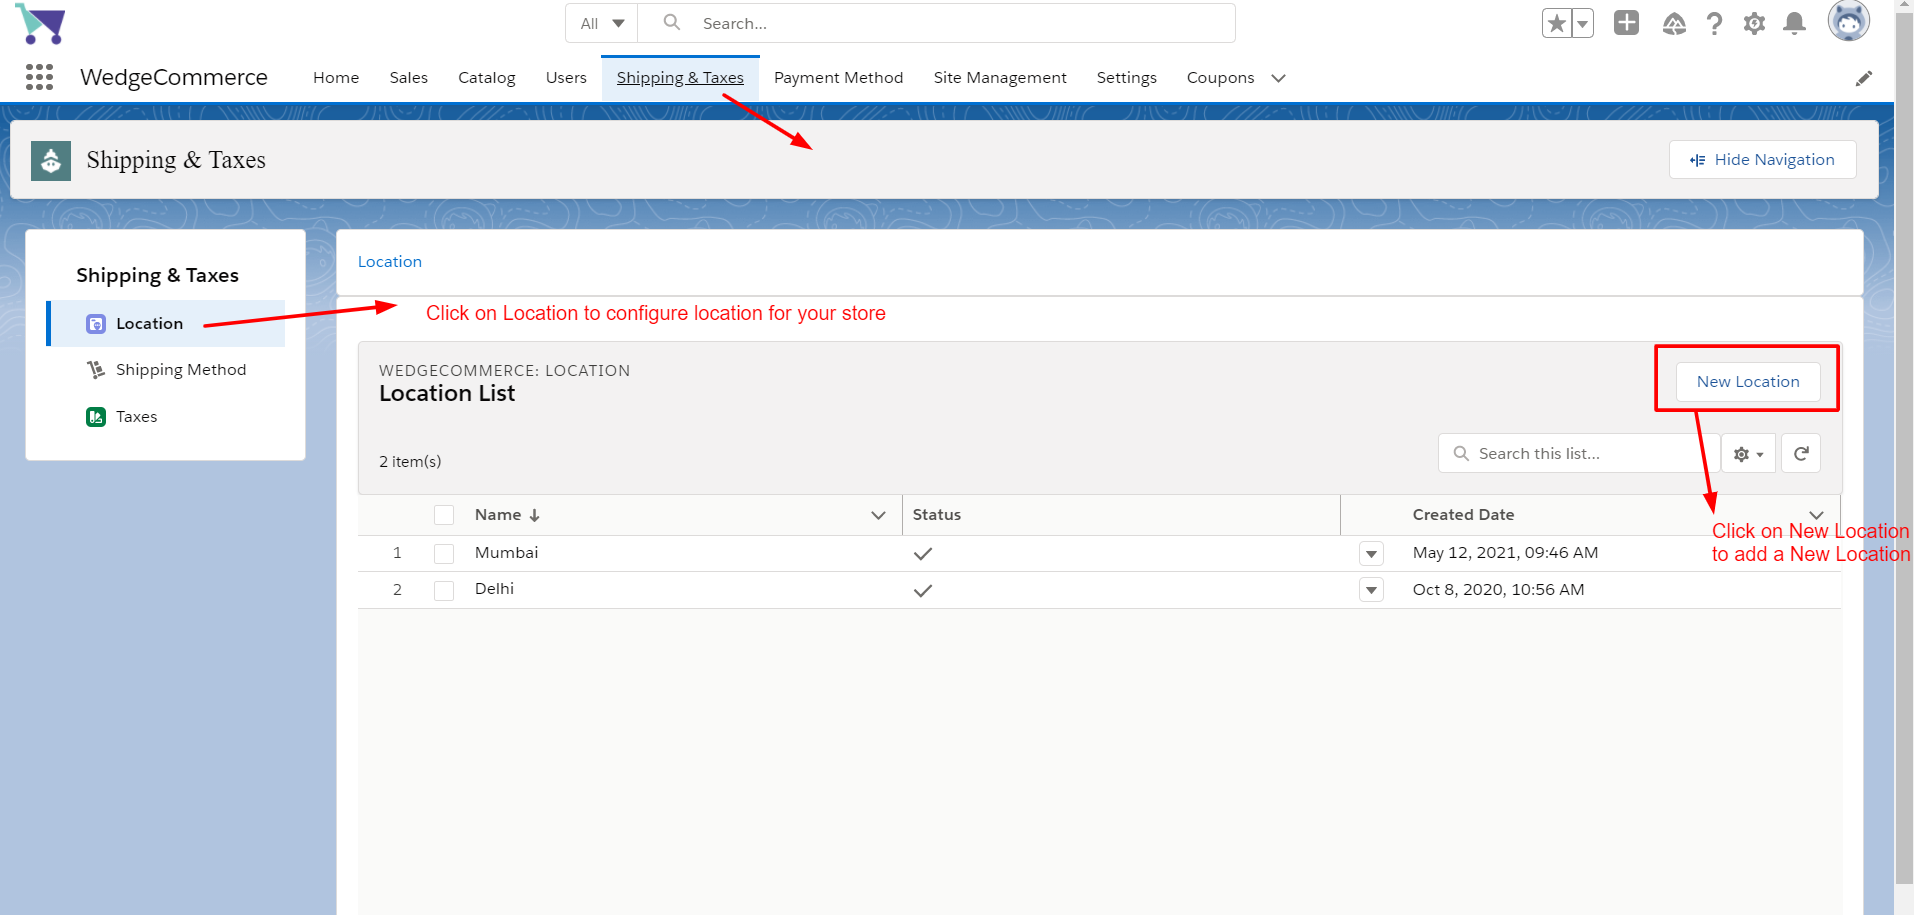
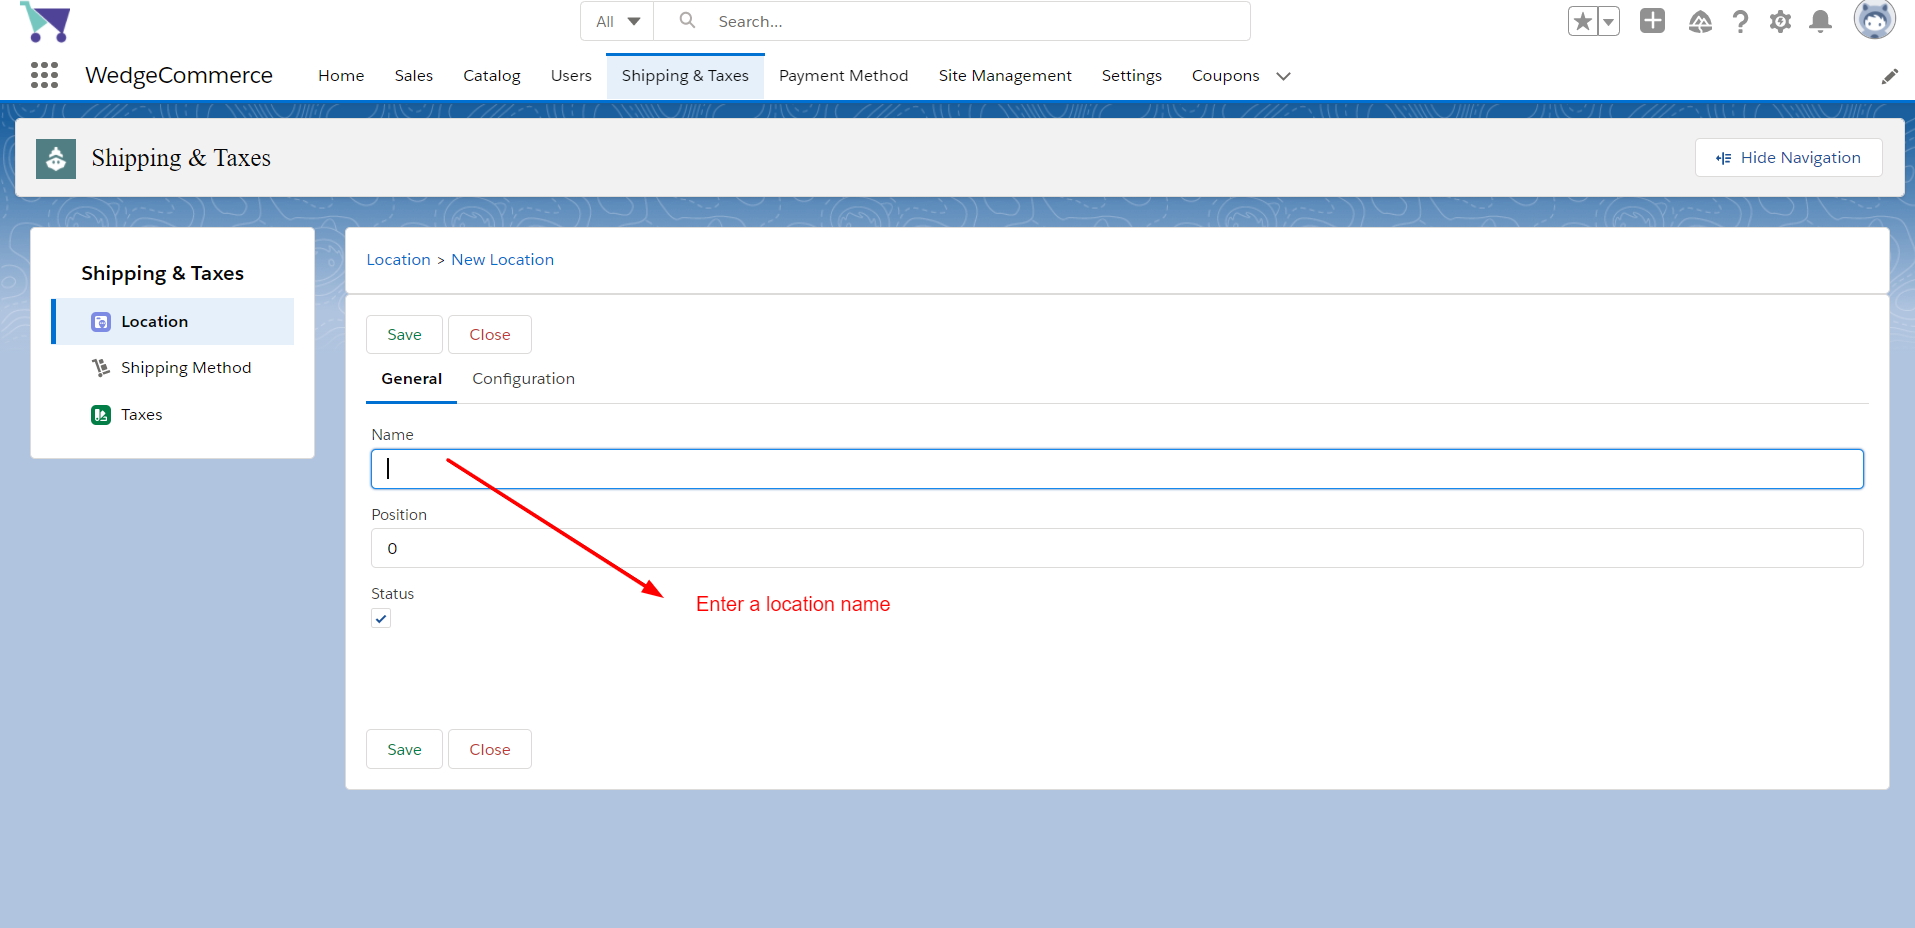
To add a new location, click on the New Location option as shown above and then you need to enter a Location Name as shown below:
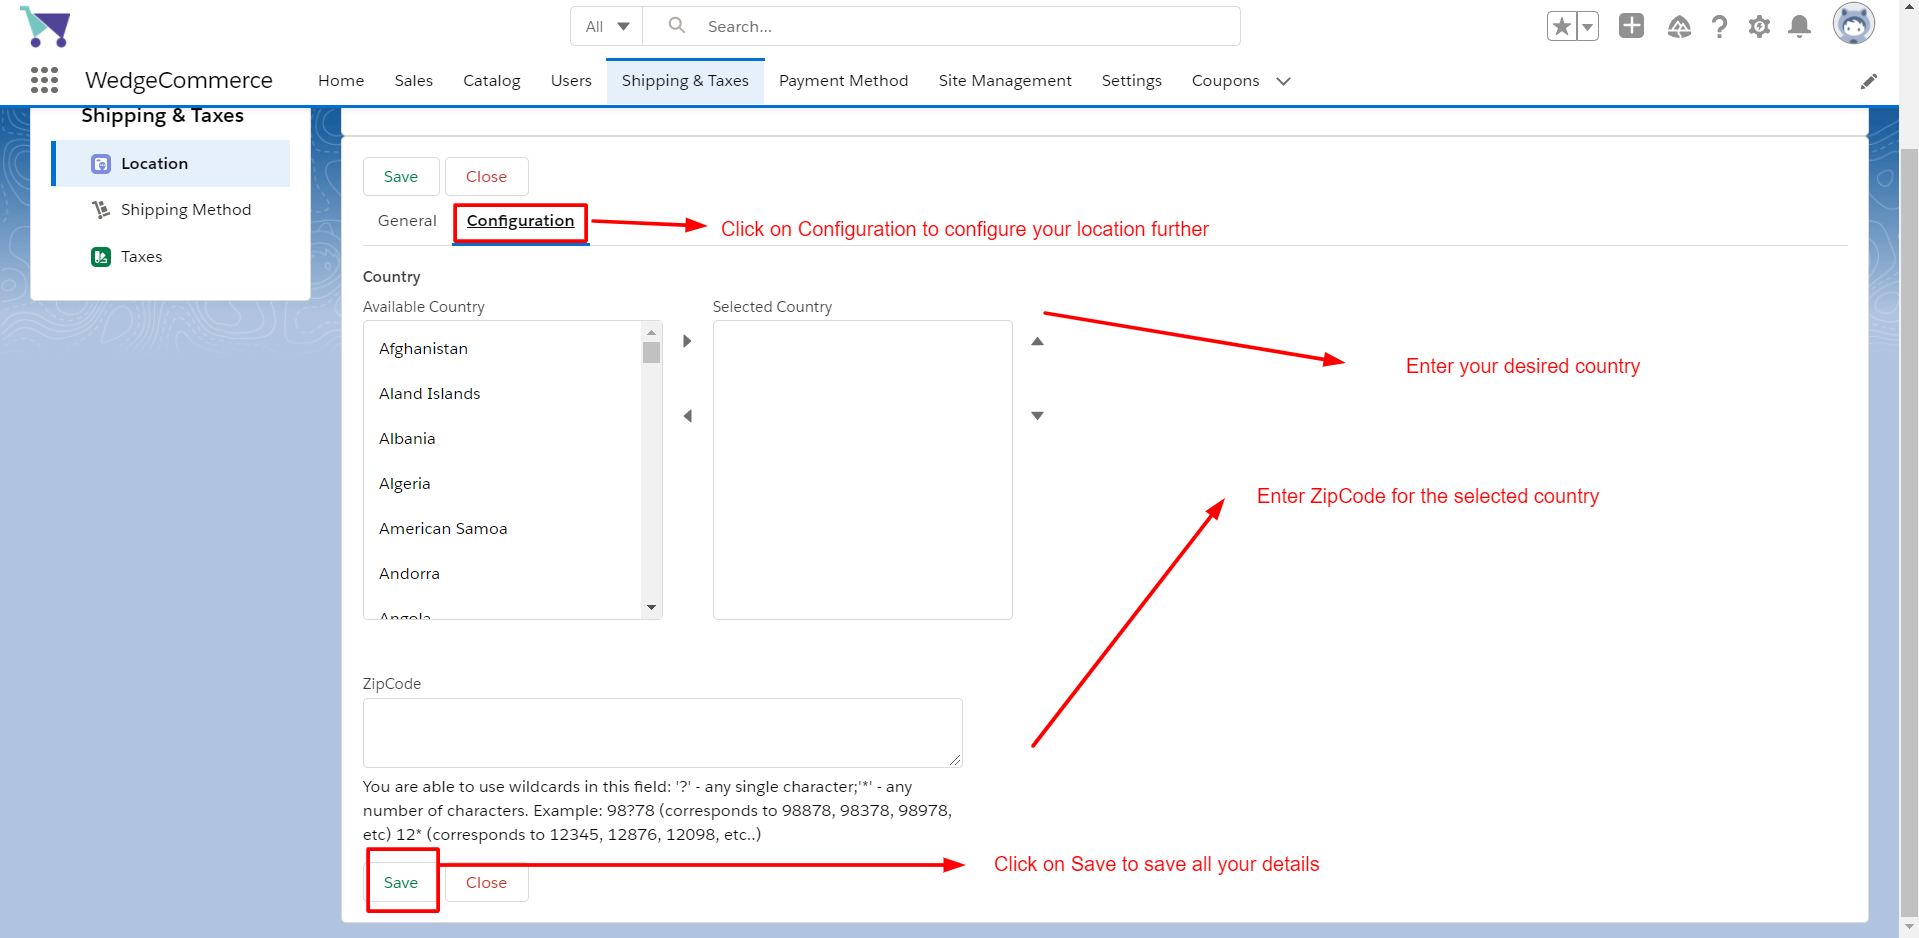
After the location name, you need to click on Configuration to configure the location further, after clicking on Configuration you can Select Country, Enter Zip Code, and then click on Save to save all the location-related details for the Shipping & Taxes section.
After configuring the location, now let’s move on to the Shipping Method Configuration. For this you need to click on the Shipping Method Configuration Option, on clicking you will see a tab like this:
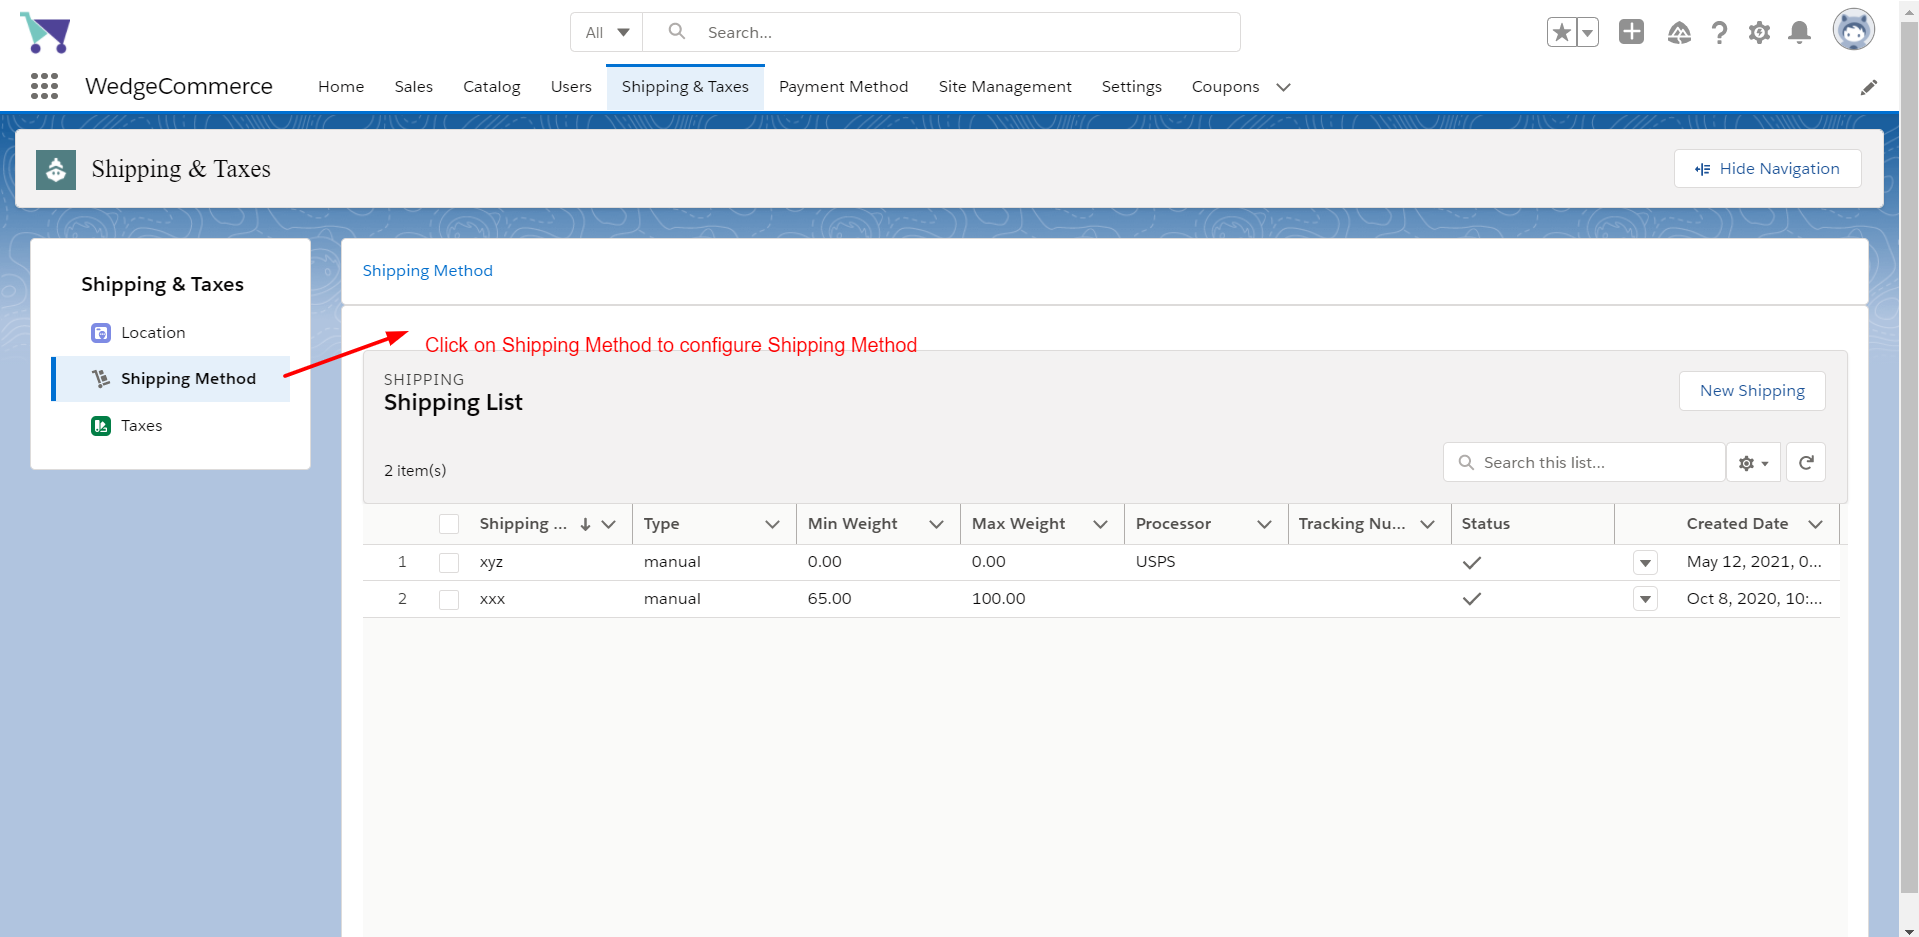
Afterward, you need to click on New Shipping to configure Shipping for your desired location.

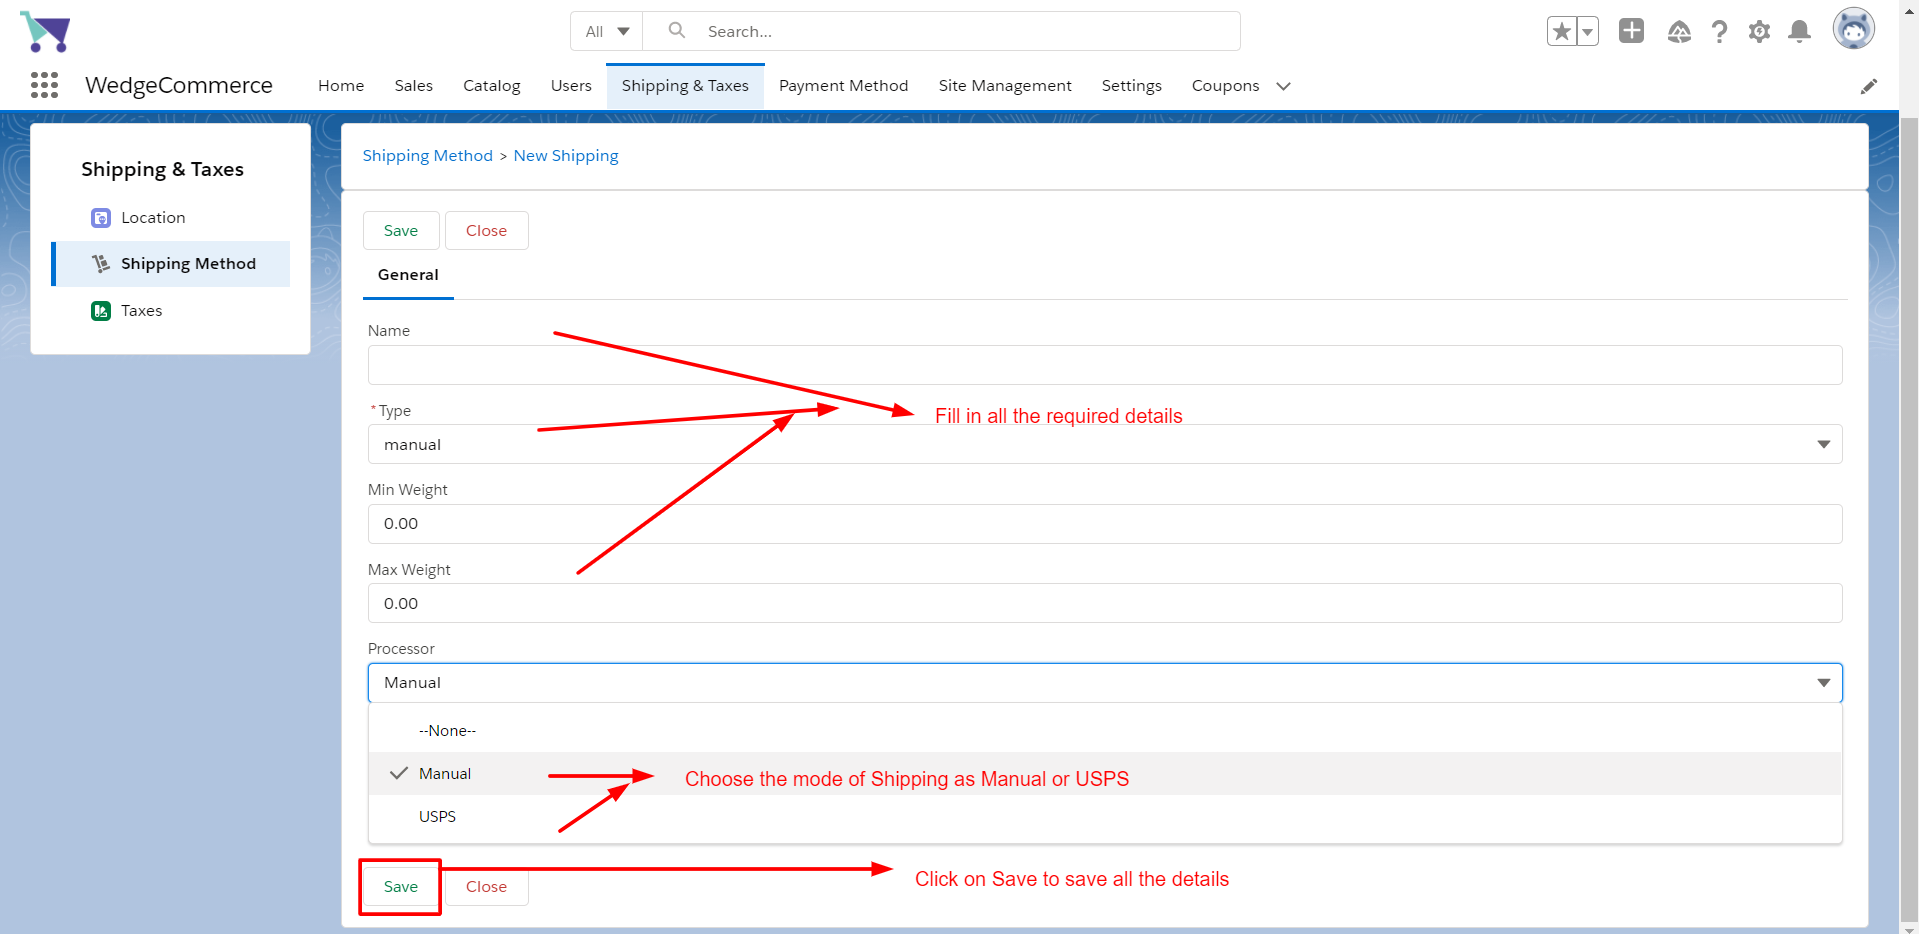
Once you click New Shipping, a new tab will be opened and you need to fill in all the required details and you can use the mode of Shipping as Manual or USPS from the Processor option as shown below. In the end, Click on Save to save all the details.
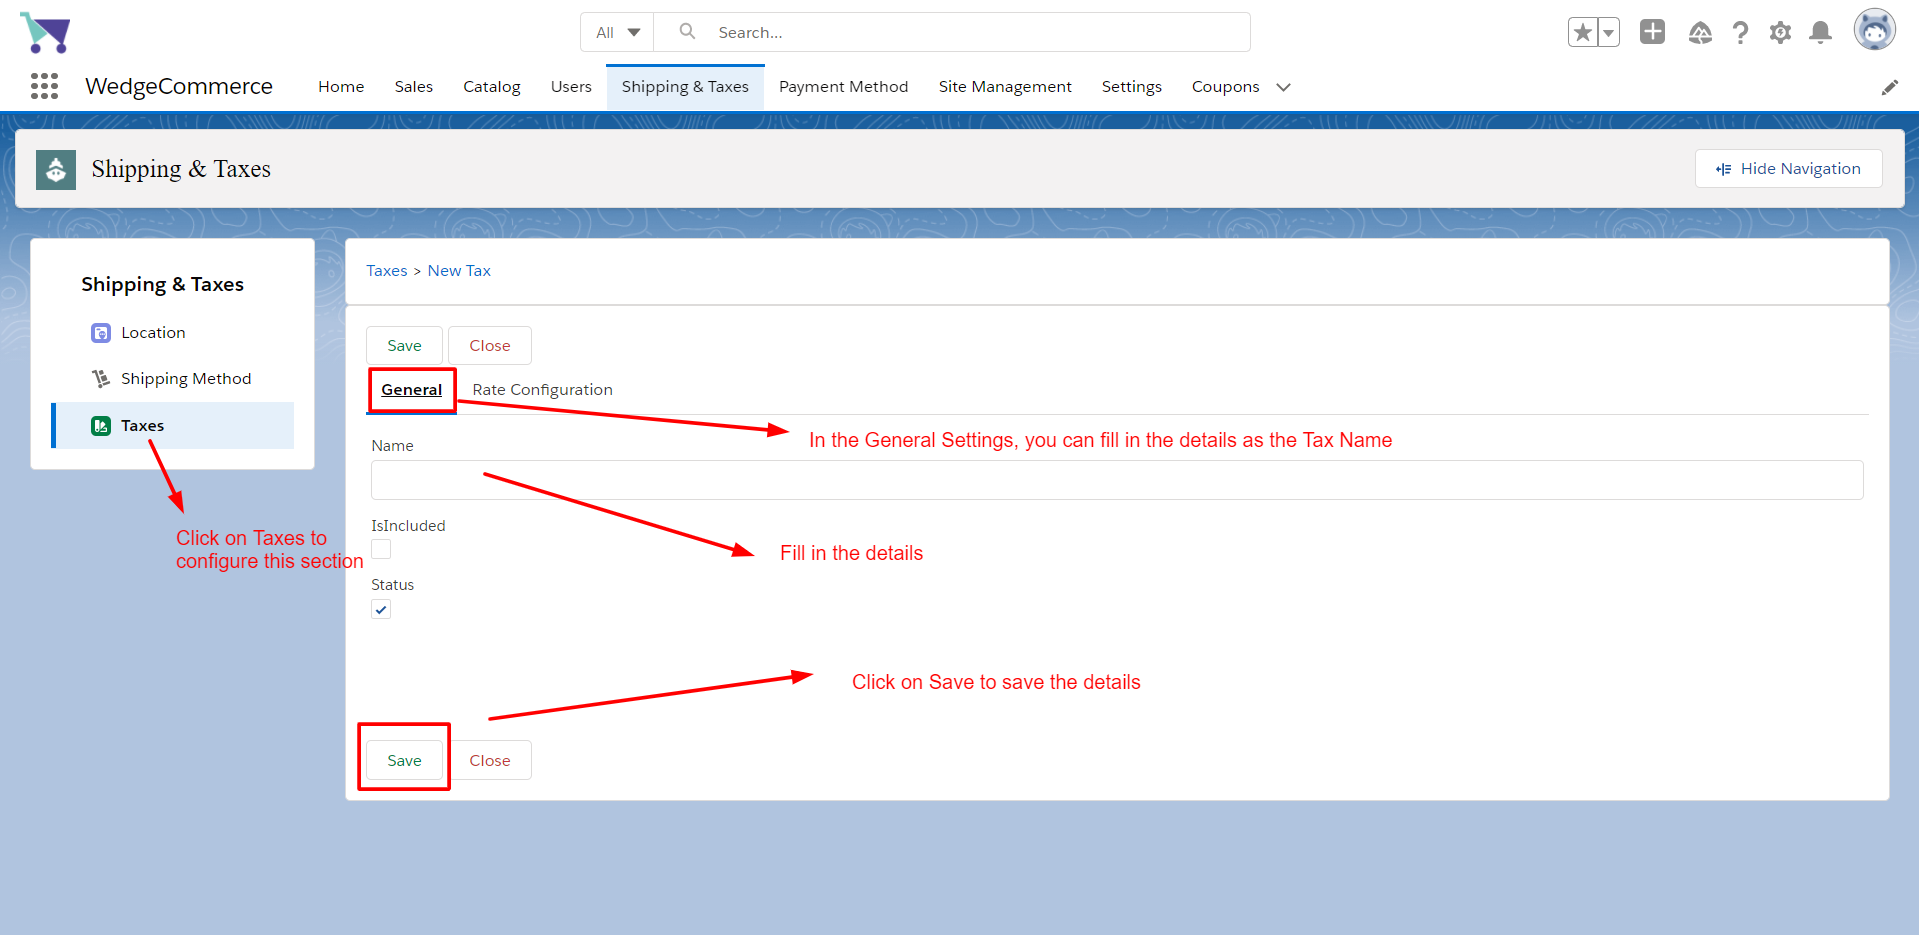
Now let’s move on to the last part of the Shipping & Taxes section i.e to configure the Taxes tab, Click on Taxes, you will see the General and Rate Configuration Tab, click on General, fill in the required details such as the Tax Name then Click on Save to save all the details.
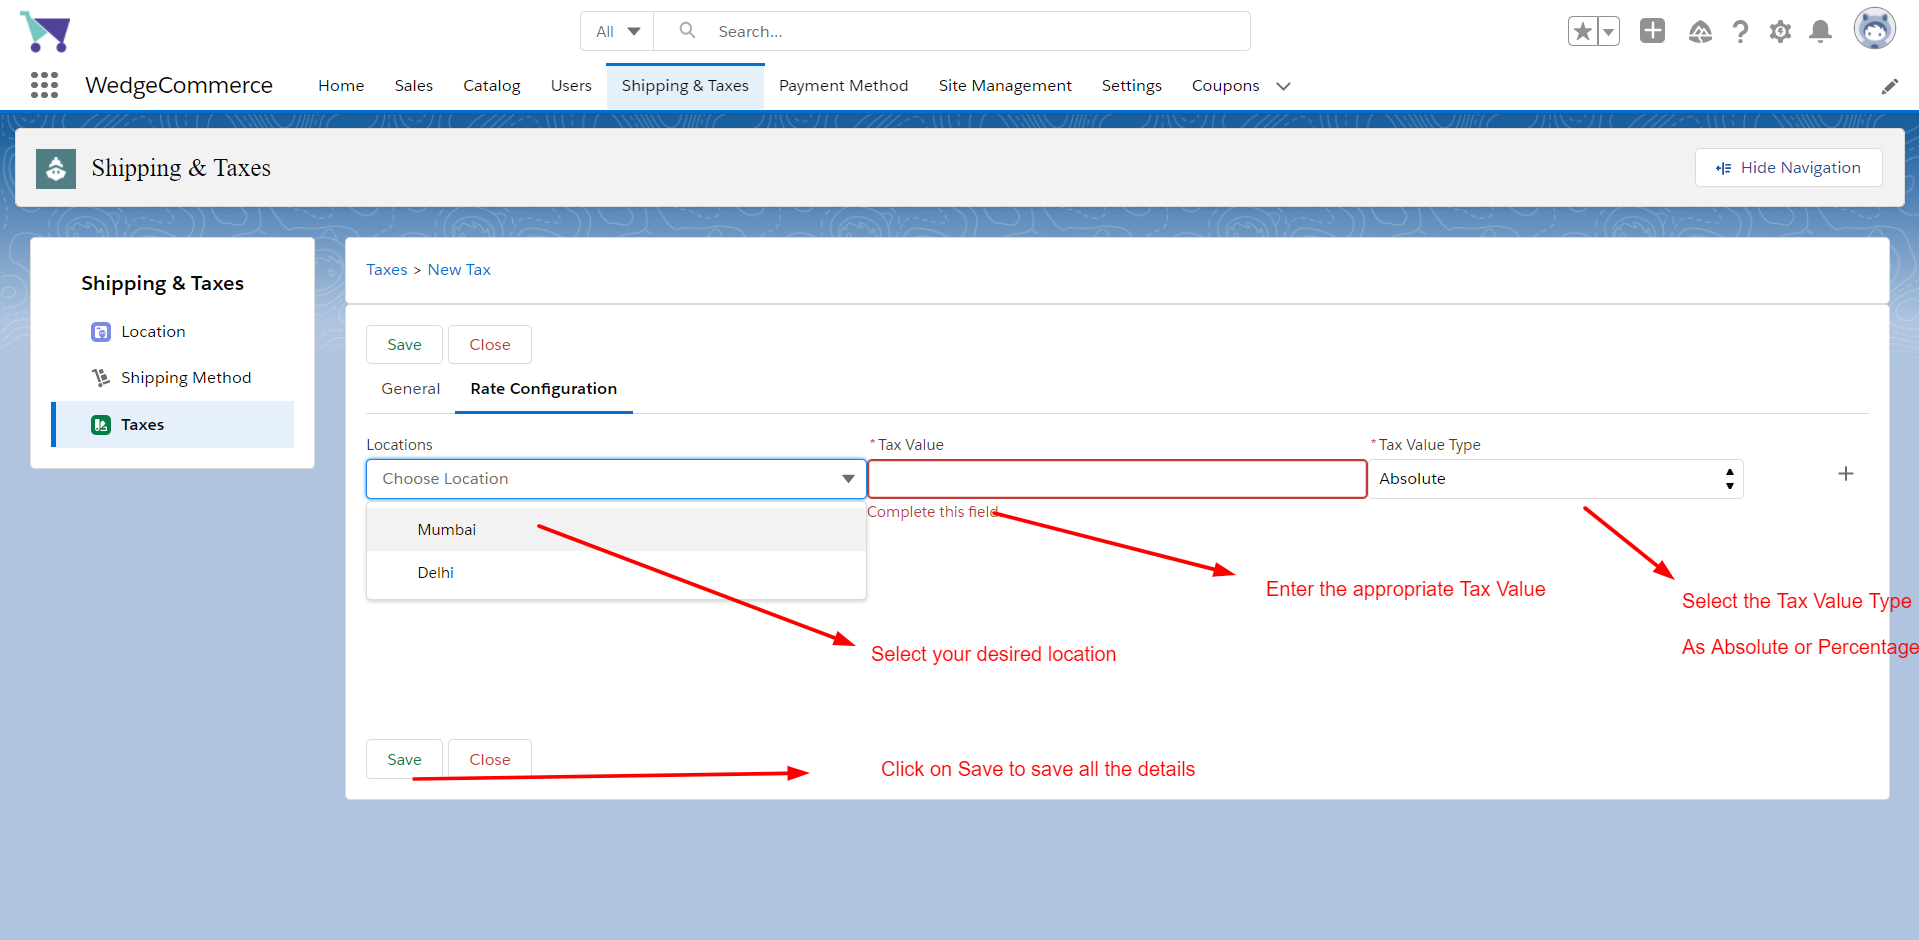
Now for the Rate Configuration, you need to select the location from the drop-down menu in order to select the appropriate tax value along with it you can also set the Tax Value type as Absolute or Percentage from the drop-down section.
Click on Save to save all the details for Taxes Configuration.
To configure the Price Books, you need to click on the dots available on the left hand and search for the keyword as the price to find Price Books, which will appear at the bottom to proceed further.

Once you click on the Price Books, you can create a new Price Book by clicking on New.
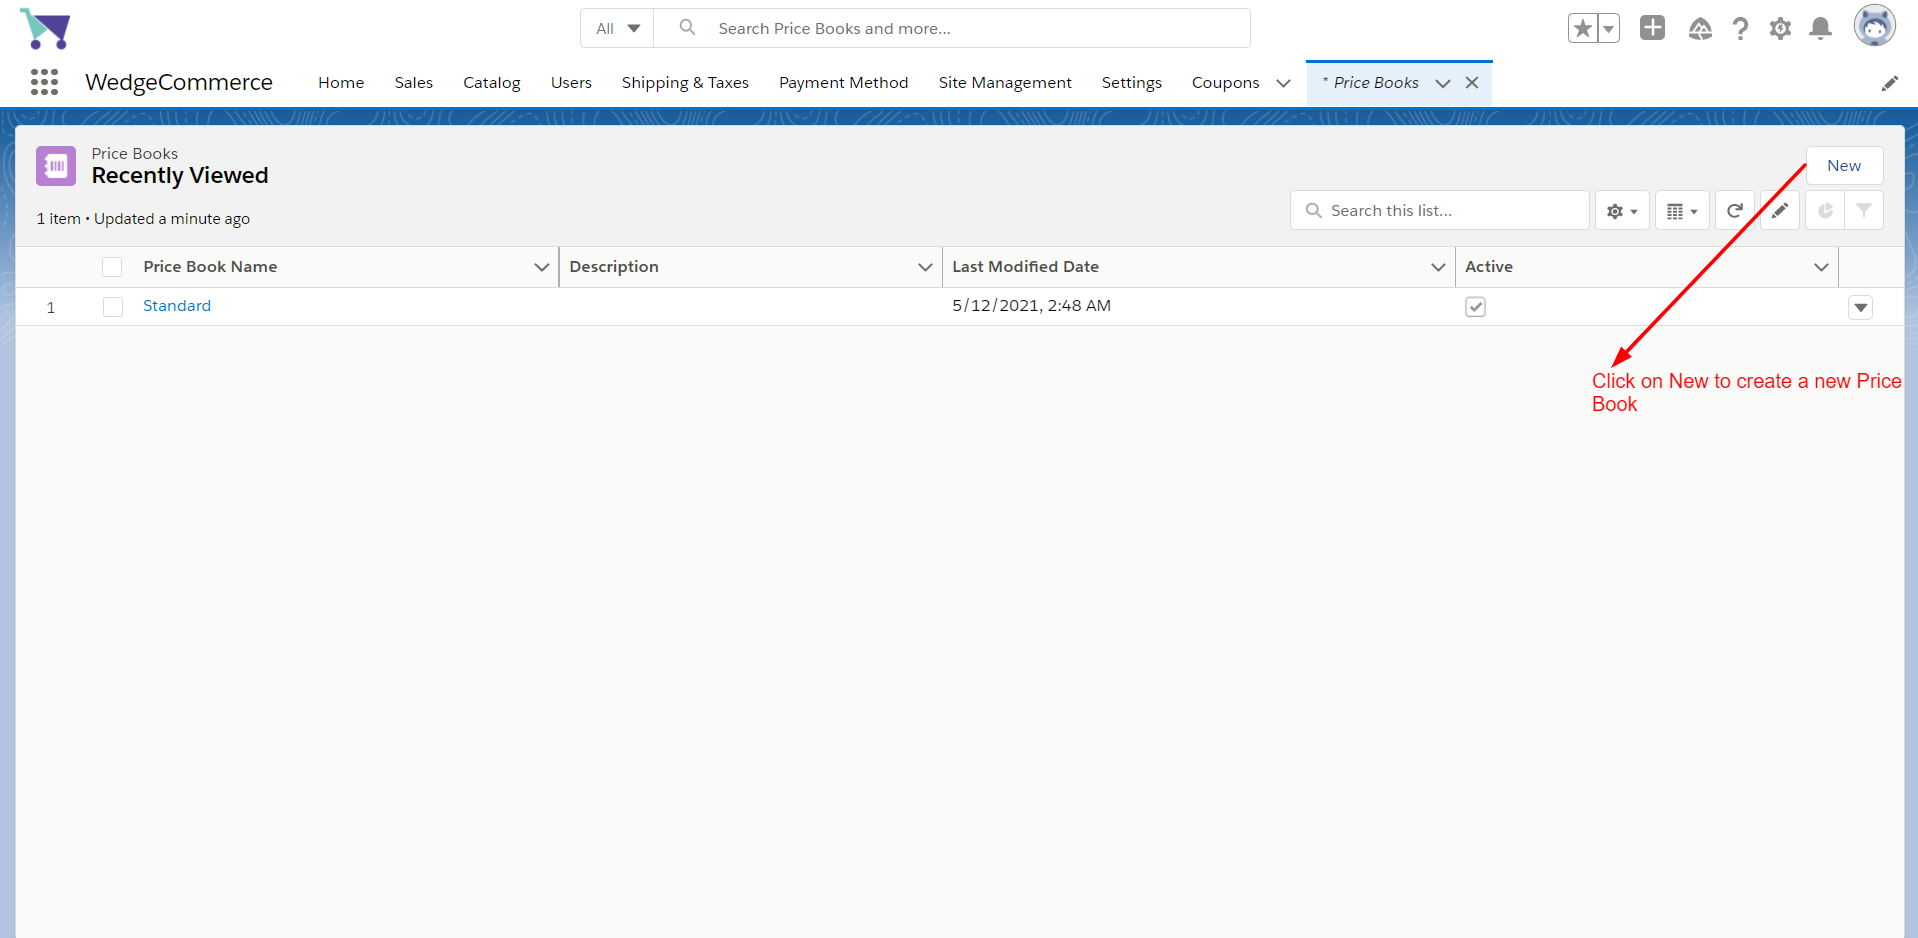
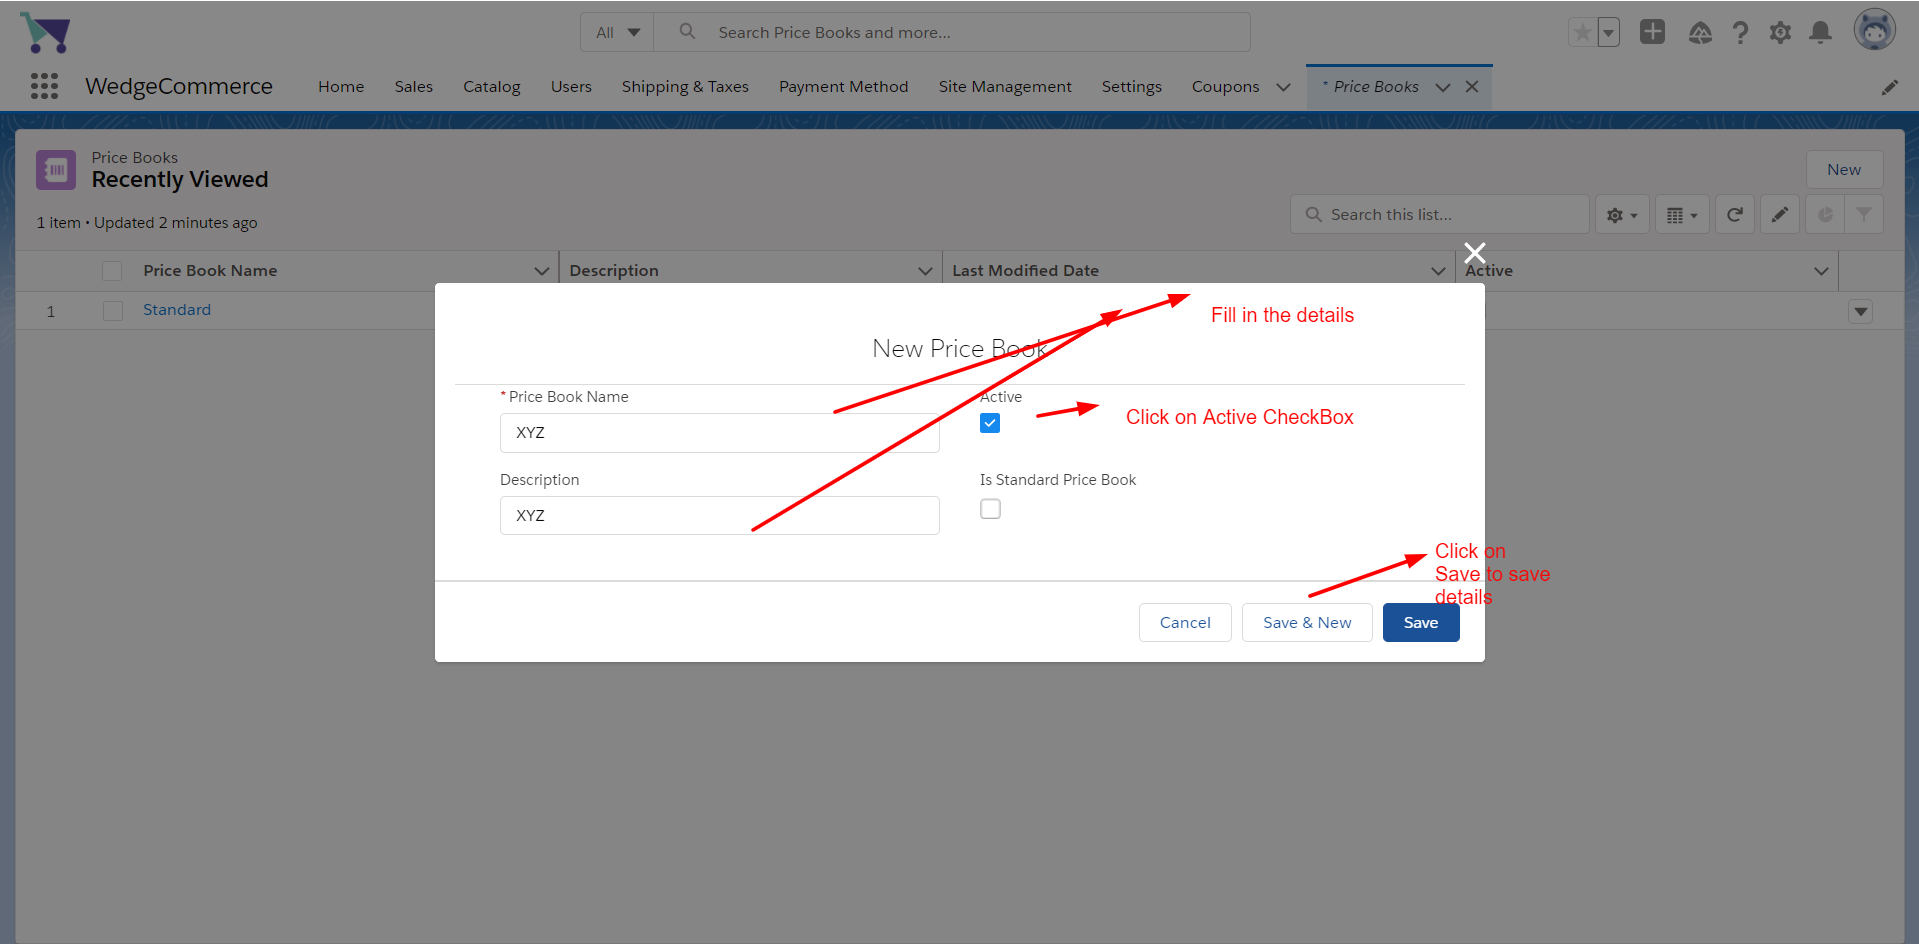
To create a new Price Books, click on New, add in all the required details and click on the Save option to save all the details.
Now let’s move on to the General Settings option, for which you need to click on the Setting Options and then click on General Tab to configure.
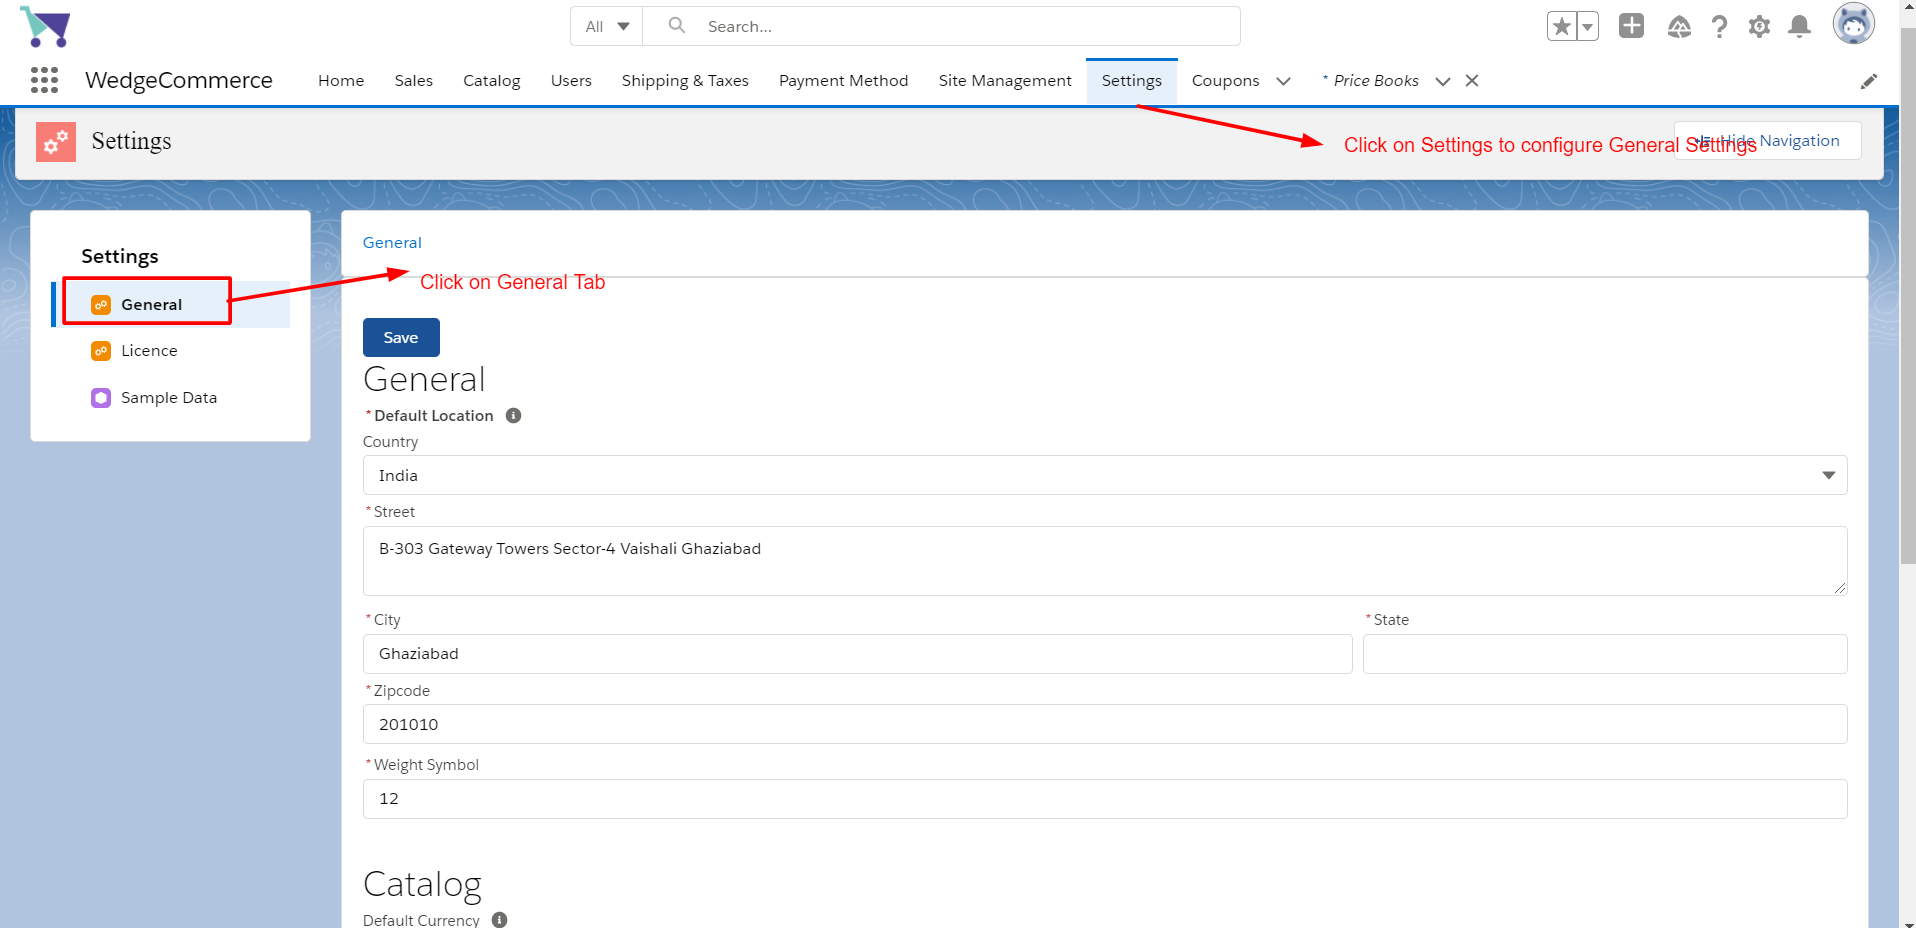
After Clicking on the General Tab, you will need to select your default location, price book, and address for your store. Click on Save to save all the details.

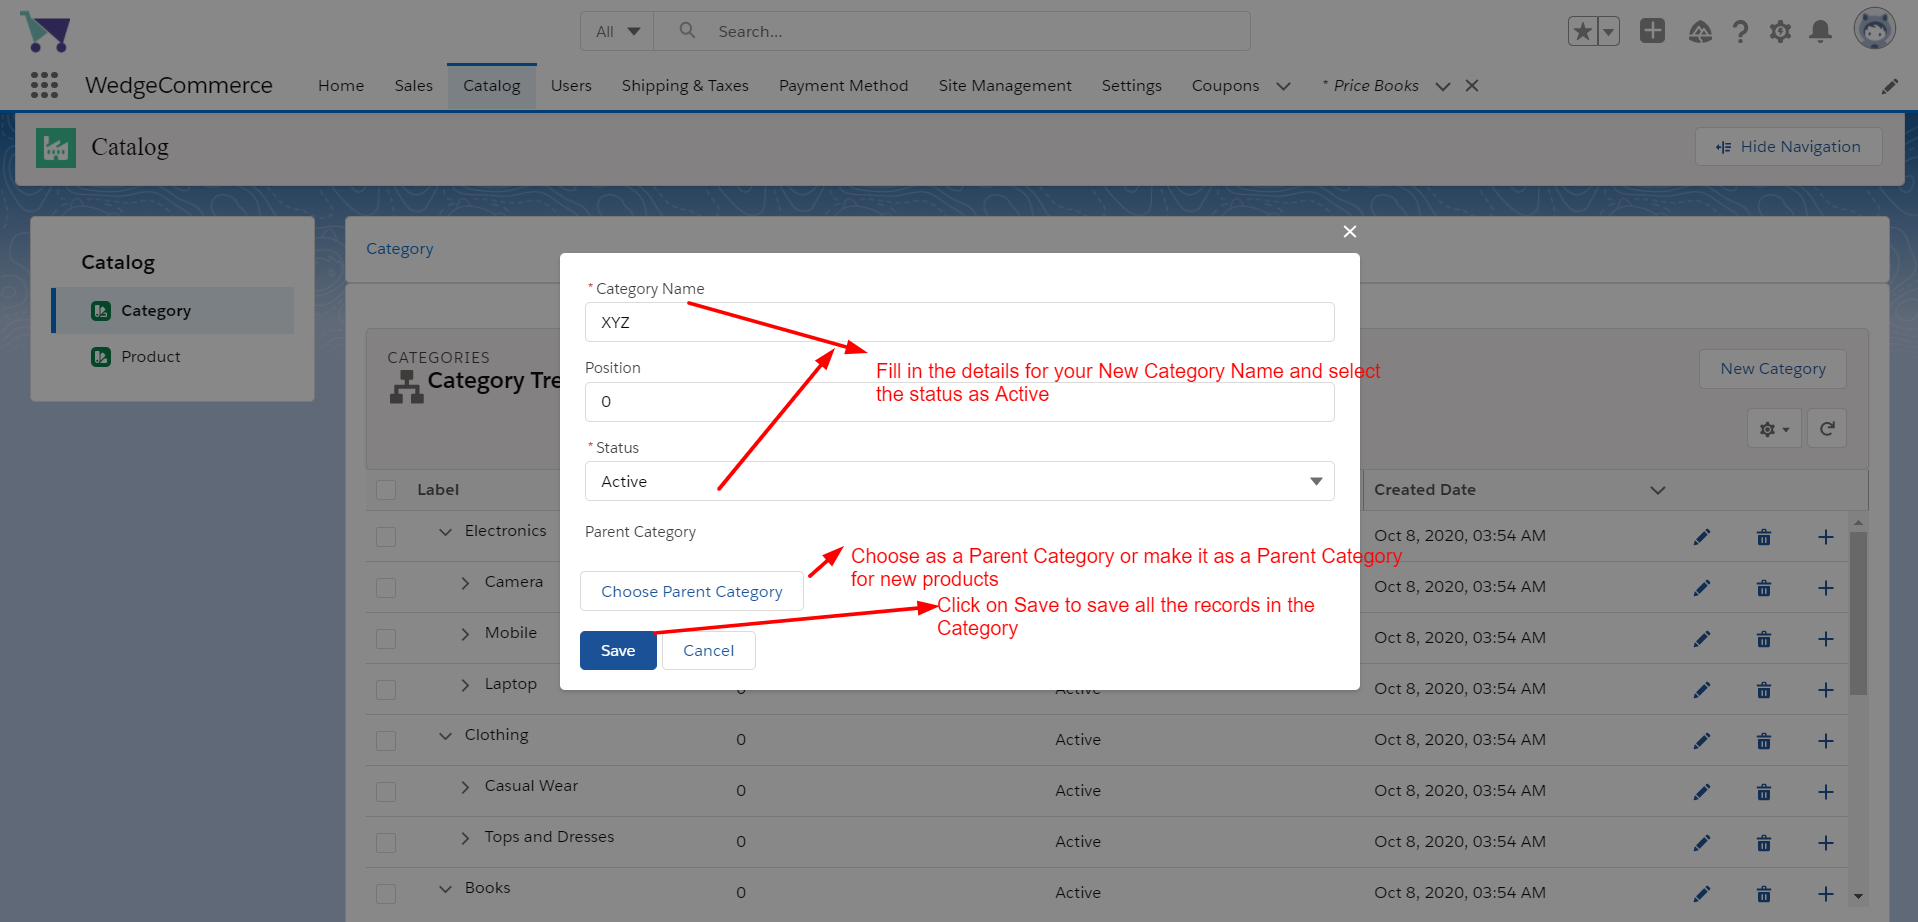
Now let’s move on to the Catalog Section, where we will configure Category and Products for the store. For this, you will first need to click on Catalog and then Category to add in the desired product category for your store.
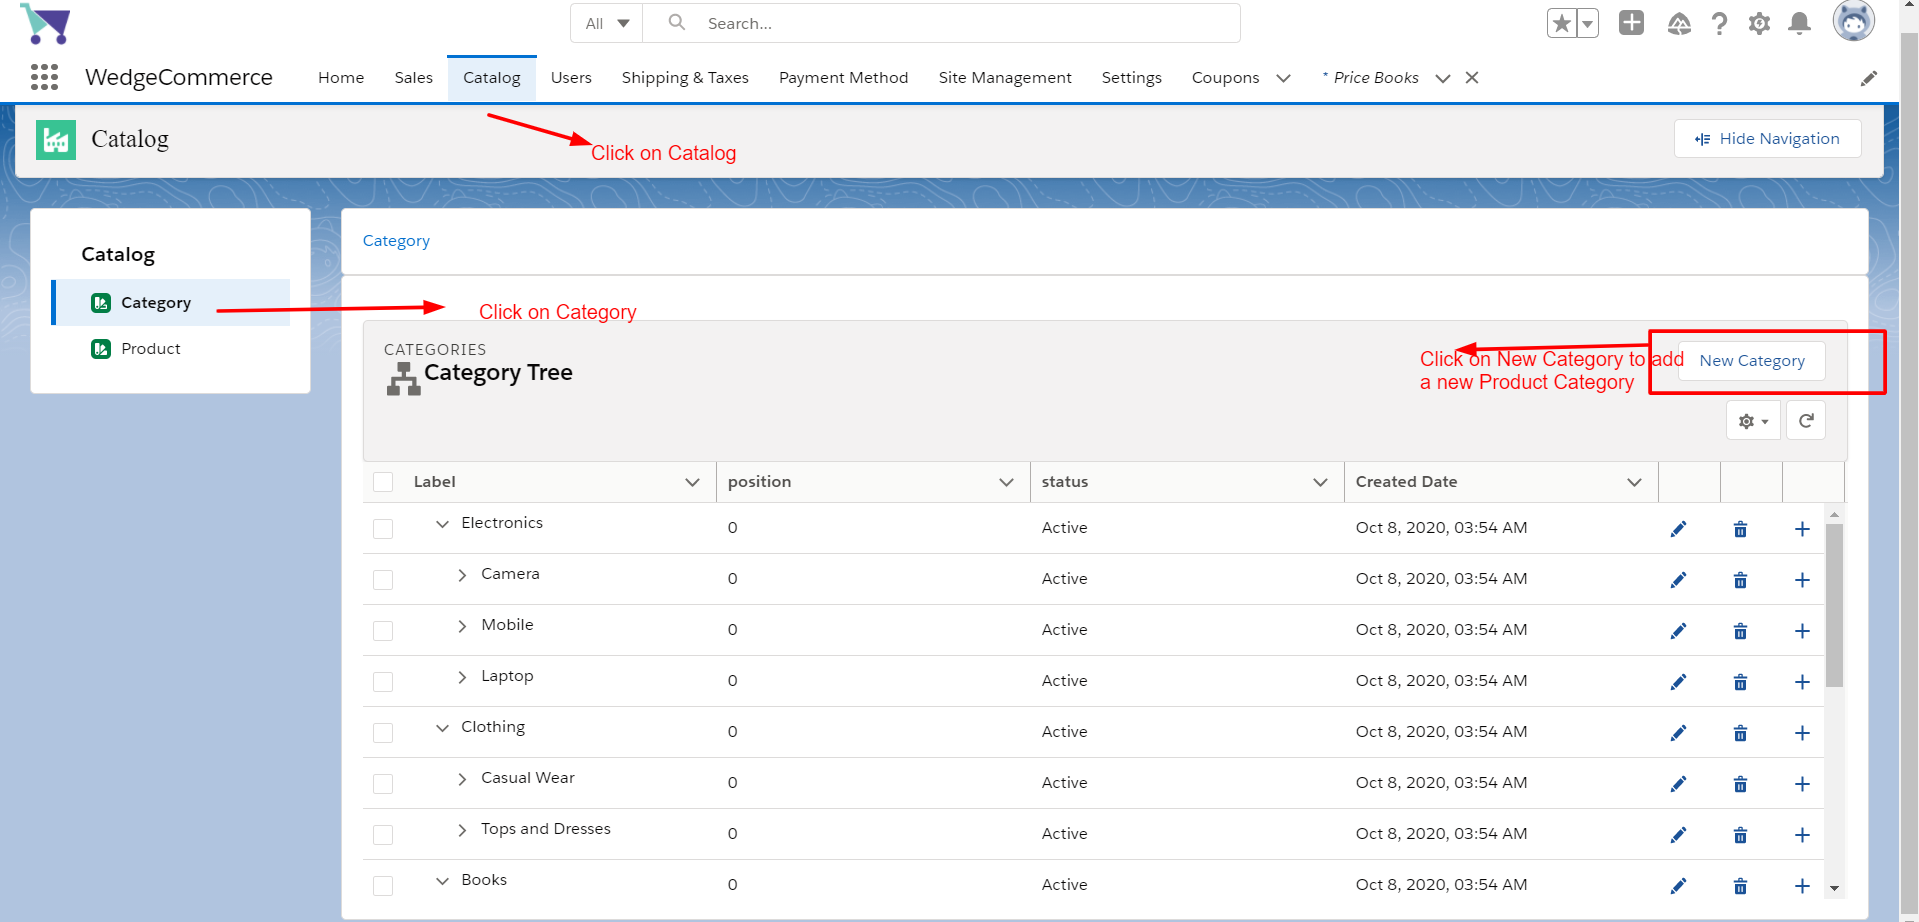
To add a new category, you need to fill in the category name, mark the status as Active, you can make this category as a New Parent Category or can choose a Parent Category for this new Product Category, and then click on Save to save the records.
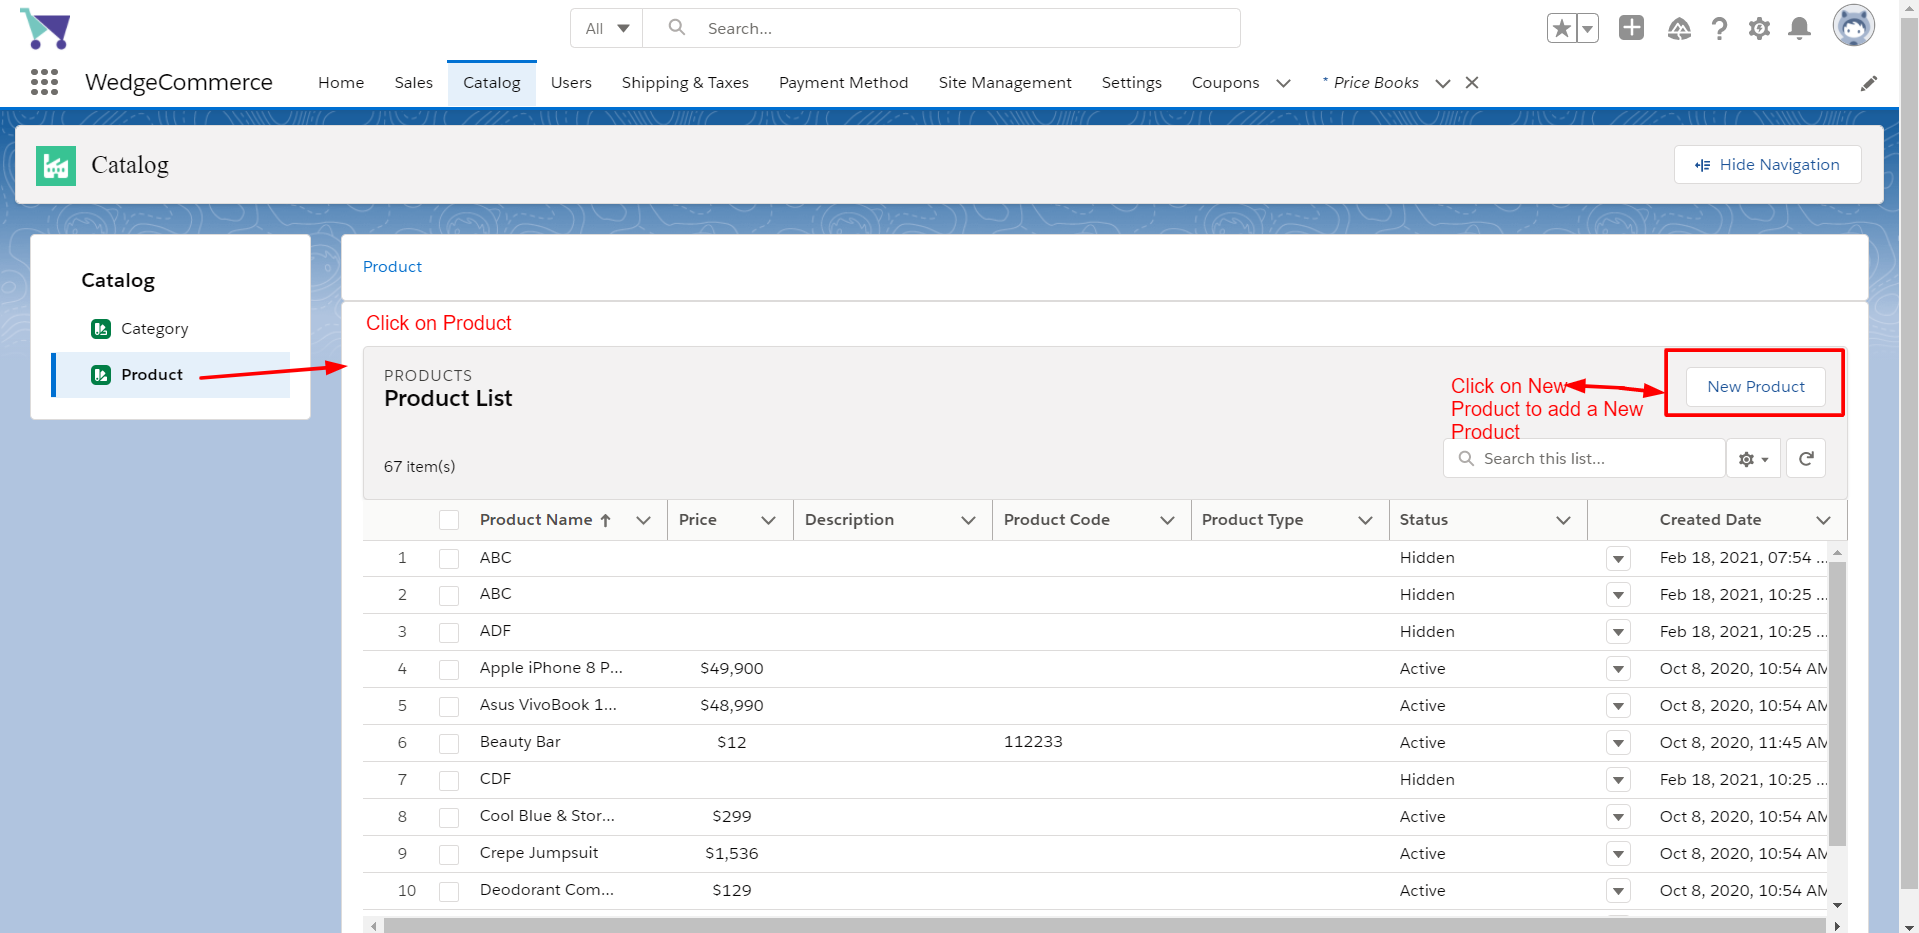
Now let’s move on to configure Products for your store. Click on Product, then click on New Product to add a New Product for your store.
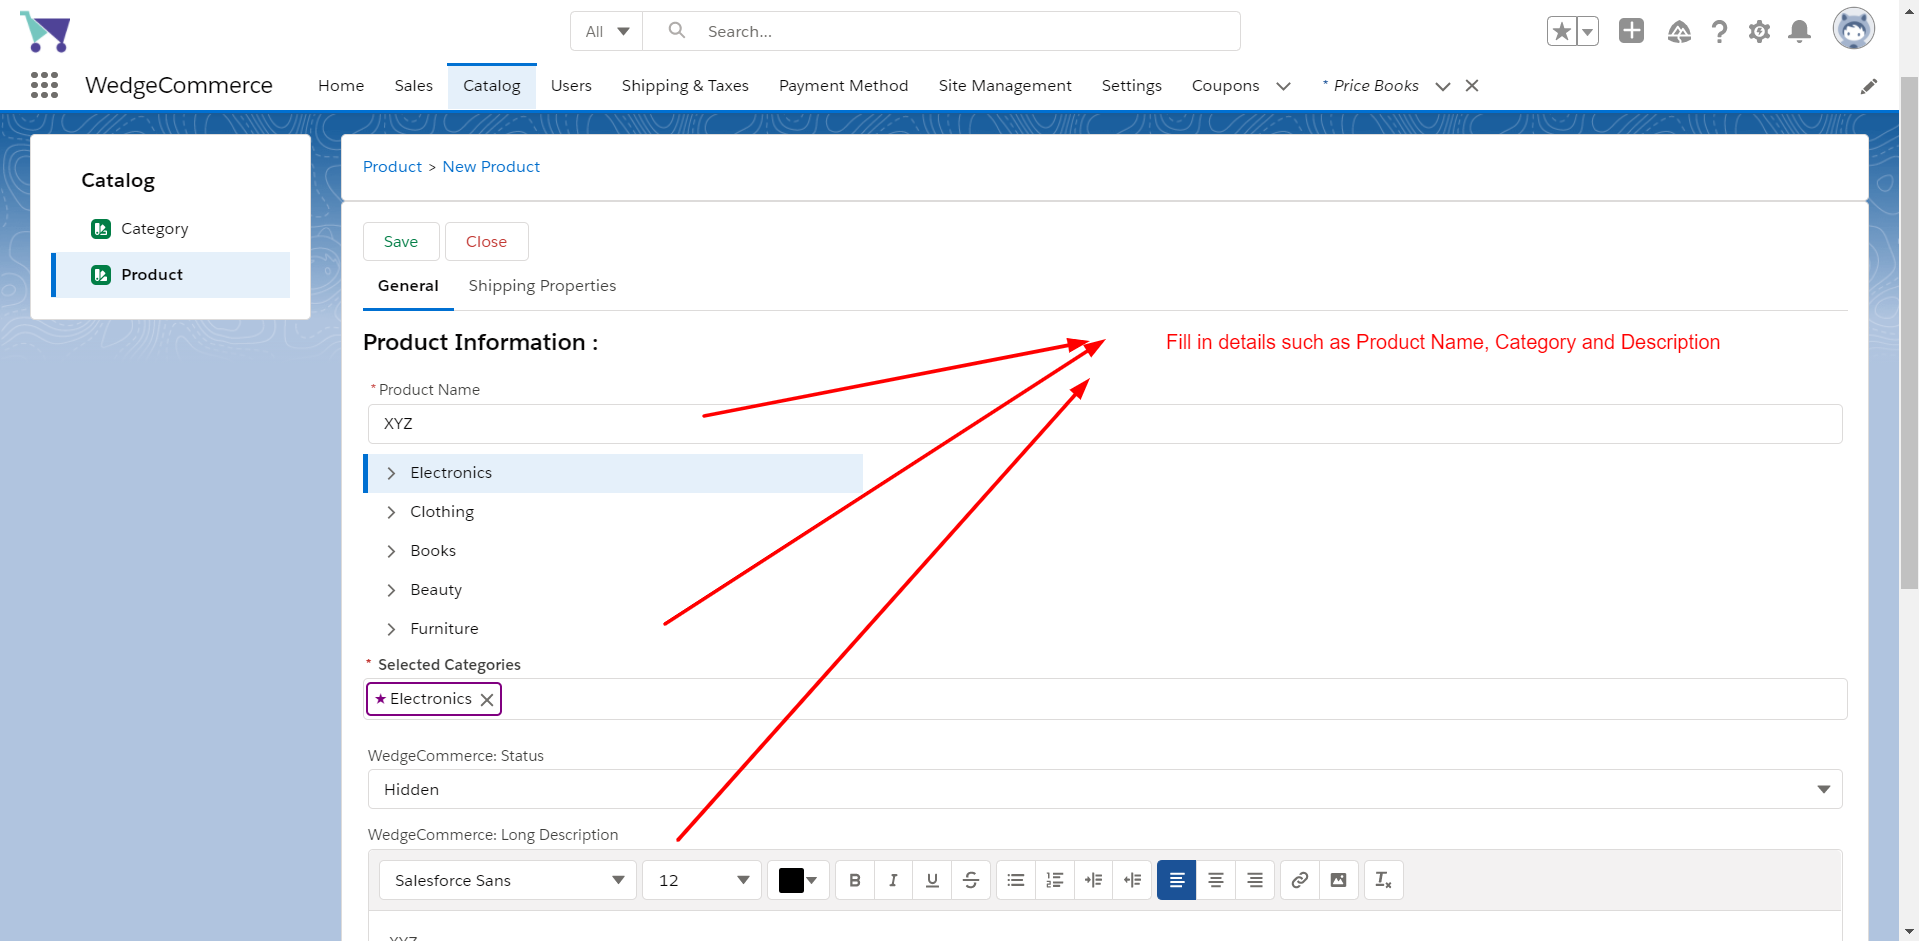
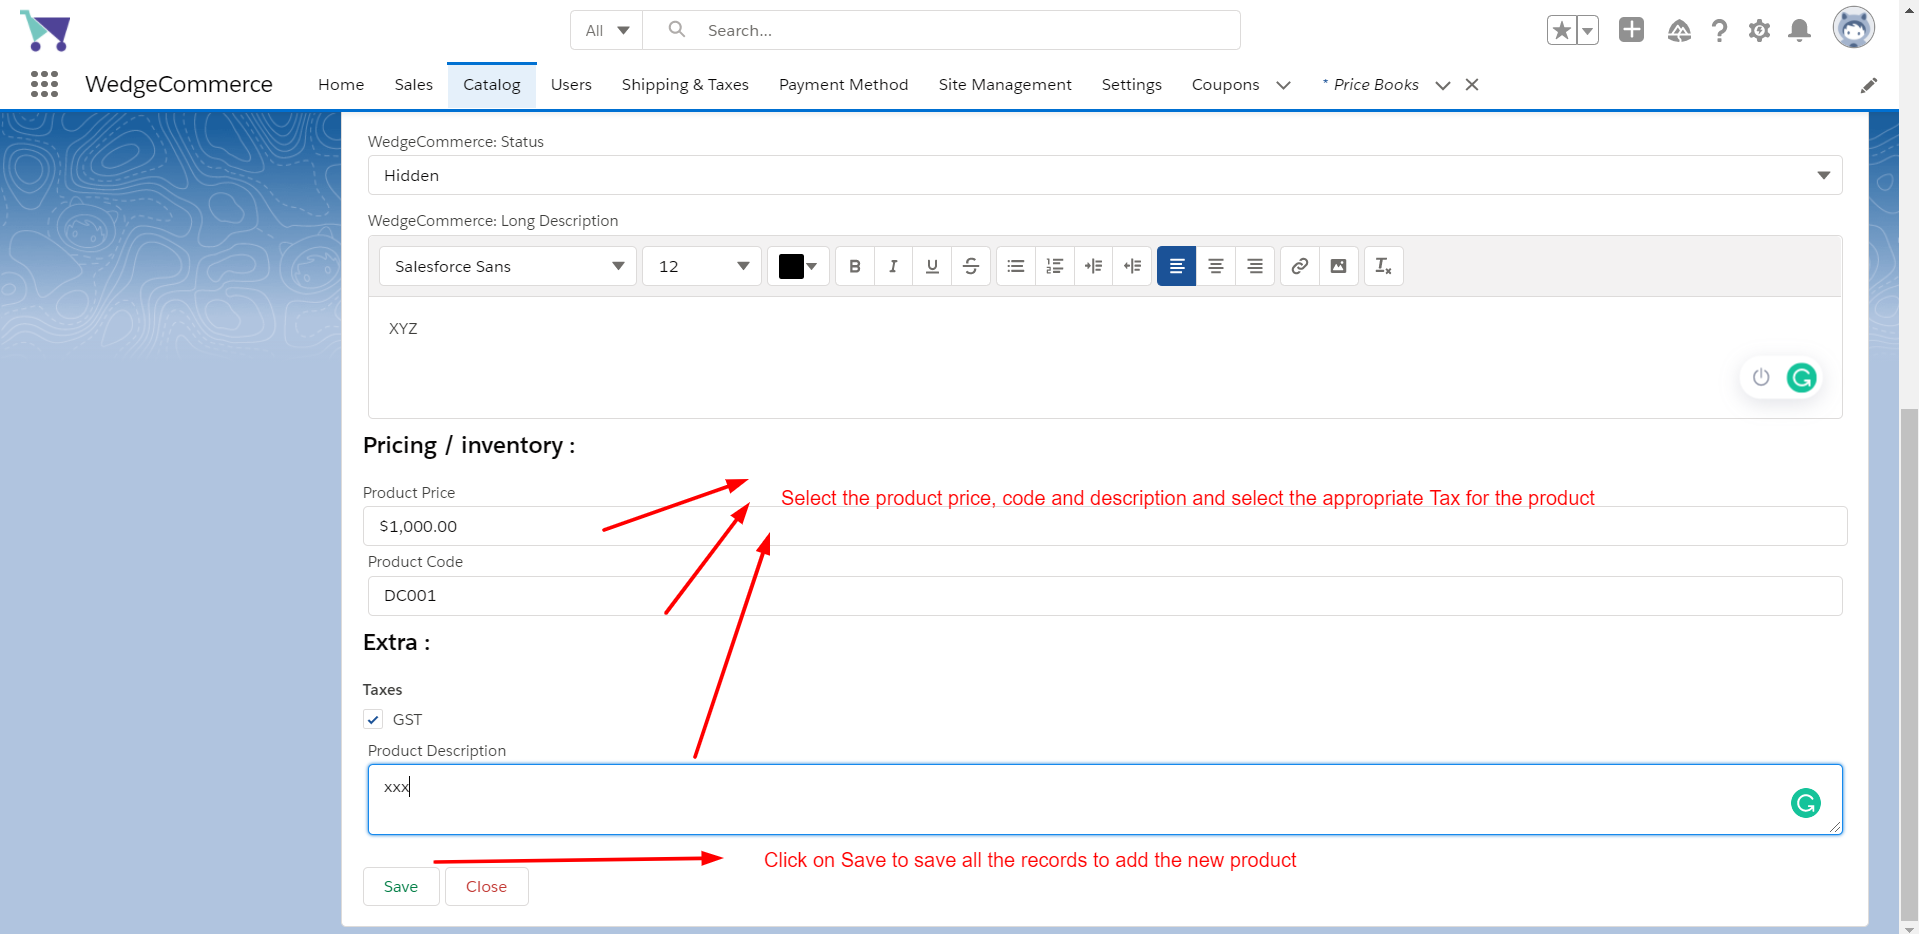
Once you click on New Product, you can add a New Product for your store, fill in all the required details as shown below and then click on Save to save all the product-related records to add a new product.
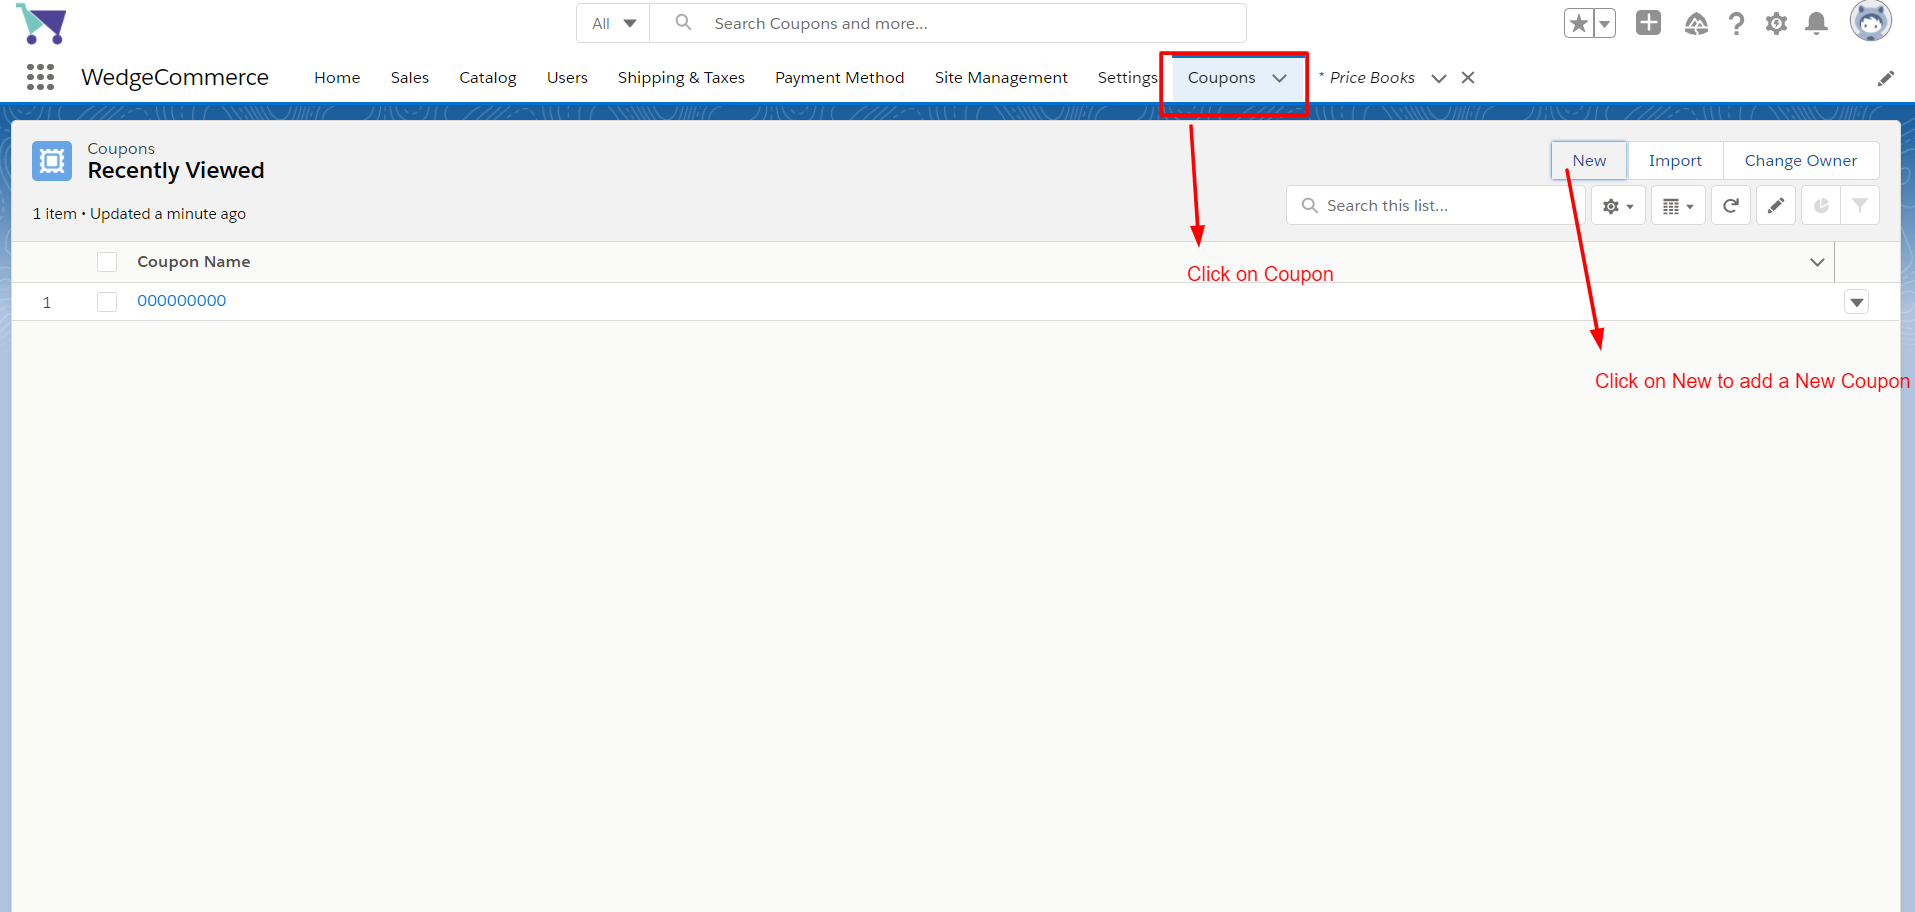
You can configure Coupons for your store. For this, you need to click on Coupons and then click on New to add a New Coupon.
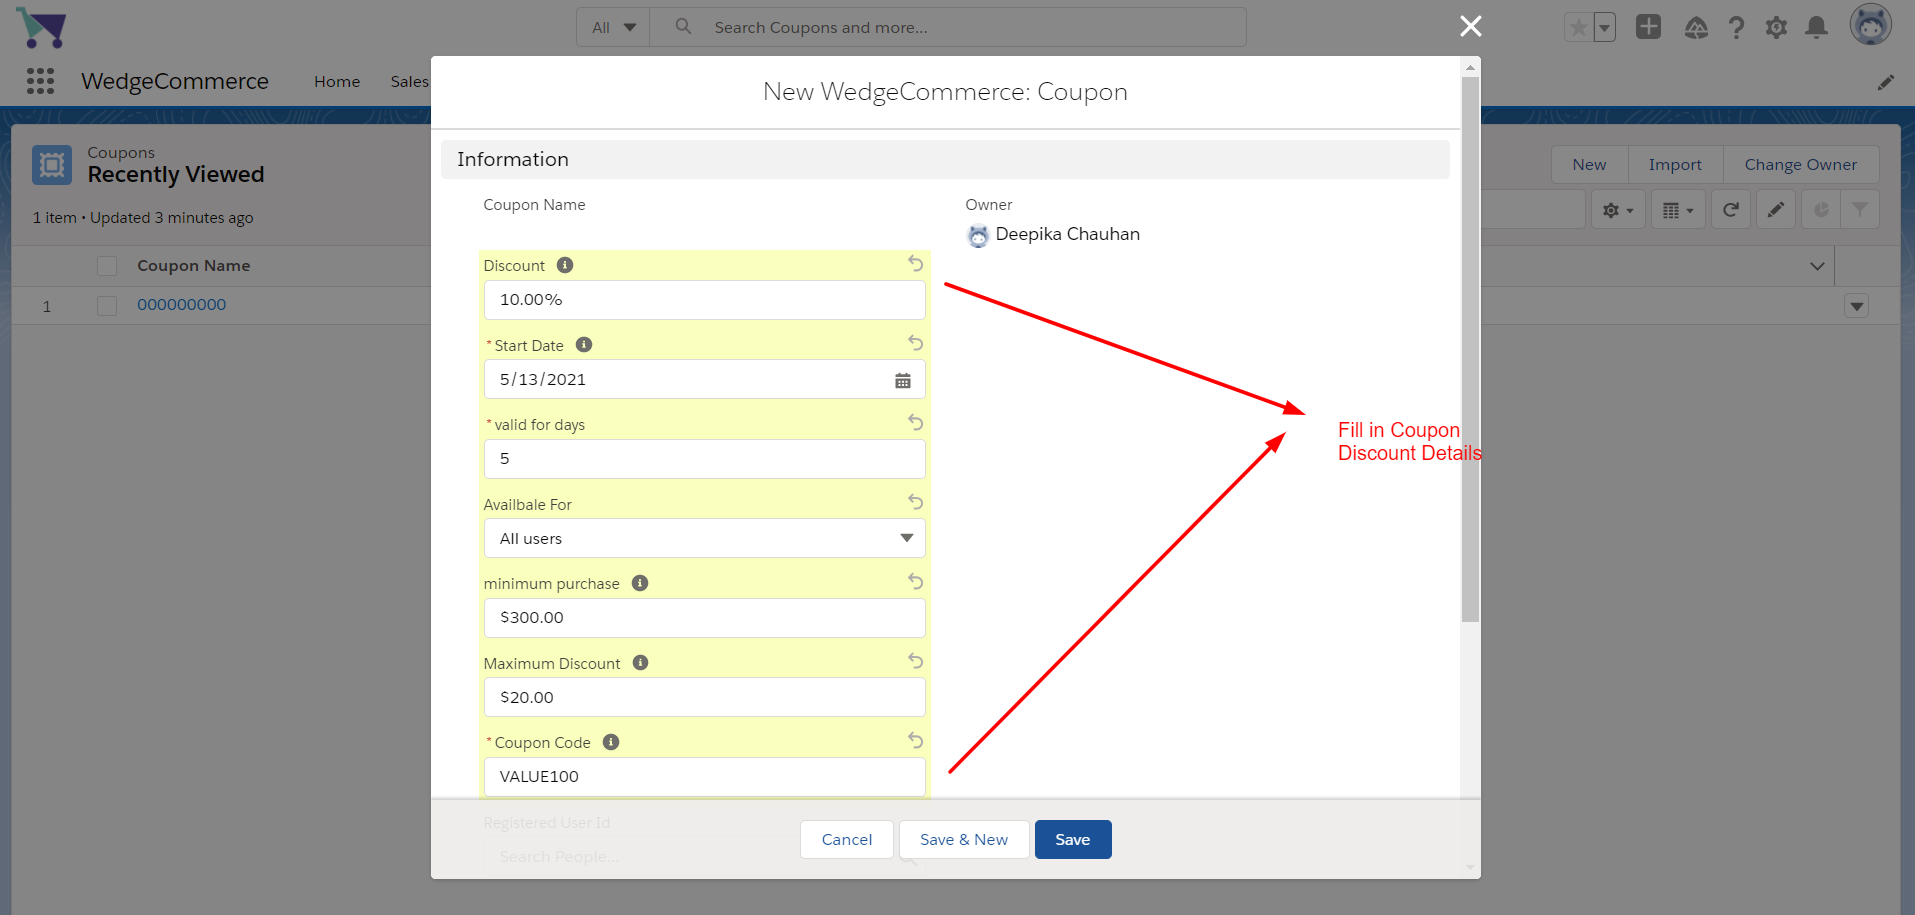
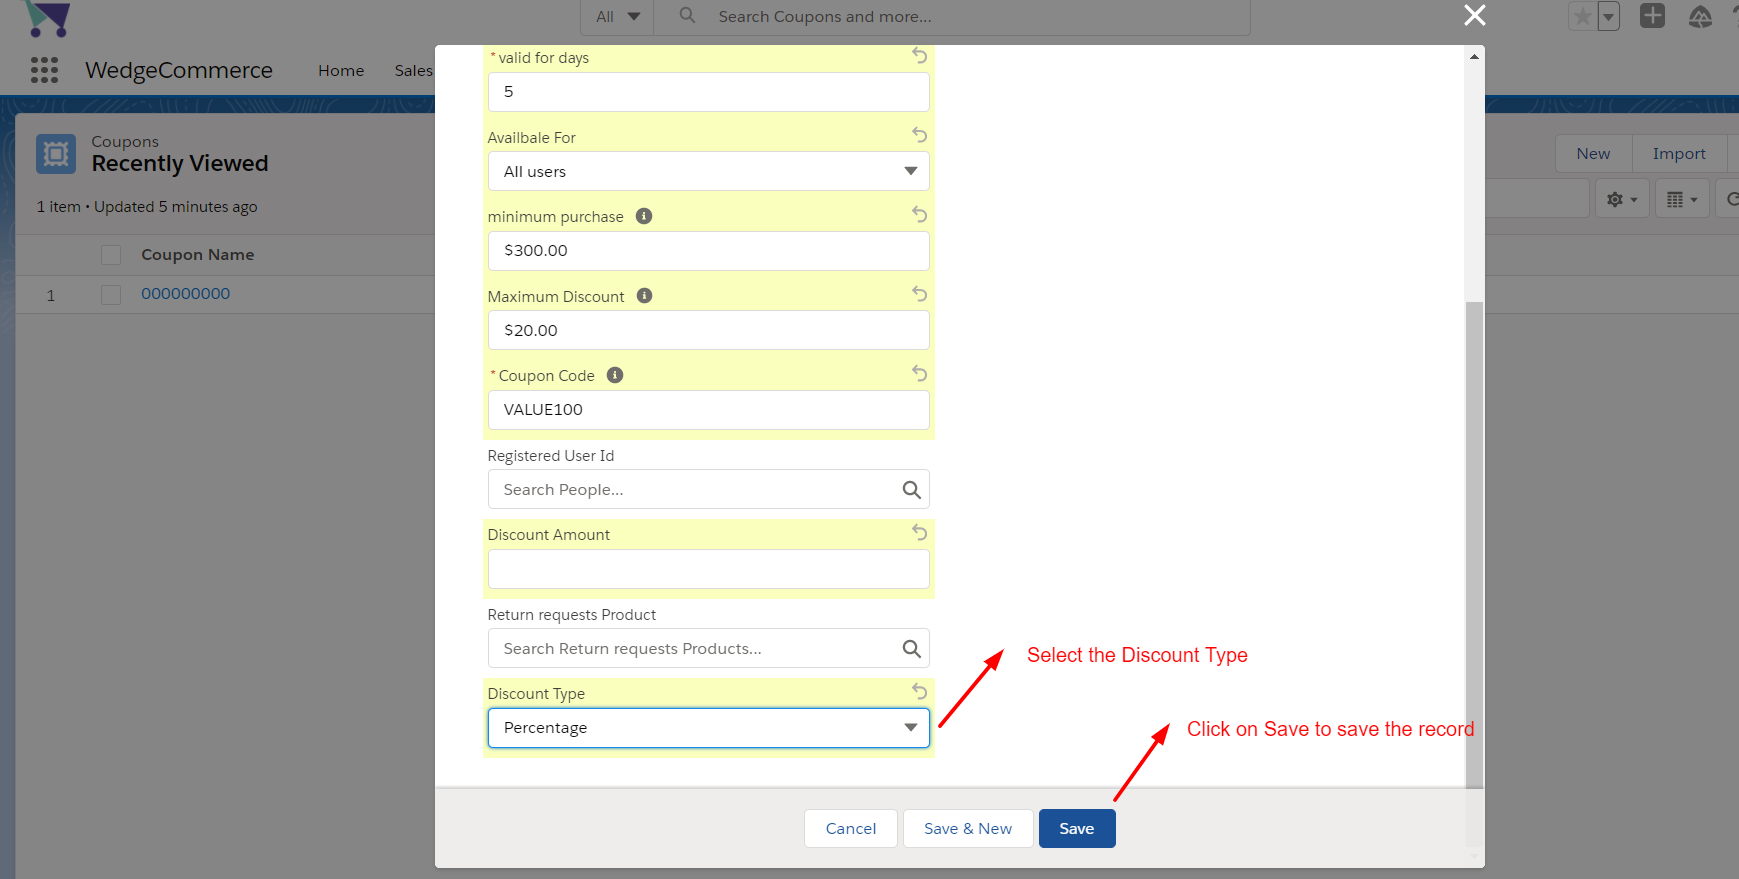
Fill in all the details related to coupon discount, along with Discount Type which you can select as Absolute or Percentage as per your preference. Click on Save to save all the records.
This is how your Store will be configured.
Tell us about Your Company
How can we help you with your business?
If you have more details or questions, you can reply to the received confirmation email.
Back to Home