Using Web Analytics in Wedgecommerce

Web Analytics as we know is the measurement collection, analysis of web data so that we can understand about the traffic, analyse it, and see do a complete research of what helps out business and what not. It helps us get the results of advertisement campaigns of our company. In all it seems like a pretty important part of any E-commerce platform. Looking at this we at Webkul decided to integrate it with Wedgecommerce. Exactly, this means that now you can use this feature to get analytics from various sources. This feature was introduced in version 1.4 of the app, and I am going to show you how to use web analytics in Wedgecommerce.
Supported analytics
Currently Wedgecommerce supports two distinguish Web Analytics:
- Facebook Pixel: This, as the name suggest, is provided by Facebook itself and requires us to have a Facebook account for usage.
- Google Analytics: Again as the name suggest, is provided by google and requires a google account for useage.
Facebook Pixel
In order to integrate Facebook pixel with your site, first you have to create a Facebook account. After that all you’ll need is the Pixel id to get it integrated. First thing is, go to your Pixel tab in ad manager or follow the following link:
https://www.facebook.com/events_manager/
Click on create a pixel button:
![]()
When you click on the button the a dialogue box will pop up asking for the pixel’s name.
![]()
Set a name there and then click save, to save the pixel. Once the pixel is saved a dialog box will pop up. You may close the dialog box as we don’t need it just yet.
On the top left corner of the page right below your pixel’s name you’ll see a pixel id copy the id and open wedgecommerce backend. Go to the store admin and click on web analytics tab. When you will check the facebook pixel checkbox a new tab will appear like the one in the image below:
![]()
Click on the tab and add the pixel id over here and click on save. With this done move back to Facebook dashboard and click on setup. A dialog box like the one below will appear,
![]()
Click on Manually install the code yourself to go to the next step, and then scroll down to send test traffic to your pixel. Write your site URL here and click send. If the status turn to active then your pixel is successfully setup. If it shows any issues then try again after some time.
Google Analytics
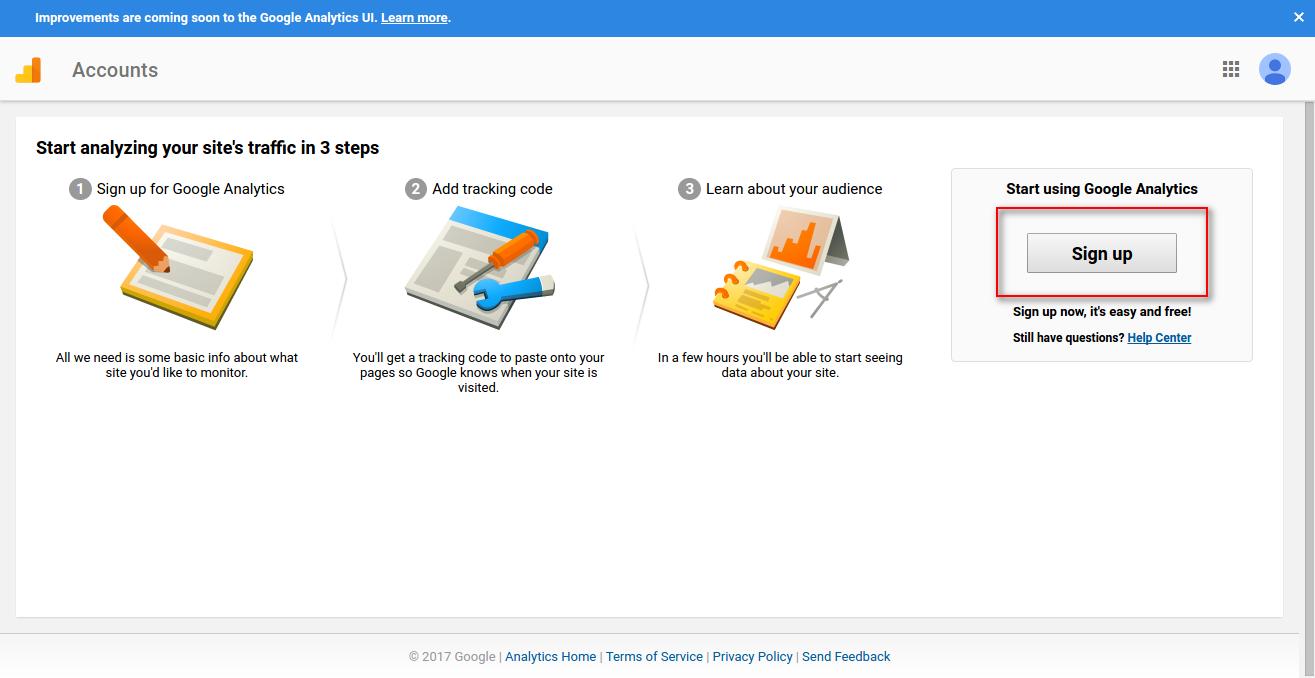
The procedure is similar with google analytics, first you need a google account. Then go to following link:
Then click on the sign up button.
Fill in the form that is displayed and then click on Get Tracking ID. After you save it accept the terms and conditions, which will redirect you to a new page where you will get the tracking ID.
![]()
Now copy this ID and follow the same procedure that you did with Facebook pixel to save it in Wedgecommerce. With all done now Google analytics is integrated into your site.
Support
That’s all about Using Web Analytics in Wedgecommerce, for any further queries feel free to contact us at:
https://wedgecommerce.com/contact-us/
Or let us know your views about this feature, in comments section below.