POS- WedgeCommerce Solution
POS- WedgeCommerce solution: It is a WedgeCommerce solution that ensures that Retailers have access to a single, connected view of customers, products, prices, orders, and other critical data elements. Based on that, they can create unified, omnichannel experiences for their customers both online and in-store. Connecting WedgeCommerce with POS will offer a more comprehensive shopping experience for Customers as it will enable everything to be done from the Retailers‘ end.
It connects digital and in-store commerce to help retailers create more engaging in-store shopping experiences. It also helps retailers streamline store operations management.
The core POS capabilities enable transaction processing, sales, returns, and exchanges, with the flexibility to adapt to changing business requirements. And because POS is based in the cloud, it’s easier to deploy, maintain, and upgrade. Retailers get seamless updates and are never stuck with outdated software.
FEATURES:
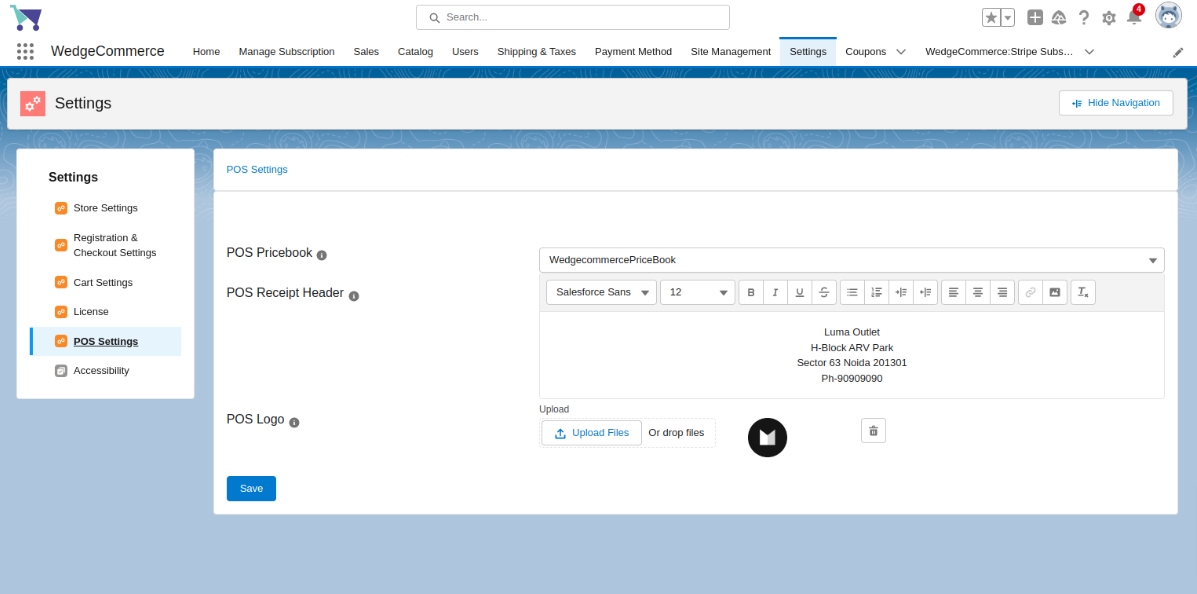
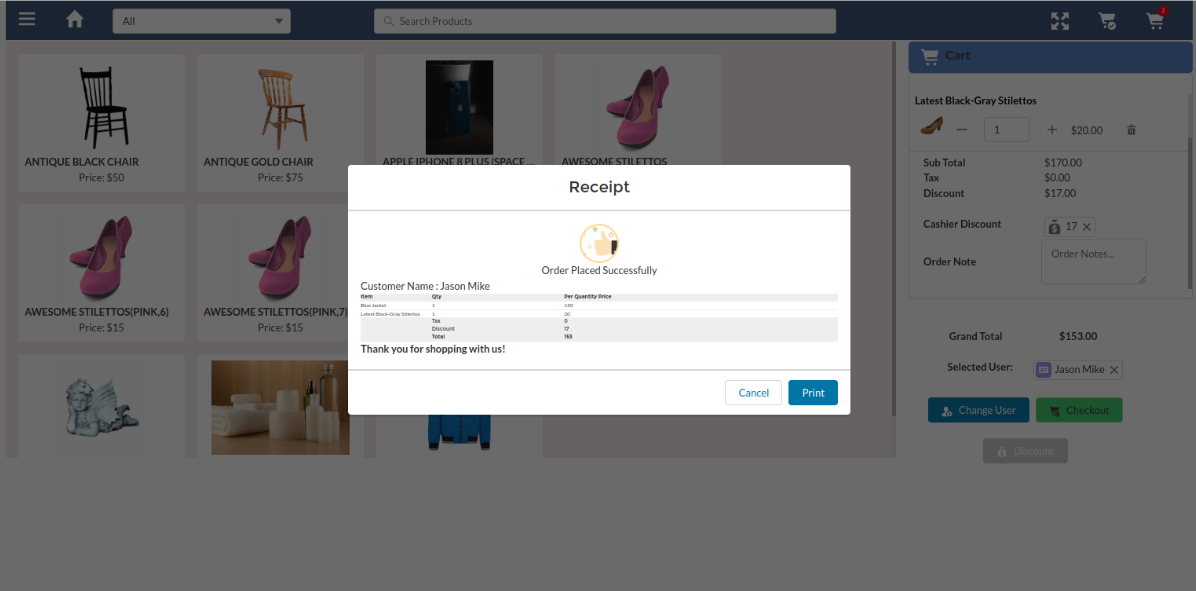
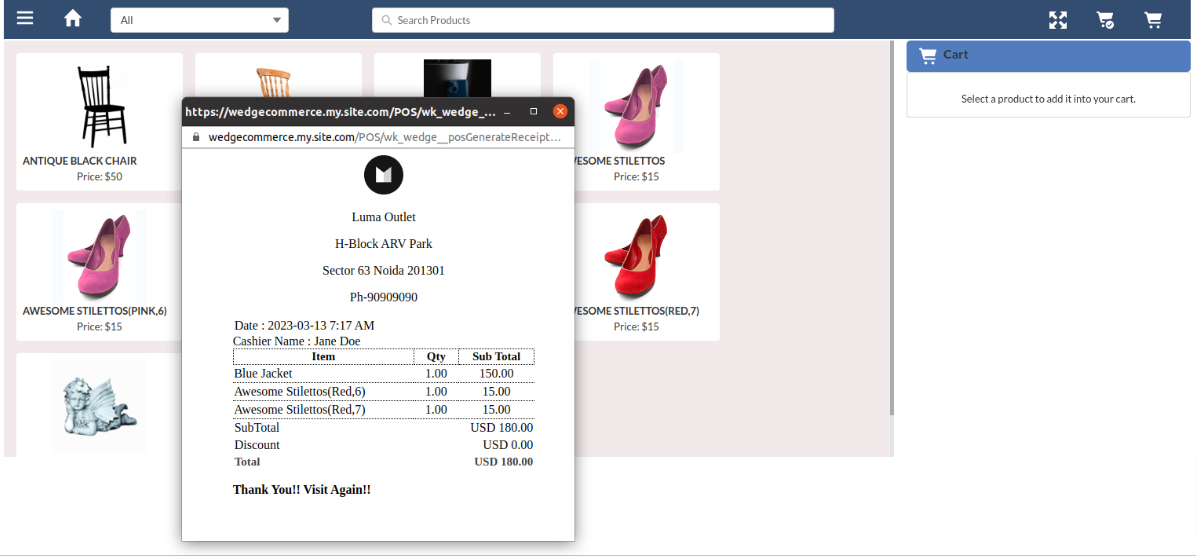
Printing Payment Receipt
This feature allows the user to print a receipt after making a payment for a purchase. The application provides options to manage the layout of the receipt, including the store’s name, logo, and address.

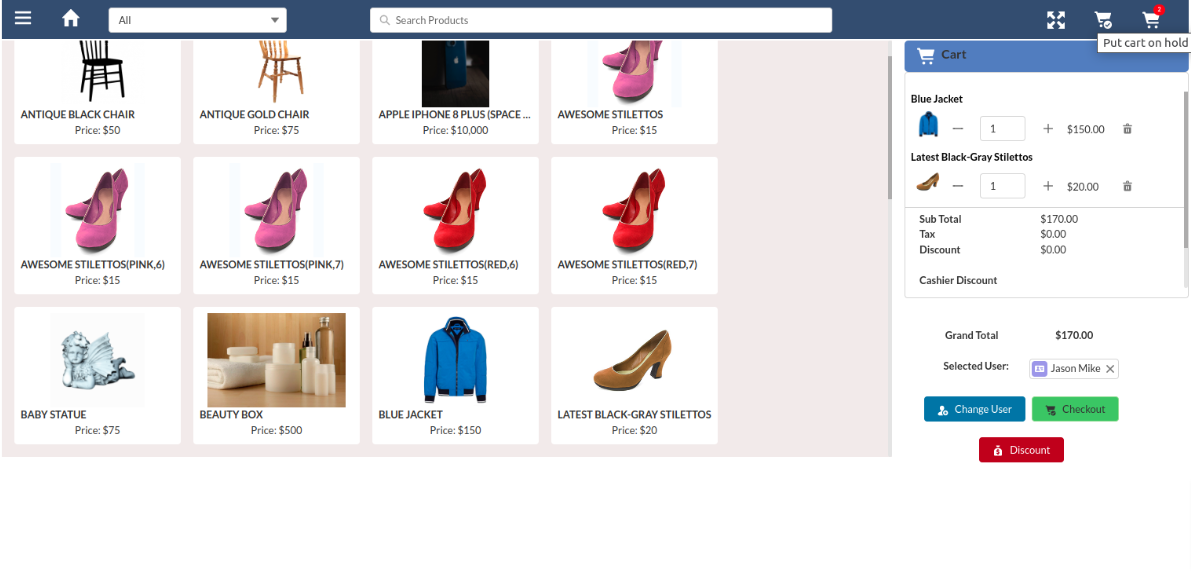
Cart Hold
This feature enables users to save items in their cart and hold their checkout for a later time without losing their selected items.

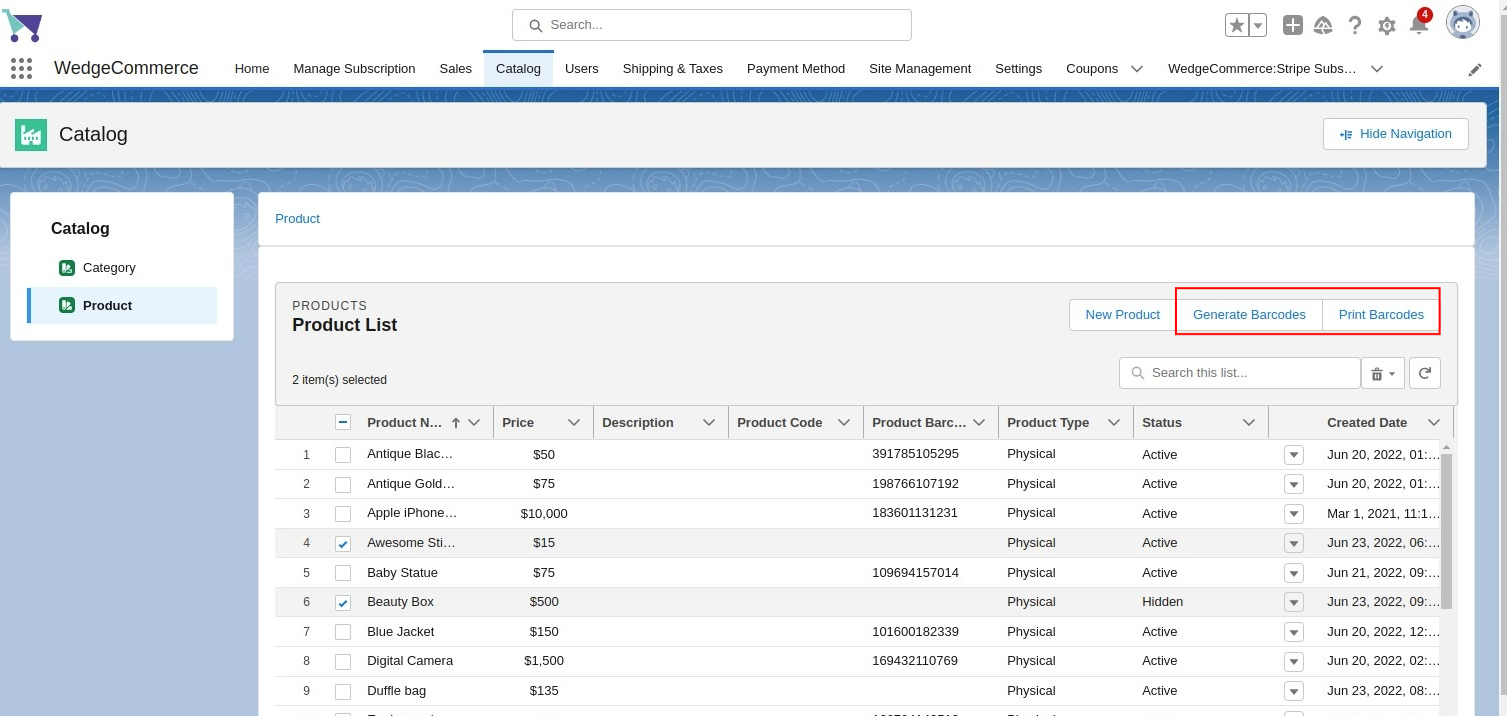
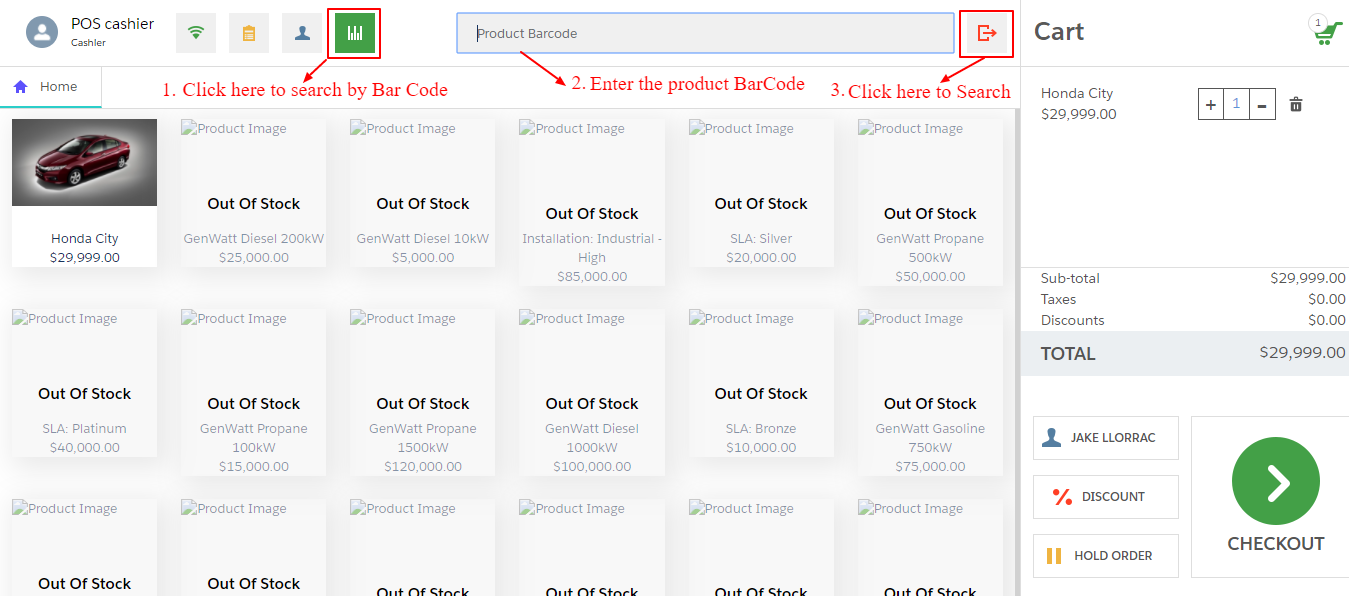
Barcode Scanner Functionality
This feature enables users to scan the barcodes of products to quickly add them to their cart.

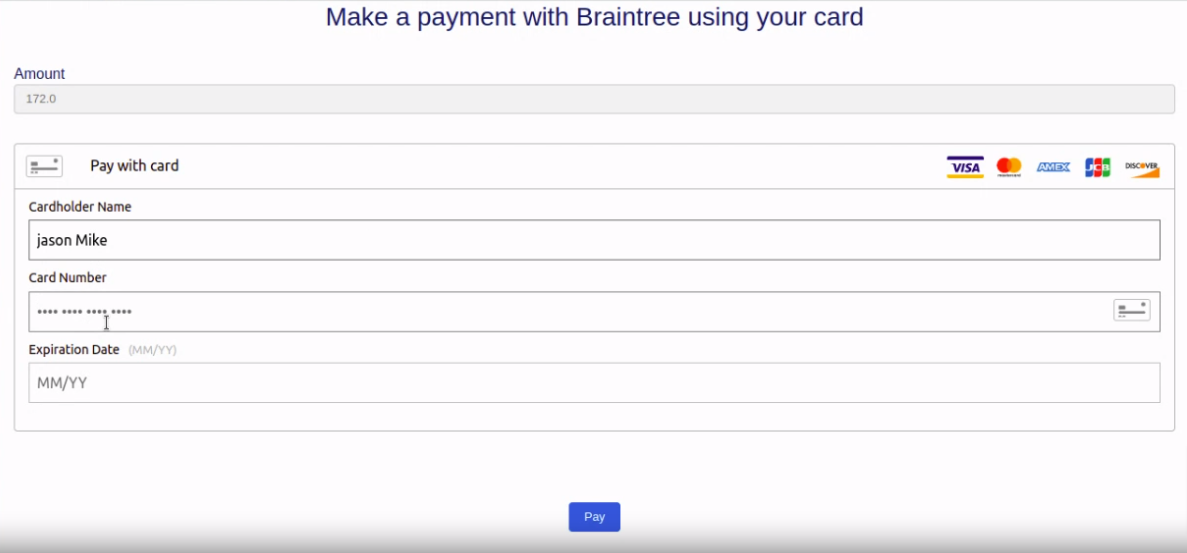
Payment Methods
This feature provides users with options to pay for their purchases, including cash and card payments, which are processed through the Braintree payment gateway.

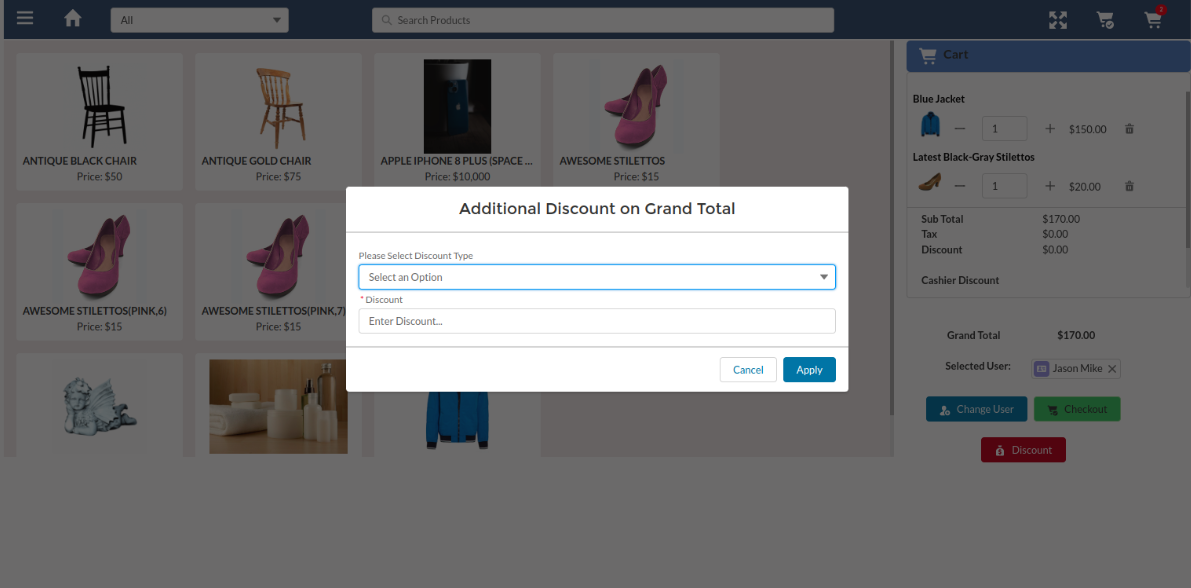
Cashier Discount
This feature allows cashiers to apply discounts to a customer’s purchase based on certain criteria, such as total purchase amount, product category, or specific items in the cart.

POS Installation Link: Install Now
LIGHTNING CONFIGURATION VIEW OF POS
To use the application at the Lightning end, it is required to register the domain first. Kindly go through the article: How to register your domain in Salesforce.
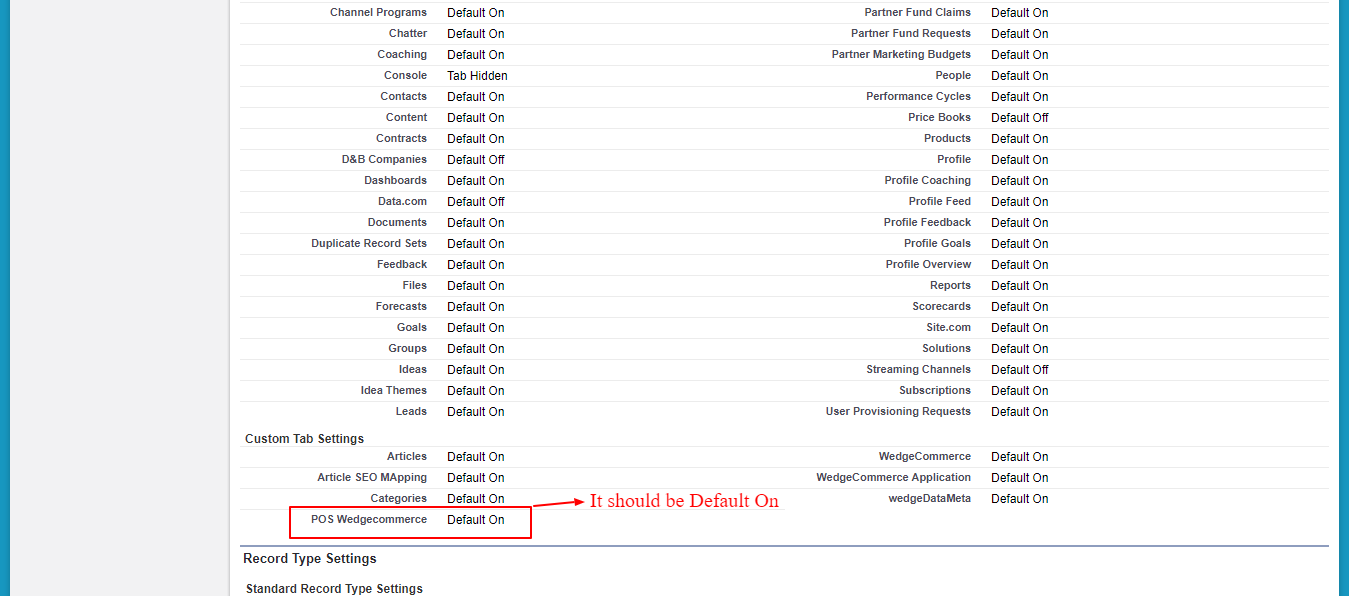
Once you get registered with your Domain, please make sure that custom tabs related to POS WedgeCommerce should be Default On.
Follow the steps to verify or update it: From Setup | Manage Users | Profiles | Select Profile and click Edit to verify as mentioned in the screenshot below.
Once done, Click on Save and Switch to Lightning Experience and proceed with the configuration at Lightning view as shown below.
Community Configuration of POS WedgeCommerce
In order to configure POS WedgeCommerce in your Community Page, please follow the steps below:

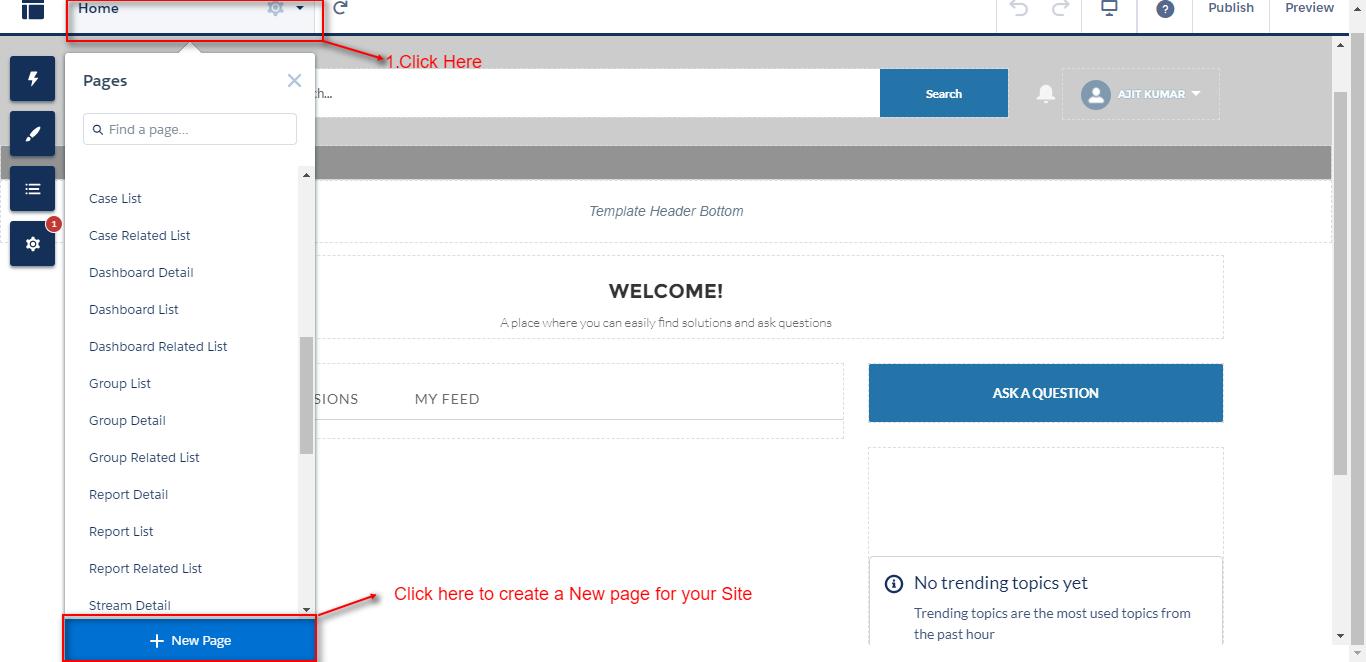
Now, in the Builder section, follow the steps below to create a new Login Page to login to your POS system.
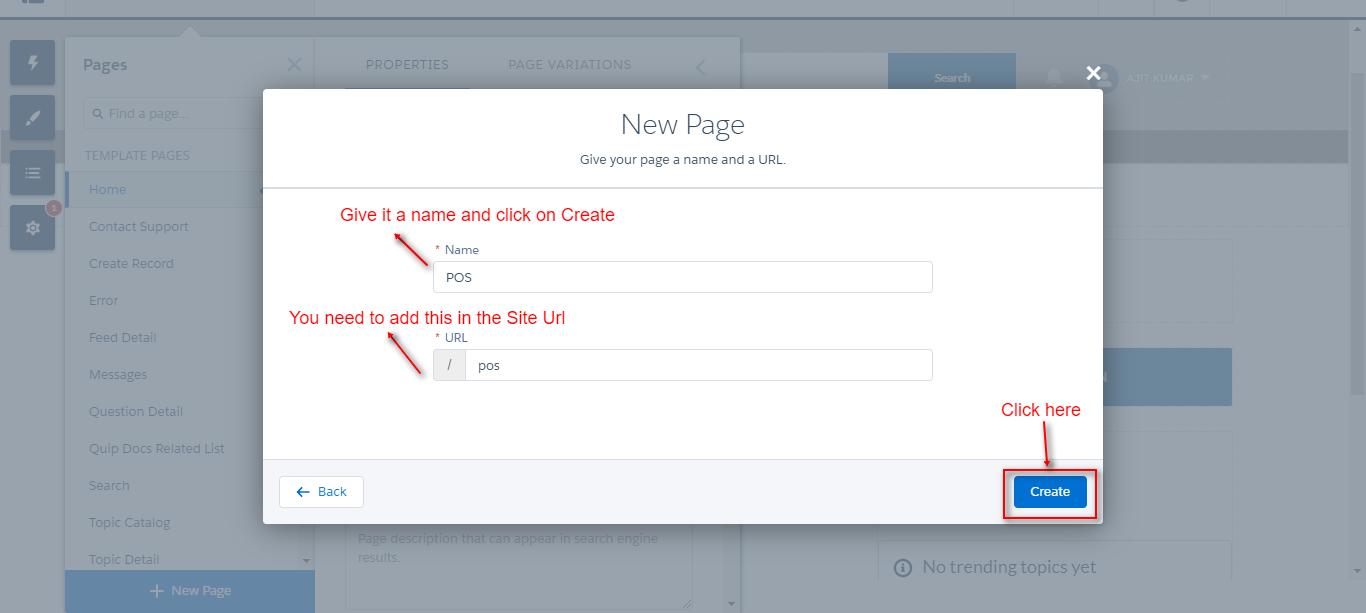
Step 1: Click on ‘Home’ and then on ‘New Page’.
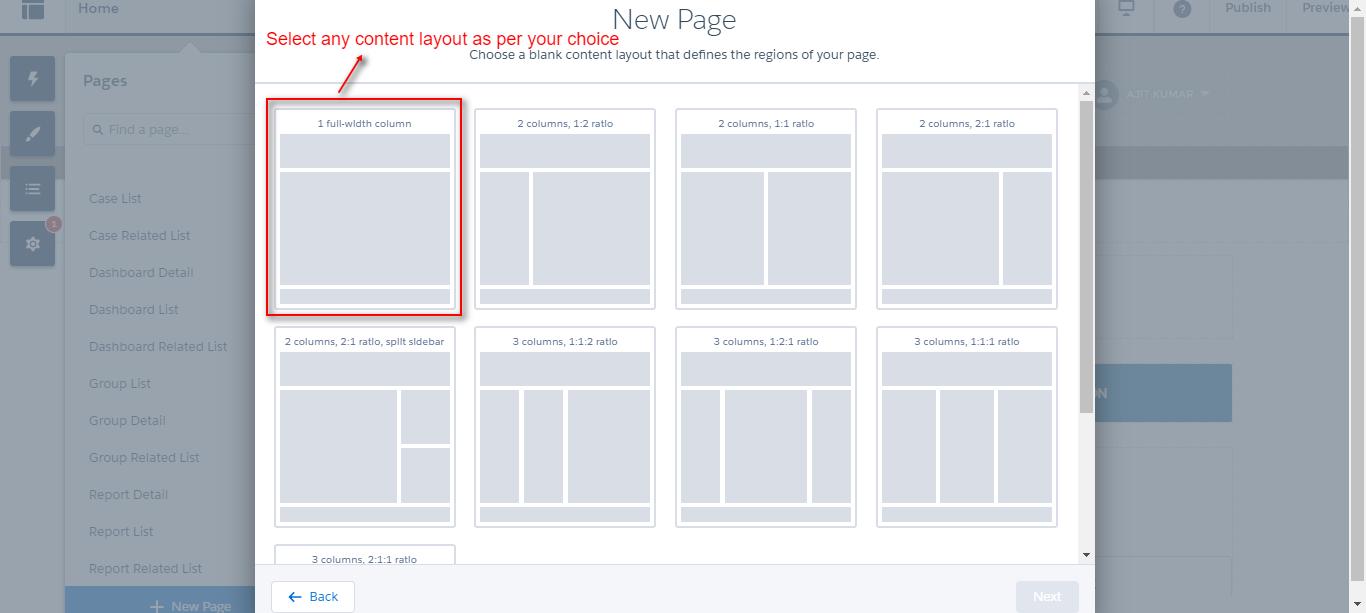
Step 2: Select a page type as per your choice as shown below:

Step 3: Choose a blank content layout that defines the regions of your page as shown below:
Step 4: Give your page a name and set the url which you will use later to open your POS Login Page. Click on ‘Create’.
Step 5: Now click on ‘Components’ and simply drag and drop the pos_loginForm component to make it appear at the required location.
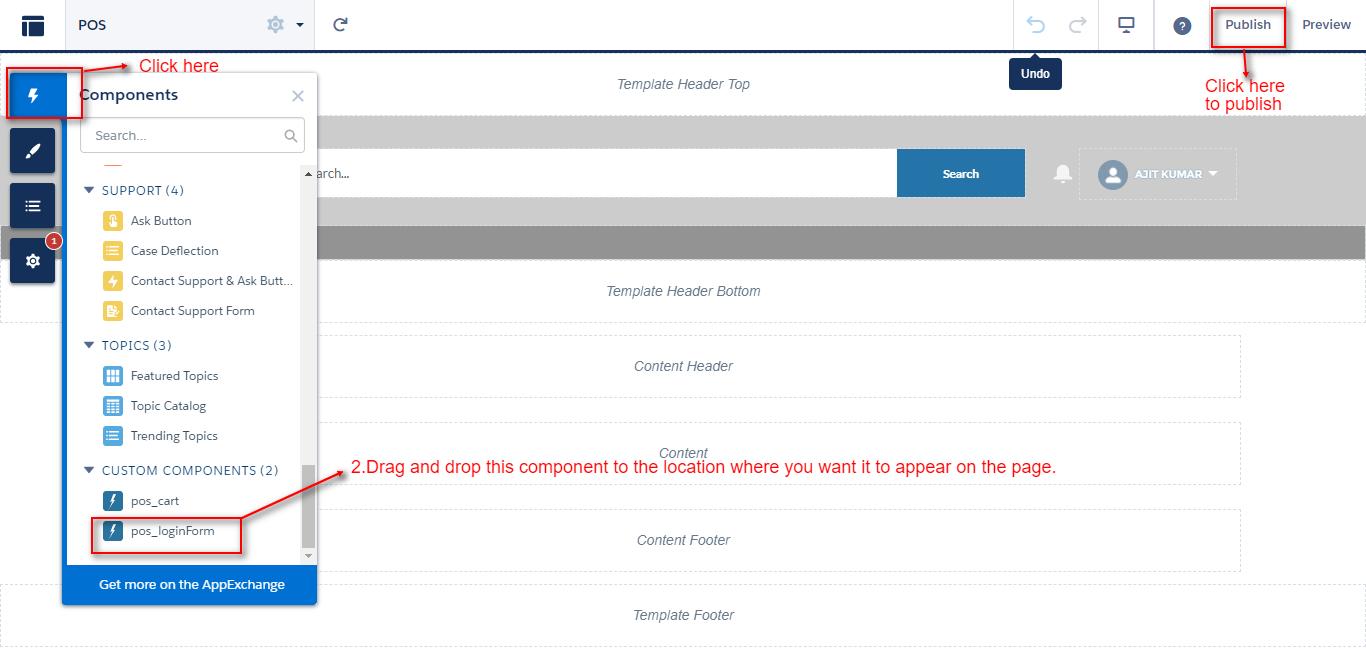
Step 6: Now, click on Publish to make it appear on the Community Page.

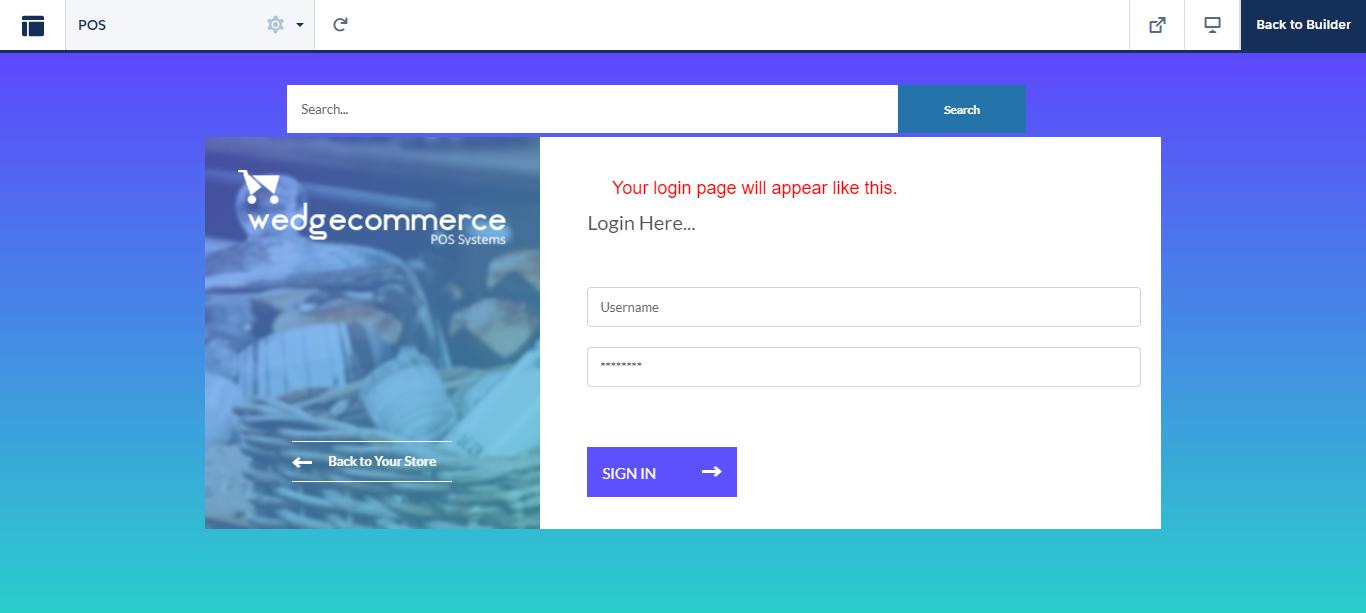
POS Login Page Preview:
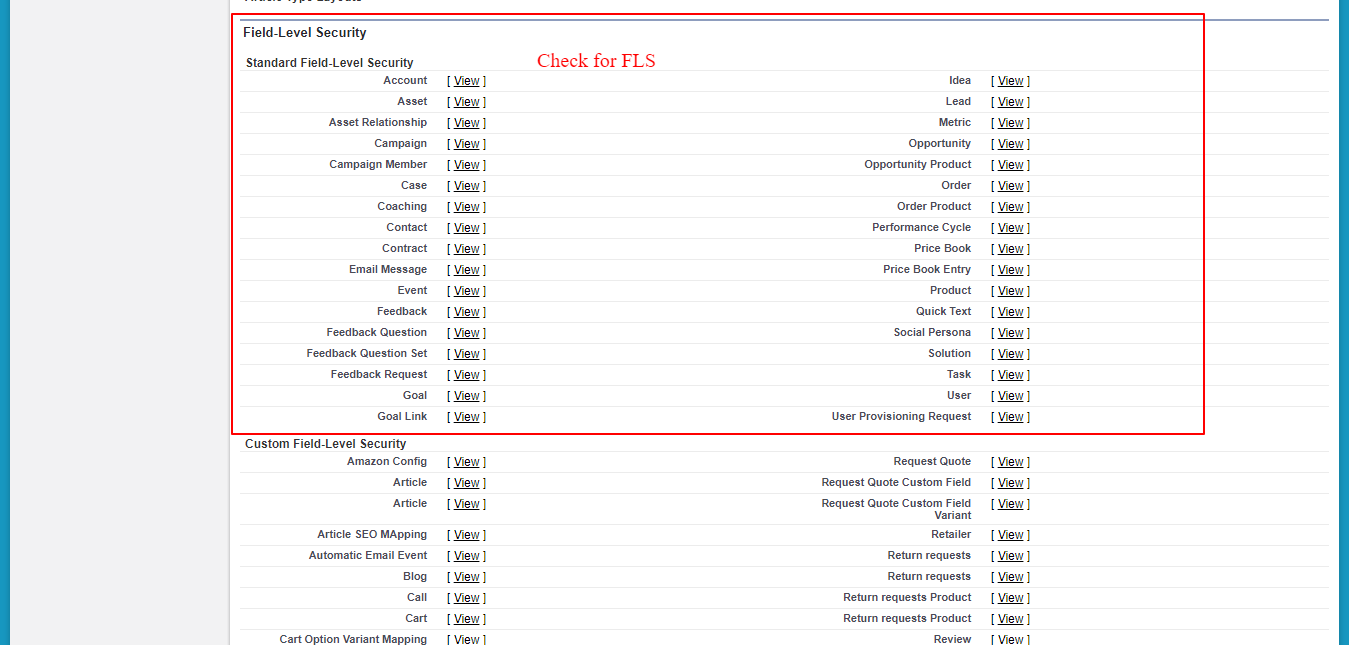
REQUIRED FLS for POS
After you are done with the setup and configuration, you also need to take care of Field Level Security of some fields of the Objects as shown below in the table:
| Object Name | Fields | Permission |
|---|---|---|
| User | Id, Name, SmallPhotoUrl | Read |
| Account | Id, Name | Read, Create |
| Contact | Id ,Name , MailingStreet, MailingCity, MailingState, MailingCountry, MailingPostalCode, Phone, Email, AccountId | Read, Create |
| Order | Id, TotalAmount, OrderNumber, Status, CreatedDate, Pricebook2Id Transaction_Id__c, Description, Coupon_Applied__c, Discount__c, Tax_Rates__c, shipping_Charge__c, AccountId, Amount_Paid__c, IsPosOrder__c | Read, Create |
| Categories__c | Id, Name, Level__c, ParentCategory__c | Read |
| Pricebook2 | Id, Name | Read |
| Pos_User_Group__c | Id, Pos_User__c | Read |
| StoreAdmin__c | Id, Guest_Account__c, Pos_Order_Account_Type__c, Pos_Low_Alert_Product__c, Product_Low_Alert_Quantity__c, StorePriceBook__c |
Read |
| Product_categories__c | Id, Product__c | Read |
| Product_Option_Variant__c | Id, Name, Modifier__c, Type__c, Product_Option__c | Read |
| Product_Option__c | Id, Name, Option_Type__c, Option_Status__c | Read |
| Product2 | Id, Name, Product_image__c, Returnable__c, Image_Id__c, Stock_Availability__c, Barcode__c, Barcode_Type__c | Read |
POS Admin Settings
 Step 2: Click on ‘POS WedgeCommerce’ Tab.
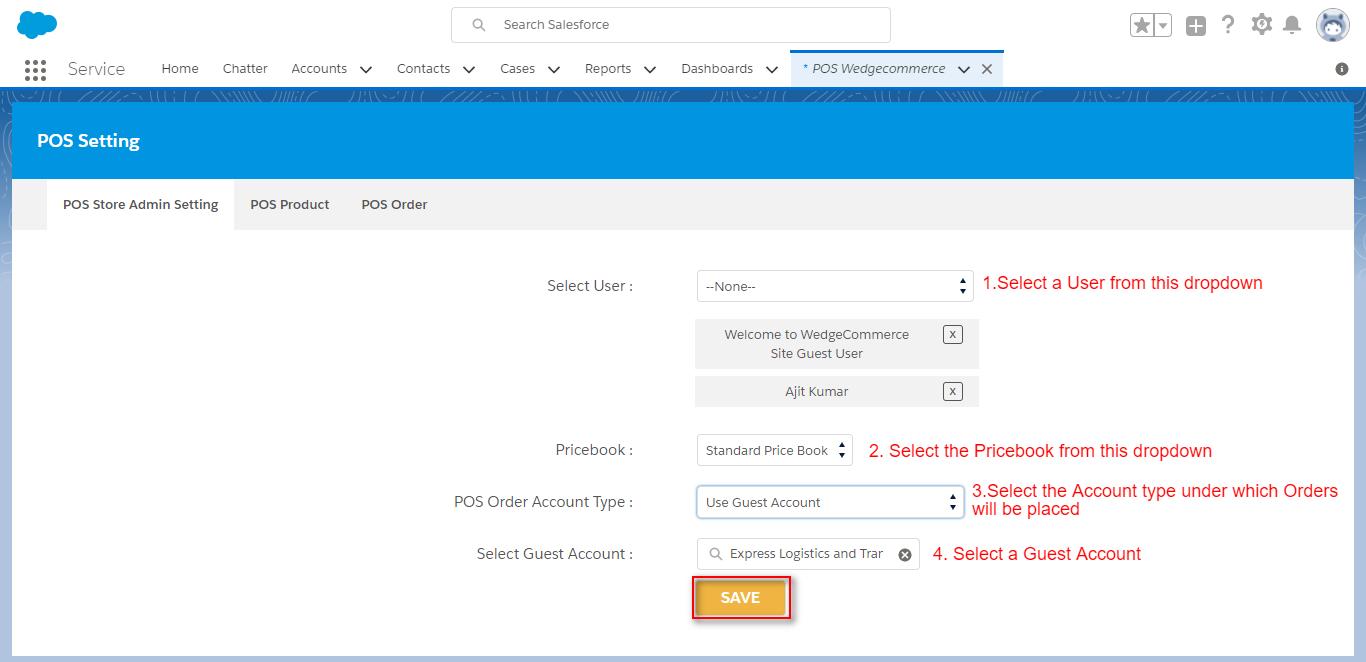
POS Store Admin Settings:
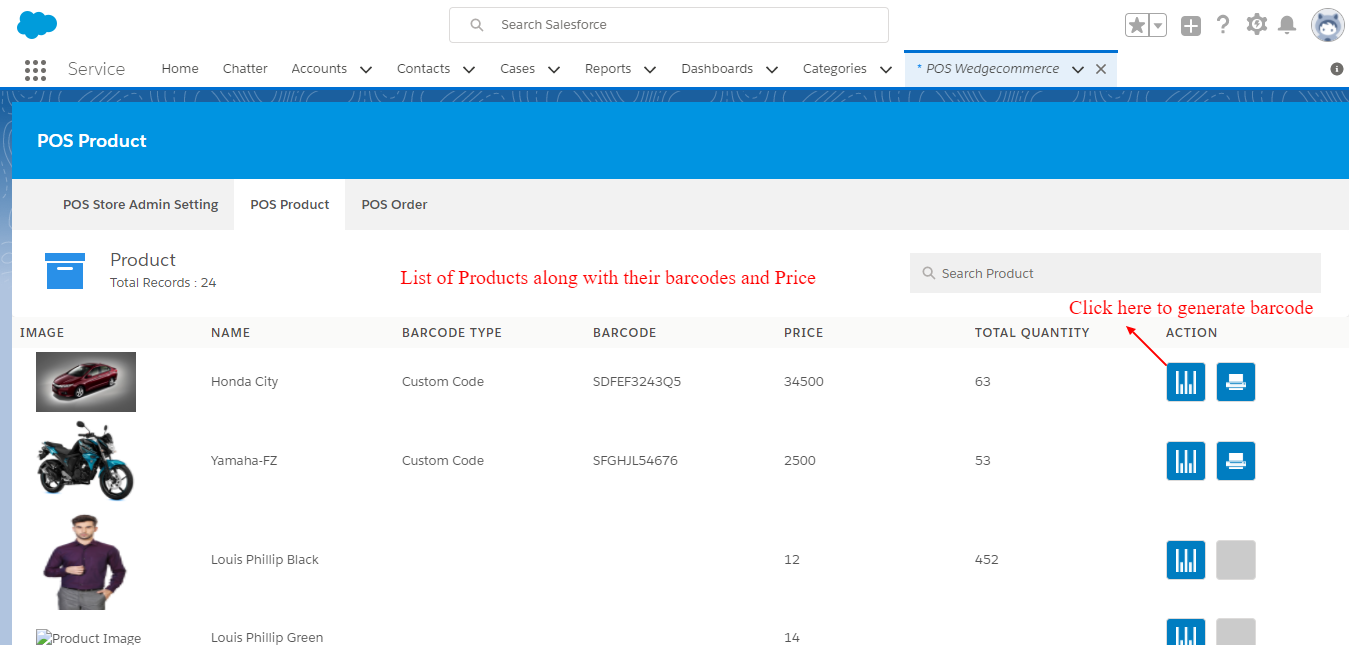
POS Product Tab
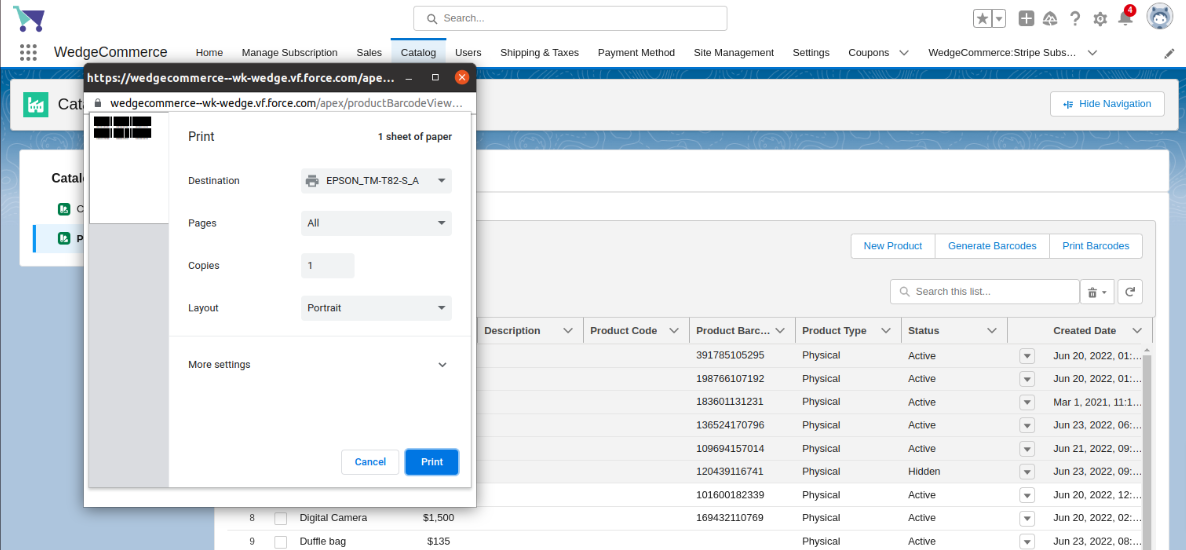
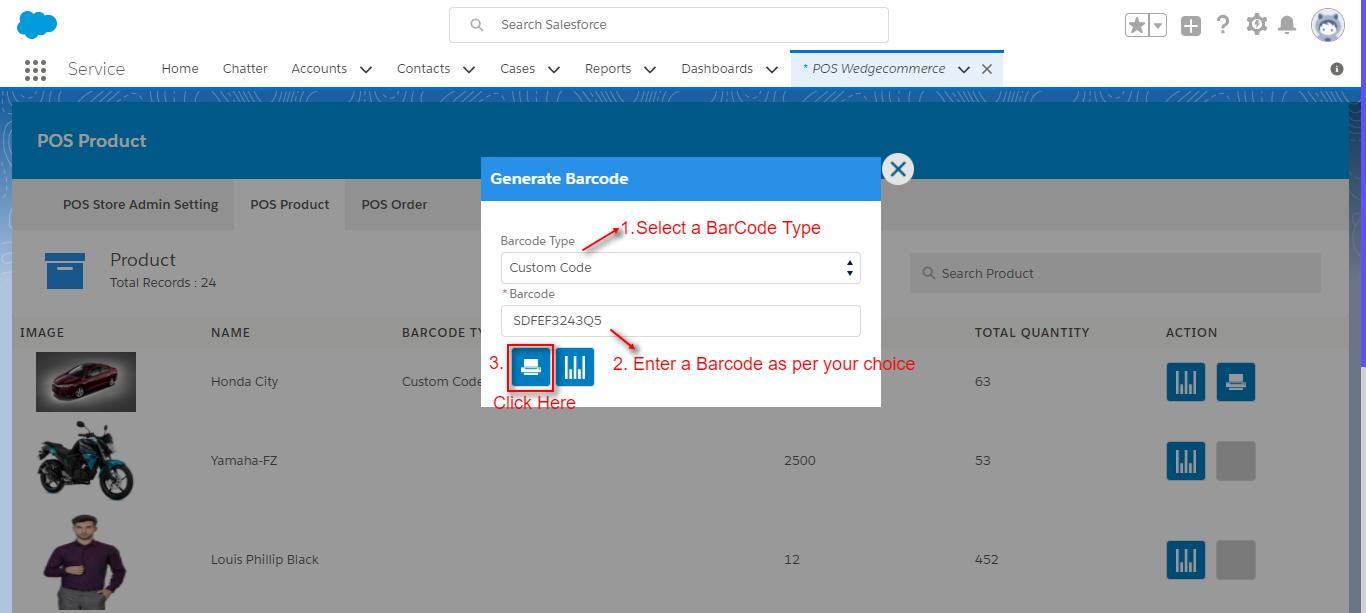
How to Generate Barcode for your Products:

Step1: Click on the Barcode icon under the ‘ACTION’ tab.
Step 2: Select ‘Barcode Type’, it may be a custom code as per your choice, or it may be some pre-defined text from the drop-down menu.
Step 3: Click on the Bar icon to generate and print the Bar Code.
After generation it will appear as below:

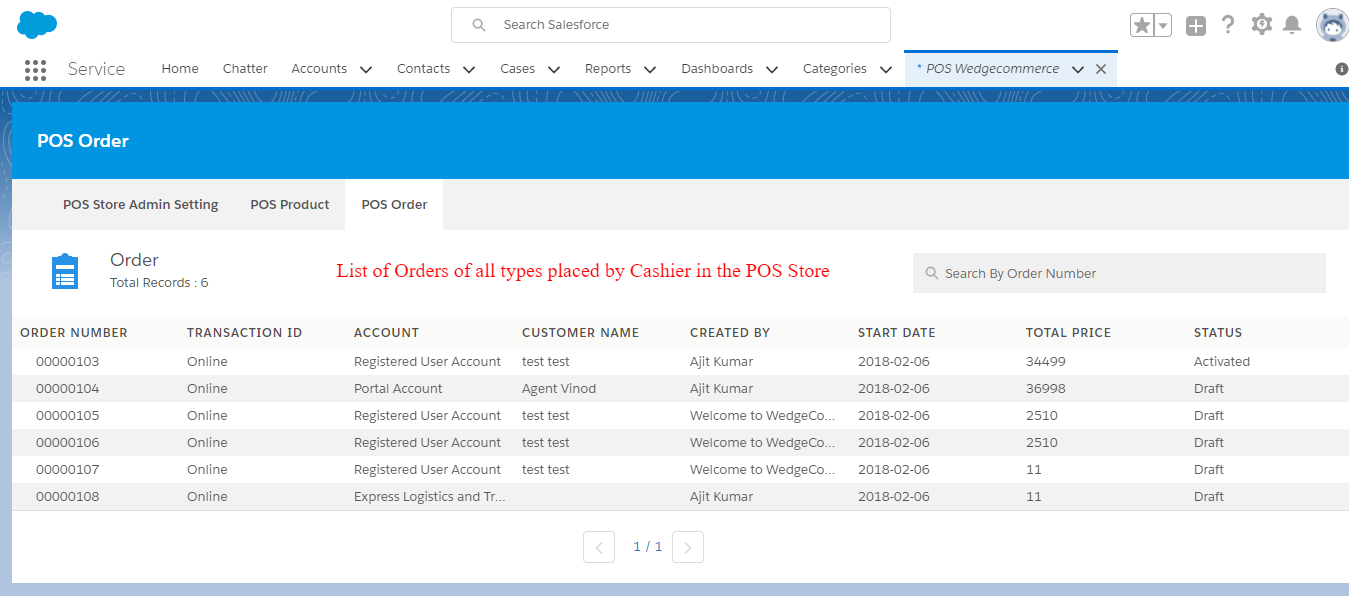
POS Order Tab:
Clicking on POS Order Tab will list all the Orders created so far by the Cashier in both the Modes i.e Online as well as Offline mode.
Login to your POS System
To open the POS system login page you configured in your Community, you just need to append /s/Page_Name at the end of your Community URL as shown below:

Product List front End View


Add Customer

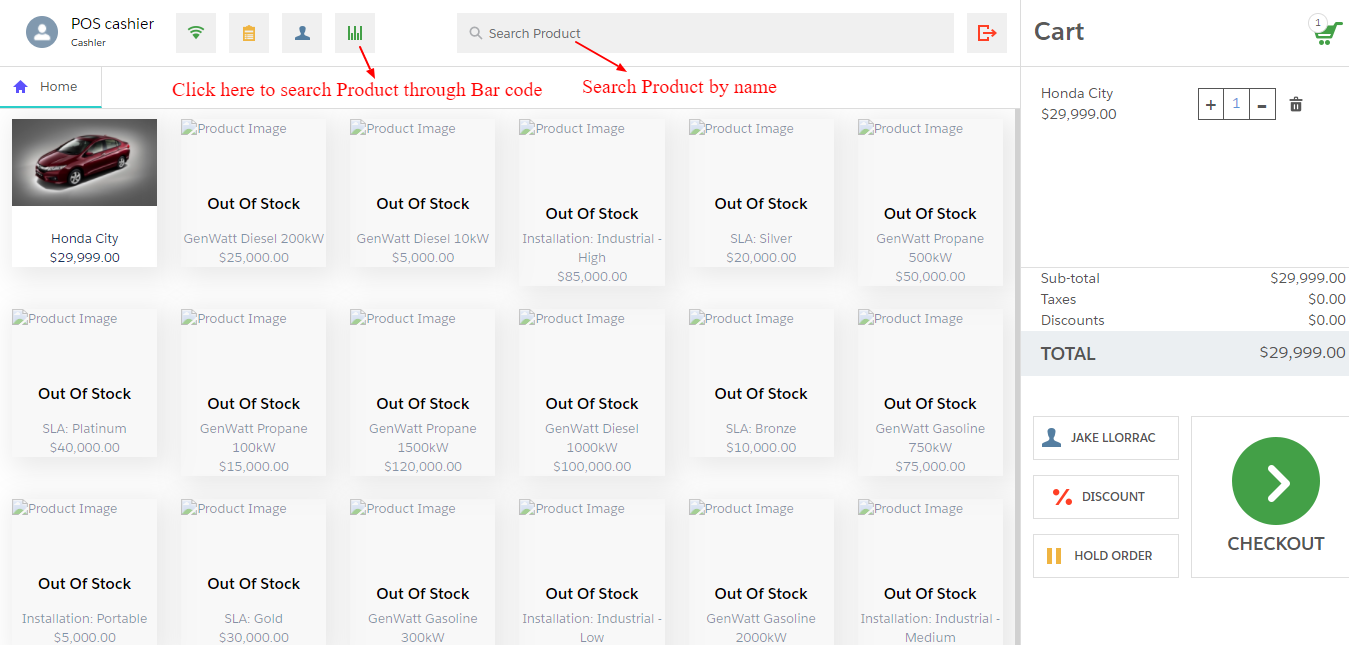
Search Product Criteria
You can set search Criteria if you want the product to be searched via either Product name or Barcode as shown below:
Hold Order
POS allows you to hold orders before checkout so that you can proceed with placing the Order and billing later on so that you don’t have to re-calculate the order at some later stage.
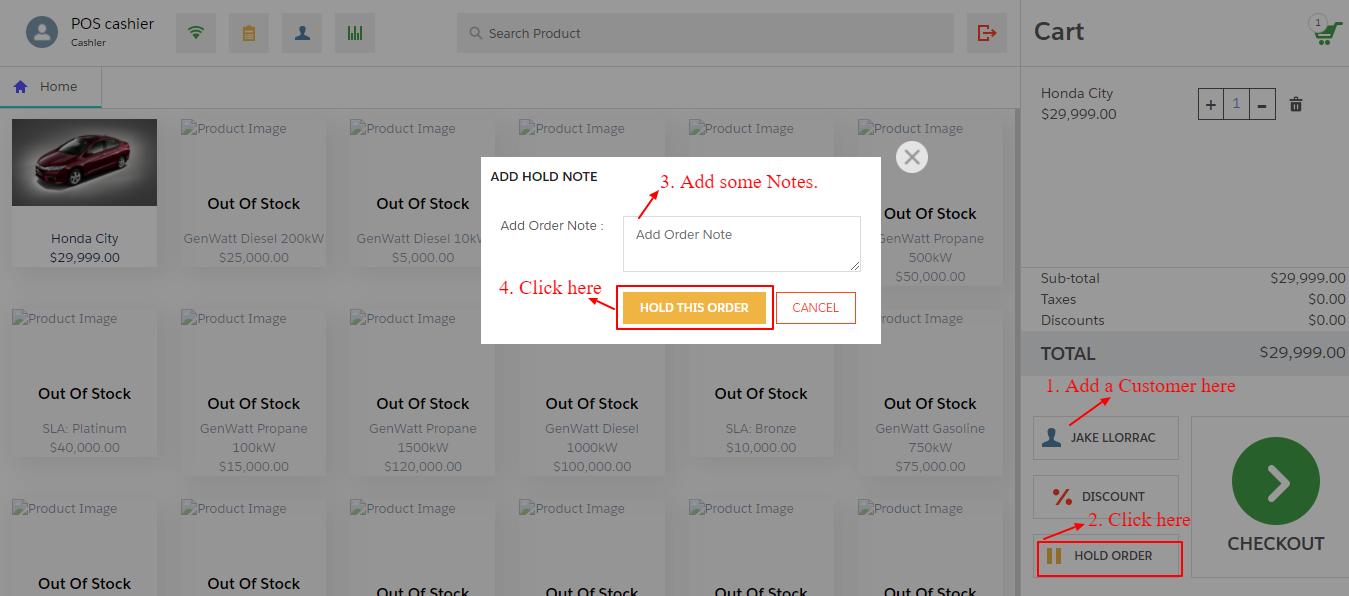
Step 1: Add a Customer.
Step 2: Click on Hold Order.
Step 3: Add some Notes stating the reason for hold and Click on ‘Hold this Order.’
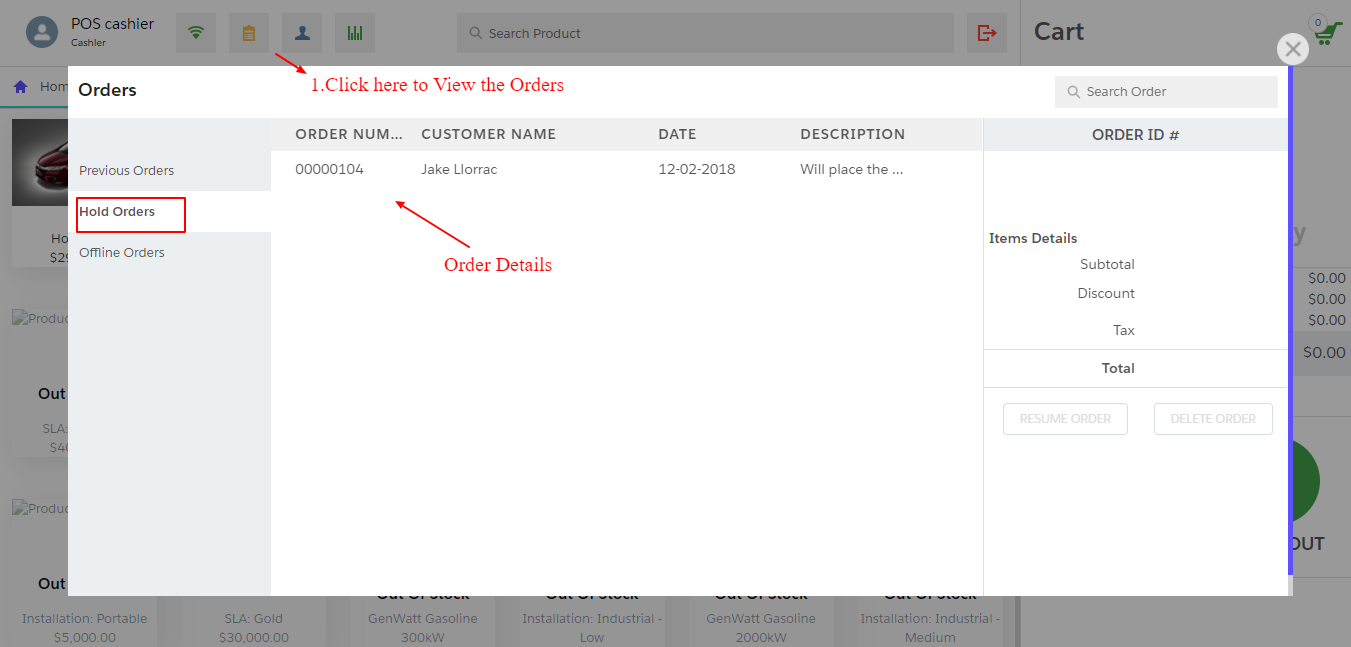
View Hold Orders:
SUPPORT
- To view the applications in Appexchange, go to Webkul Appexchange Applications .
- For further any query : Create Ticket Now