Lightning File Upload tag in Lightning Experience

While working with lightning components, we use to face issues when it came to the part where we would have to upload file. With Winter ’18 release that’s not an issue anymore. Salesforce has introduced many lightning component, which can be used with the help of lightning tags. One of them is Lightning File Upload tag (lightning:fileUpload).
Lightning File Upload tag
The Lightning File Upload tag will work with API version 41.0 or later. If you have the earlier version of the components, you just have to update metadata file of the component. First of all, we will discuss the attributes of the tag.
1) recordId: This attribute refers to the record Id of the record that the uploaded file is associated to. This attribute is required.
2) class: Adds extra css to the element.
3) title: Title of the icon appears when you hover mouse over it.
4) label: The text label for the file uploader. This attribute is required.
5) multiple: This attribute is of boolean type. It denotes whether multiple uploads are allowed or not (default=false).
5) disabled: This attribute is of boolean type. It denotes whether the components displayed should be disabled or not (default=false).
5) accept: Comma separated values can be added, for the file type which can be uploaded.
5) onuploadfinished: The action performed when files have finished uploading.
Let’s refer to an example:
Component-
<!-- I'm using implements attribute to access this component on all pages. -->
<aura:component implements="flexipage:availableForAllPageTypes" access="global" >
    <!--
	/**
         * Webkul Software.
         *
         * @category  Webkul
         * @author    Webkul
         * @copyright Copyright (c) 2010-2016 Webkul Software Private Limited (https://webkul.com)
         * @license   https://store.webkul.com/license.html
         */
	-->
    <!-- You can use lightning data service for getting record Id from page. -->
    <aura:attribute name="edgeRecordId" type="String" default="001XXXXXXXXXXXX" description="Record to which the files should be attached" />
    <div class="wrapper">
    	<lightning:fileUpload label="Upload Attachments"
        multiple="true"
        accept=".pdf, .png"
        recordId="{!v.edgeRecordId}"
        onuploadfinished="{!c.handleAfterUpload}" />
    </div>
</aura:component>
Controller-
({
    /**
     * Webkul Software.
     *
     * @category  Webkul
     * @author    Webkul
     * @copyright Copyright (c) 2010-2016 Webkul Software Private Limited (https://webkul.com)
     * @license   https://store.webkul.com/license.html
     */
    handleAfterUpload: function (component, event) {
        // Number of files Uploaded
        var uploadedFiles = event.getParam("files");
        alert("Number of files uploaded : " + uploadedFiles.length);
    }
})
CSS-
/**
     * Webkul Software.
     *
     * @category  Webkul
     * @author    Webkul
     * @copyright Copyright (c) 2010-2016 Webkul Software Private Limited (https://webkul.com)
     * @license   https://store.webkul.com/license.html
     */
.THIS.wrapper{
    width: 100%;
    background: #fff;
    padding: 10px;
}
Output
Here is the output:
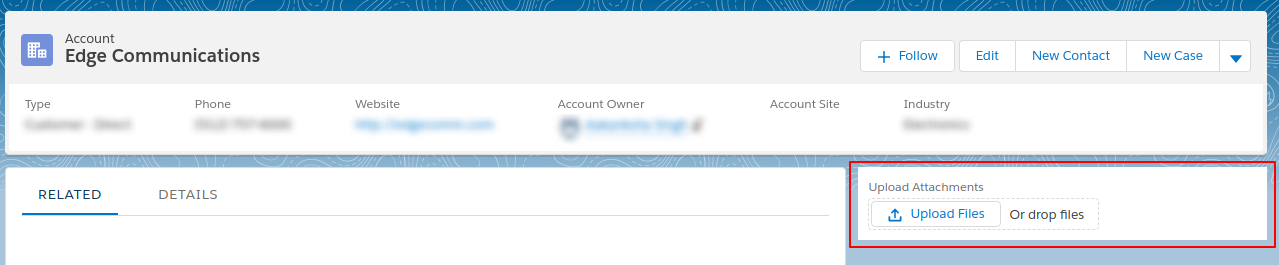
Hit the upload button to test it. You will find an attachment created for the record id you mentioned in the code.
Support
That’s all about Lightning File Upload tag in Lightning Experience, for any further queries feel free to contact us at:
https://wedgecommerce.com/contact-us/
Or let us know your views on how to make this code better, in the comments section below.