How to install Force.com IDE in Eclipse

We will get to know how to use How to install Force.com IDE in Eclipse. Before we get to that part, we should know what IDE is. So, let’s get started with it.
Integrated Development Environment (IDE)
Integrated Development Environment (IDE) is an application which provides the end user an environment which is feasible for seamless development. It consists of editor, debugger and automation tools. Some of the IDE(s) also support intelligent code completion.
Force.com IDE is a client application which is used for creating, modifying and deploying Force.com applications. It is based on Eclipse platform and built using Tooling API.
Requirements
- OS requirements:
- Windows 7, 8, or 10
- macOS 10.7, 10.8, 10.9, 10.10, or 10.11
- Ubuntu 12.04 LTS or 14.04 LTS
- Java SE Development Kit (JDK), Runtime Environment 8 or above
- Eclipse Mars/Neon or latest version
Install Force.com IDE in Eclipse
Now, let’s get started with the installation process.
Step 1: Open Eclipse. Go to Help > Install New Software.

Step 2: After the install dialog box opens, click on Add button.
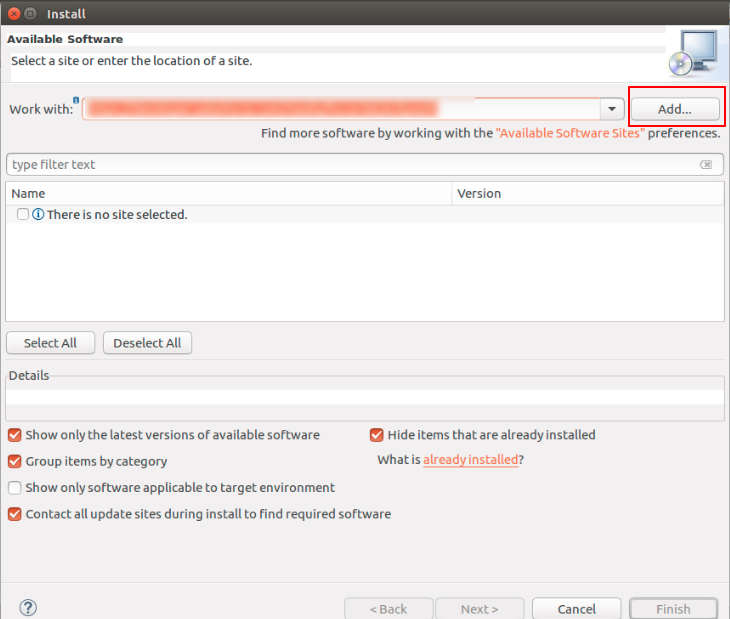
Step 3: Add Repository dialog box opens. Fill Force.com IDE in Name field, and https://developer.salesforce.com/media/force-ide/eclipse45 in the Location.

Step 4: You will get the screen mentioned below:

Select all the options and click Next until you are asked to agree to the license.
Step 5: Select I accept the terms of license agreements radio button and click Finish button.

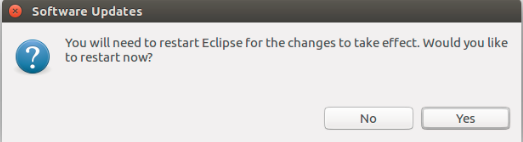
Step 6: Once the Installation process is complete, you will be asked to restart eclipse, click the Yes button.
Create a Force.com Project
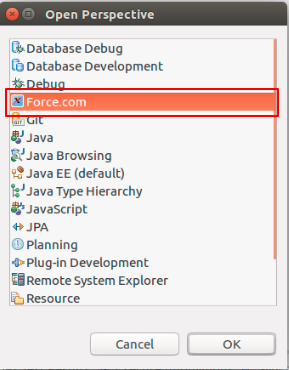
–> After restarting eclipse, go to Window > Open Perspective > Other. Select Force.com
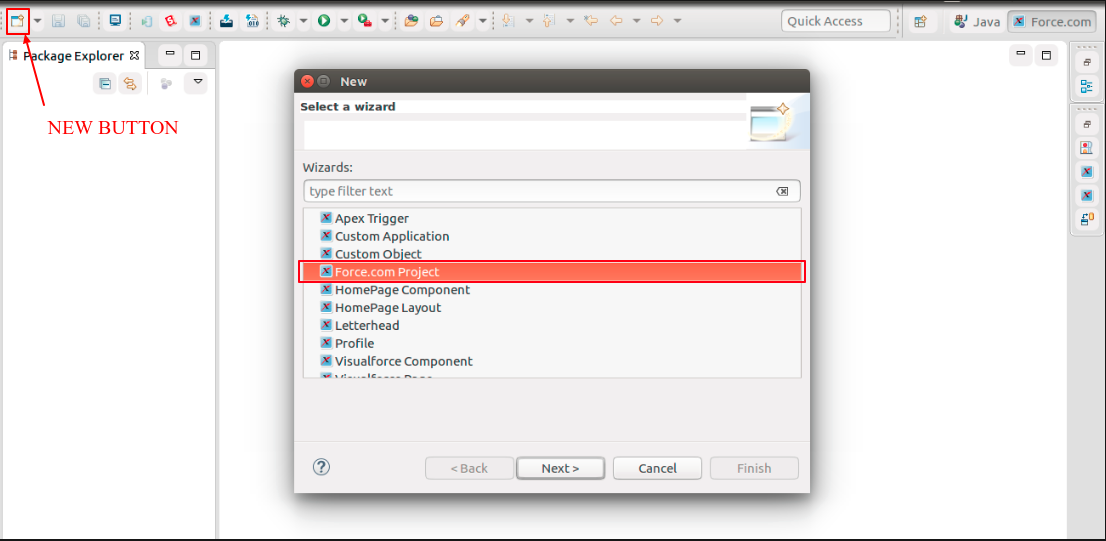
–> To create new Force.com project click new button as shown in the image, and select Force.com Project.
–> Enter a suitable Name for your project and the credentials of your Salesforce Org, and click Finish

–> The project you created just now is in offline mode, anything you change and save will not appear in your org for now. So, for the updating your project dynamically you have to right click on your project, you will find an option Force.com, hover on it, and click Work Online. Now each time you save your code in eclipse, it will be updated in your org.
Support
That’s all about How to install Force.com IDE in Eclipse, for any further queries feel free to contact us at:
https://wedgecommerce.com/contact-us/
Or let us know your views on how to make this feature better, in comments section below.