How to create reduction order in salesforce

Every one of us know the concept of refunding orders that we have placed previously. On every eCommerce site we expect to get this feature for our own convenience. Mostly these platforms give us this feature too, and looking at that Salesforce has also introduced this feature under the name of Reduction Order. In Salesforce reduction order represents an agreement between your client and your org, that some of the products that were previously purchased will be returned. This is what I will demonstrate, how to create reduction order in Salesforce.
Prerequisites
To create reduction order in salesforce the only requirement is, that you have either, Enterprise, Performance, Unlimited or Developer Org. At the moment there is no way to enable reduction order in Professional org, and there is no sign of getting it anytime soon.
Procedure
Step 1: Enable reduction order for your org, if it is not already enabled. Go to Setup|Customise|Order|Order Settings and check the enable reduction order checkbox.
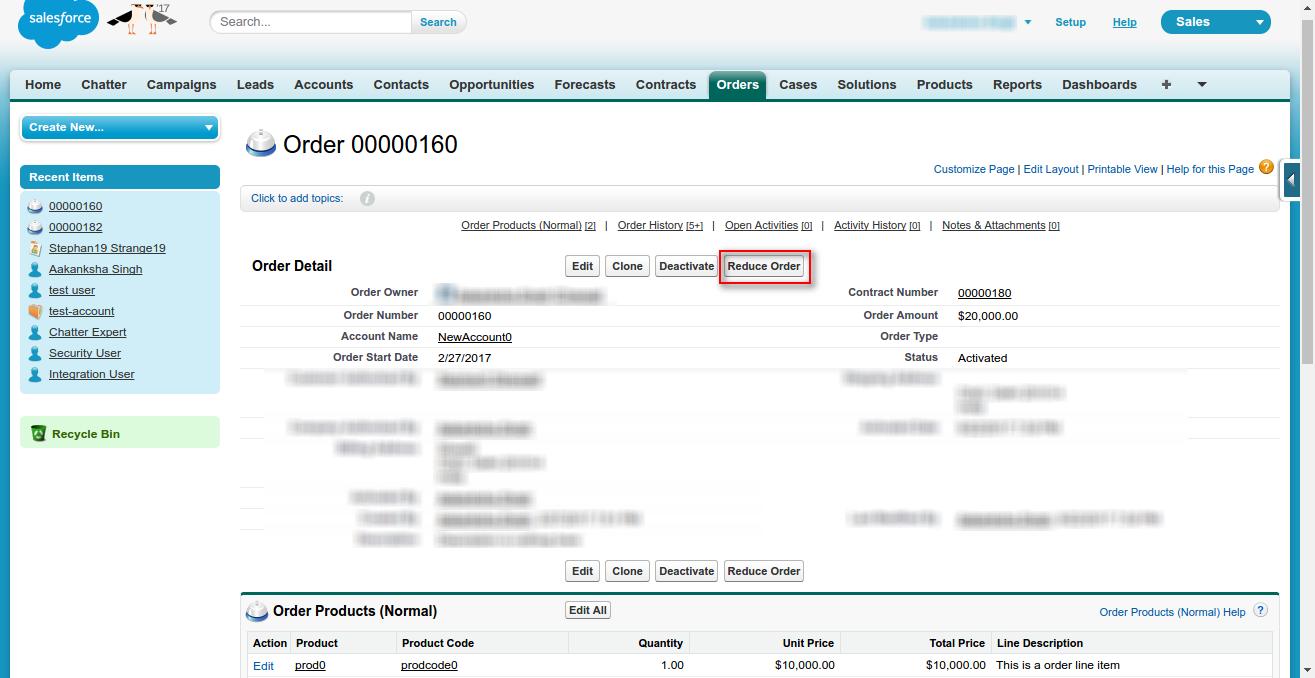
Step 2: Now go to the order which you want to reduce, or should I say which you want to create refund for and activate it’s contract and the order itself, respectively (be careful, once you have activated an order more products cannot be added to it. Although deactivating the order is still possible in order to update order items). Now on the order page you will find that there is another button, Reduce Order.
Step 3: When you will click on the ‘Reduce Order’ button you will see that the page which opened is exactly same as the create order page. The only required field here is the Start date for which you must fill a date which is previous than the contract end date, rest all are filled. Fill the rest of the details as per your requirements, and click save.
Step 4: With that done, a new reduction order is created, which will have a lookup to the original order. Now the task that is left is to add products to the order. Add products just like the way you would add them to any normal order. The only difference will be that you will see only the products of the original order. Add them select quantity and then save the details.
There you have it, this completes your reduction order in Salesforce, which can be used to represent refund orders.
Support
That’s all about creating reduction order in salesforce, for any further queries feel free to contact us at:
https://wedgecommerce.com/contact-us/
Or let us know your views on how to make this blog better, in comments section below.


