Step to integrate Live Agent for your WedgeCommerce Customers.
Guided Step to add Live Agent/Chat Agent to your Wedgecommerce Application.
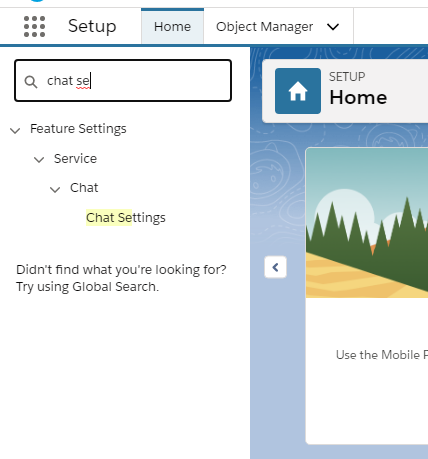
1. Enable Chat Setting in your Salesforce. Setup -> Chat Setting

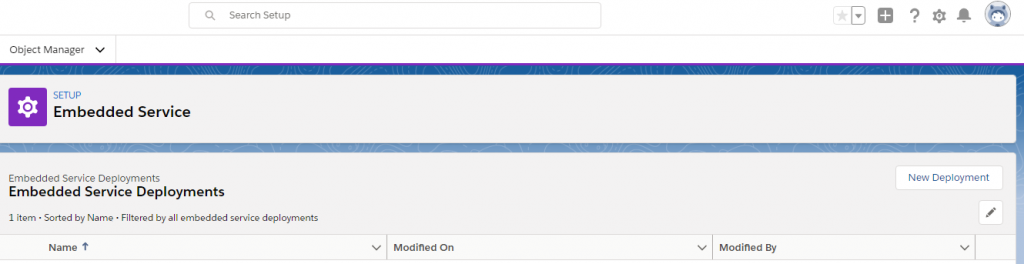
2. Go to Embedded Service deployment. Setup -> Embedded Service deployment
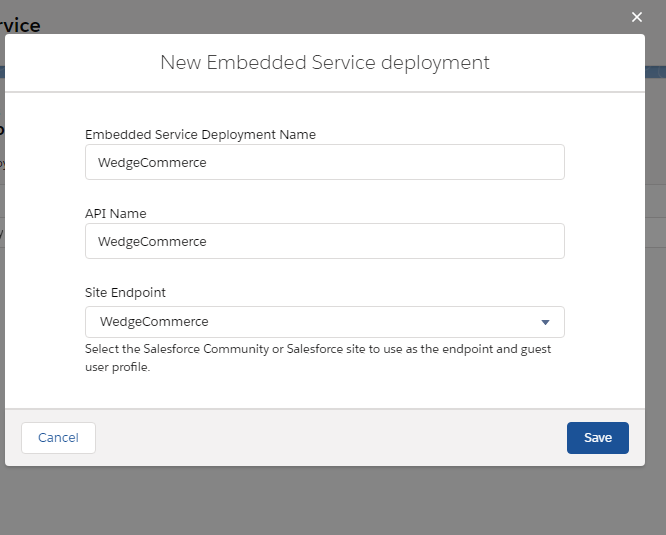
3. Click on New Deployment

4. Fill in all the Details and choose your WedgeCommerce Community Site.

5. After Setting up Chat Embed Code, you need to copy Embedded Service Code Snippets
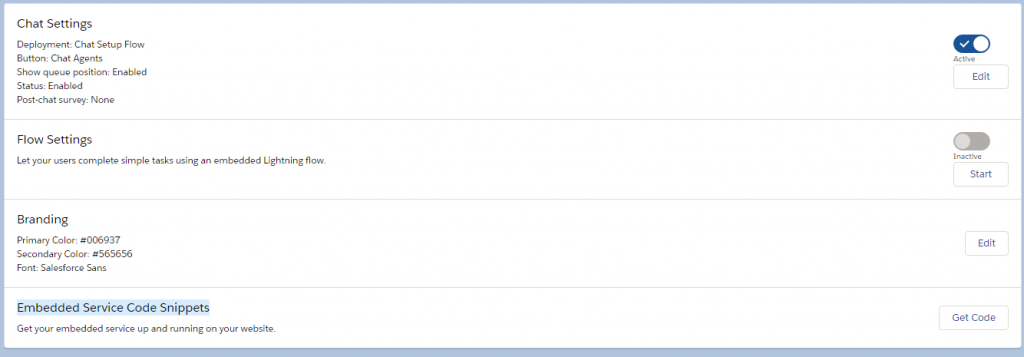

Click on Get Code button and then click on copy to clipboard.
Now you need to make minor code modification in order to work Live Agent in WedgeCommerce Customer End.
Kindly Follow Below Step to create and update code.
1. Create a Snippet Settings File Using JavaScript
2. Upload Your File to Static Resources
3. Reference Your File in Your Embedded Chat Component Settings
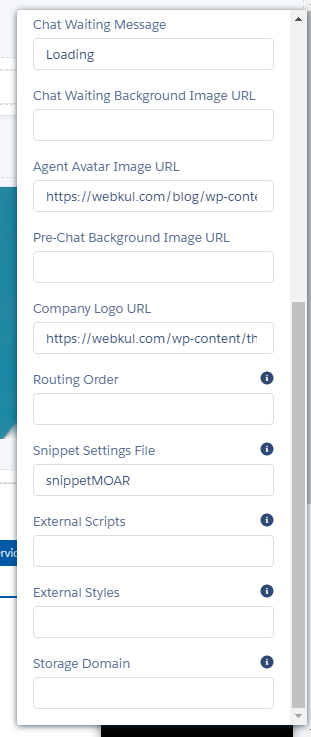
Steps to create Snippet File. Ref: Create a Snippet Settings File to Use Snippet Settings in a Community
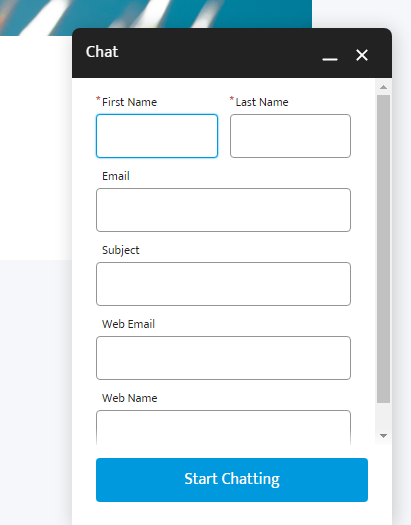
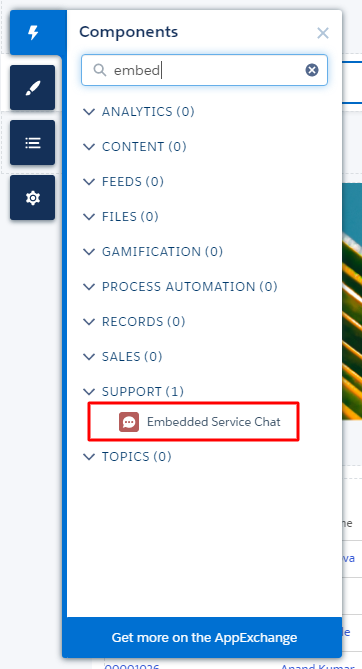
6. Now go to community Experience builder, and add component Embedded Service Chat to your community.

7. Now enter Snippet setting file name in component settings

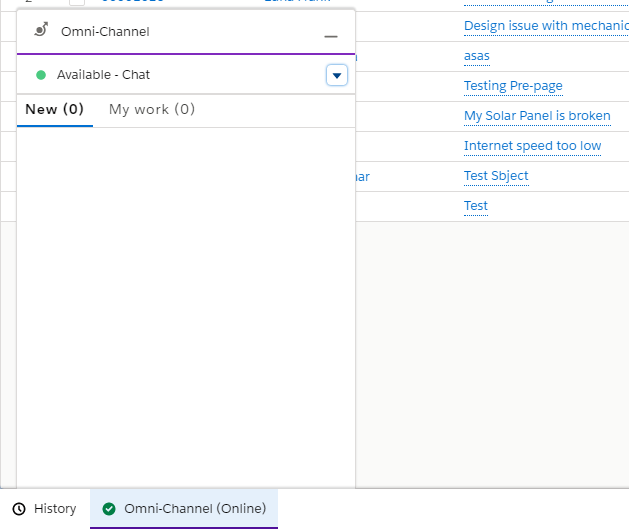
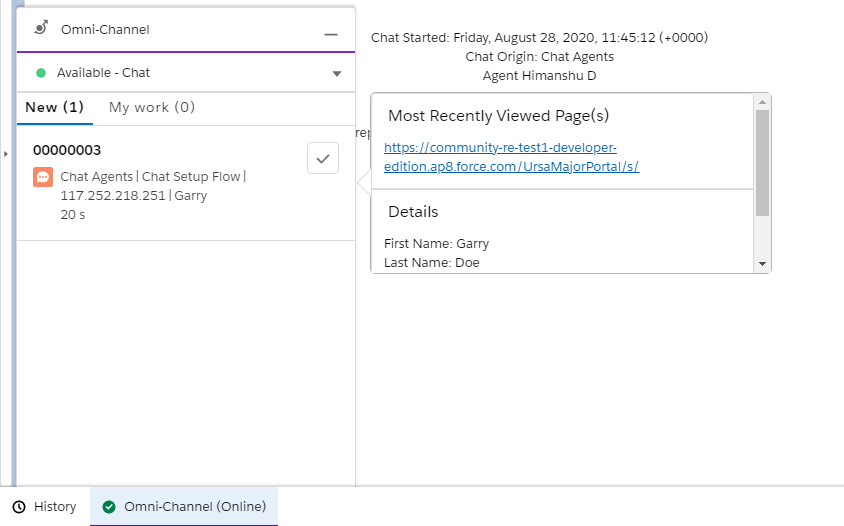
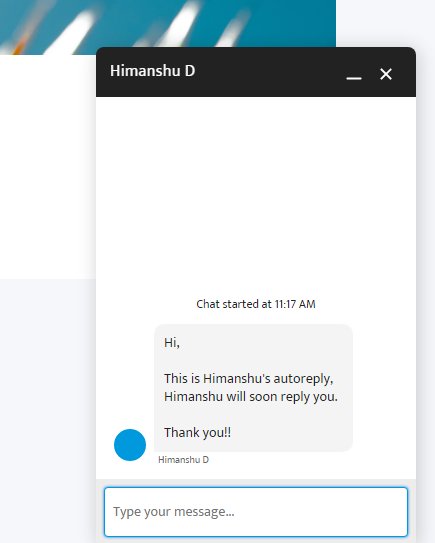
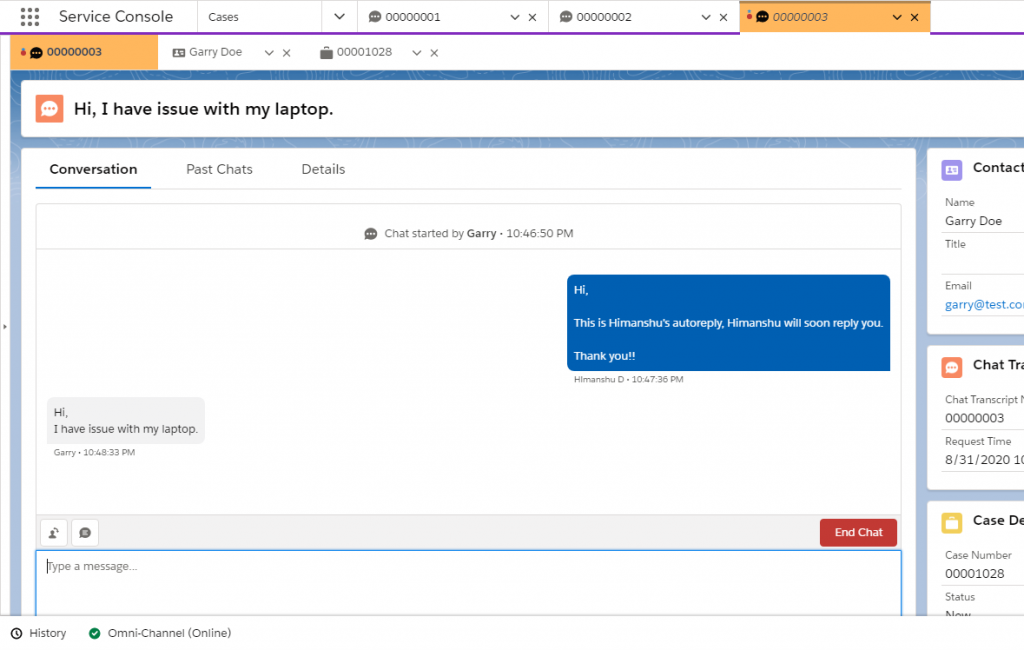
8. Go to Omni-channel console application, Change status to Online.