


Salesforce Wedgecommerce is a platform which allows Salesforce users to centralize e-Commerce and CRM with backend/frontend functionalities. Let’s proceed to install and setup admin panel of WedgeCommerce-In-Built e-Commerce platform on Salesforce.
Wedgecommerce Installation Link: Install Now
VIDEO TUTORIAL – HOW TO INSTALL

CONFIGURATION
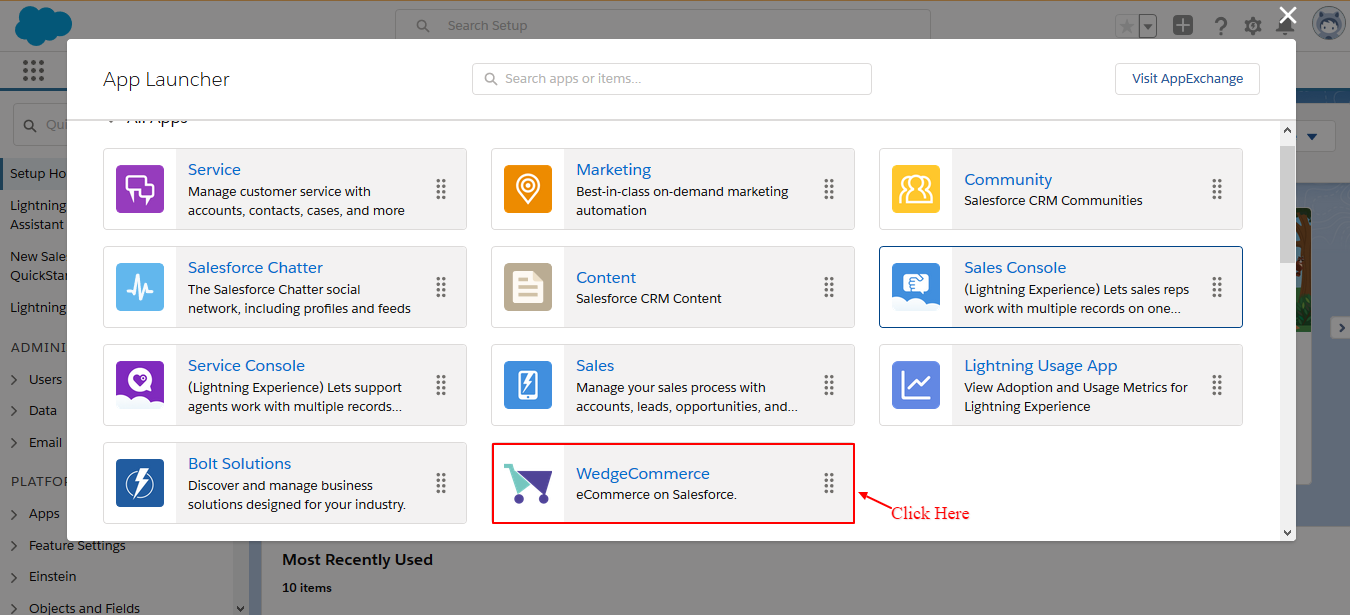
- From the App menu, select WedgeCommerce from the drop-down.

You will now be redirected to the Store Admin panel page as shown below:
Fill all the general information regarding the User
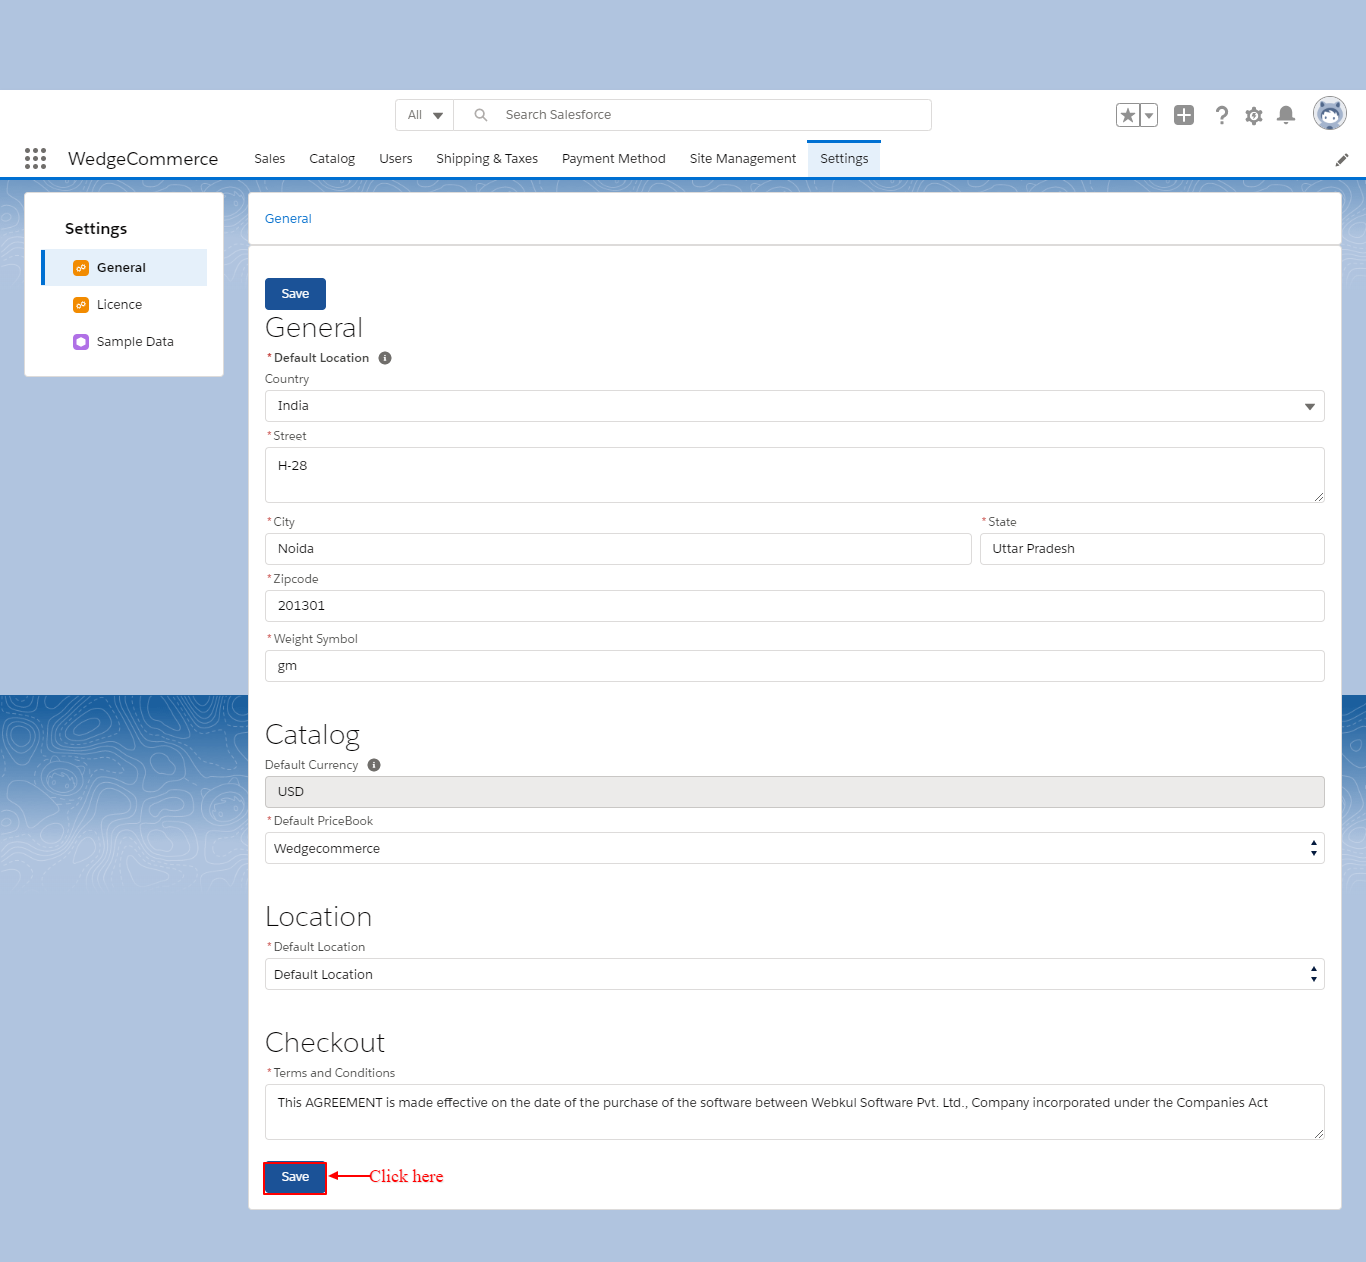

1. Click on Settings
2. Fill the General Information
3. Fill the Default City Information
Catalog
4. Currency: Select default currency for a store
5. Price Book: Select Price book based on which price of all the products will get listed.
6. Select FrontEnd Default Location: Select the location that you would like to appear at the front end.
7. Terms & Conditions: Choose the article from the drop-down consisting of terms and conditions.
8. Once you fill all the details properly, click on Save.
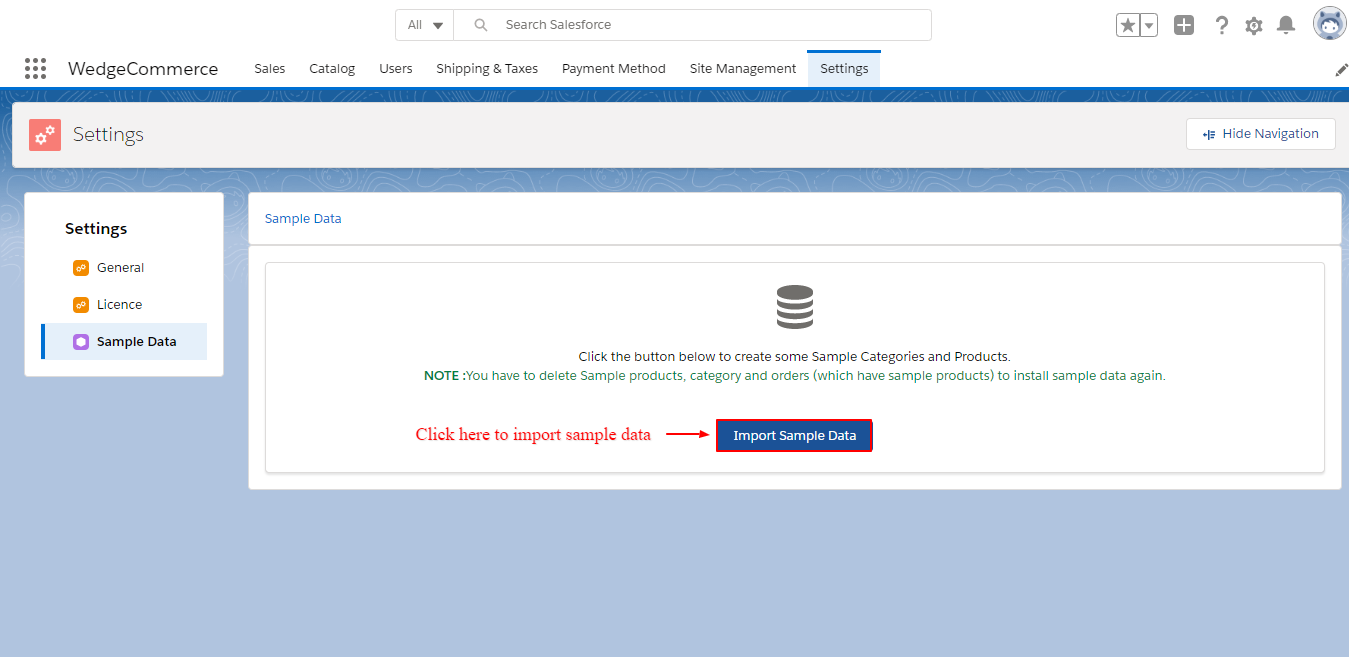
Under the Settings, Import the Sample data for the Store

SITE MANAGEMENT
How to Setup Payment Processors
It has payment processing methods like Paypal which includes COD etc. Go through the steps with screenshots mentioned below to understand configuration steps for the same.
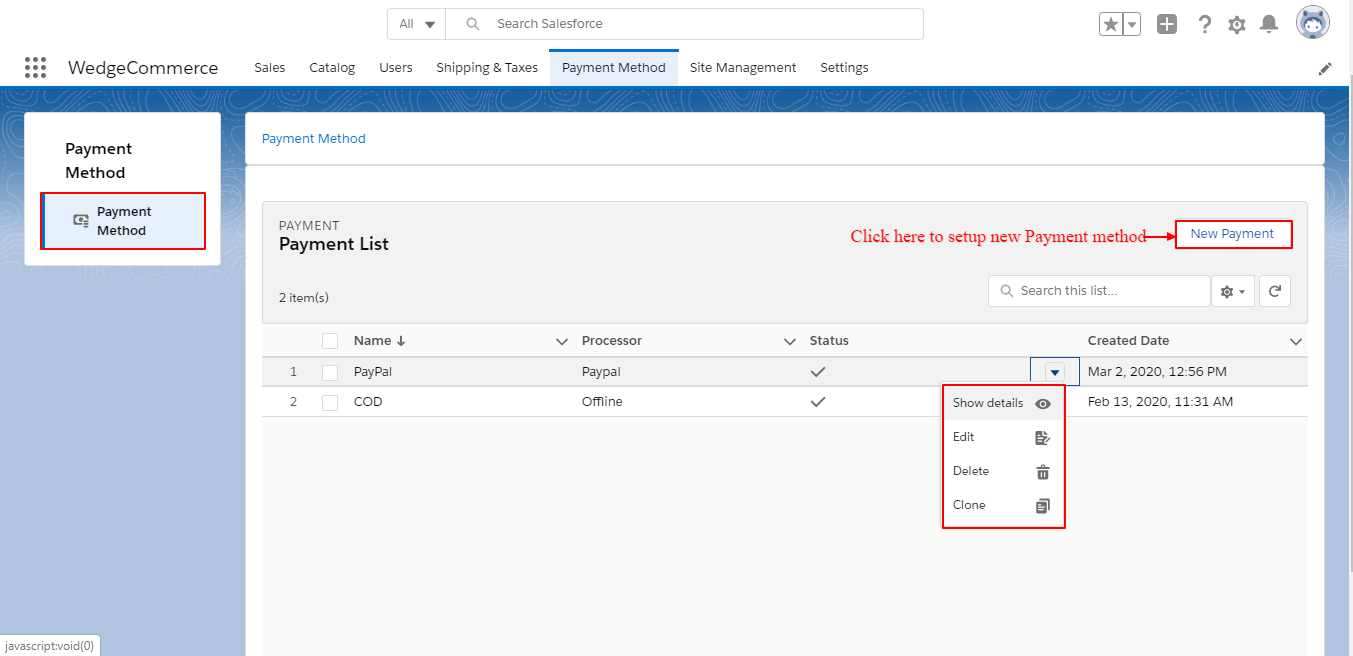

- Paypal payment method

- Select the Payment method from the drop-down.
- Enter the Payment Method Name.
- Put a checkmark on the checkbox ‘Status’.
- Enter Paypal account details with Mode as Live/Test as per your need.
- Click Save.
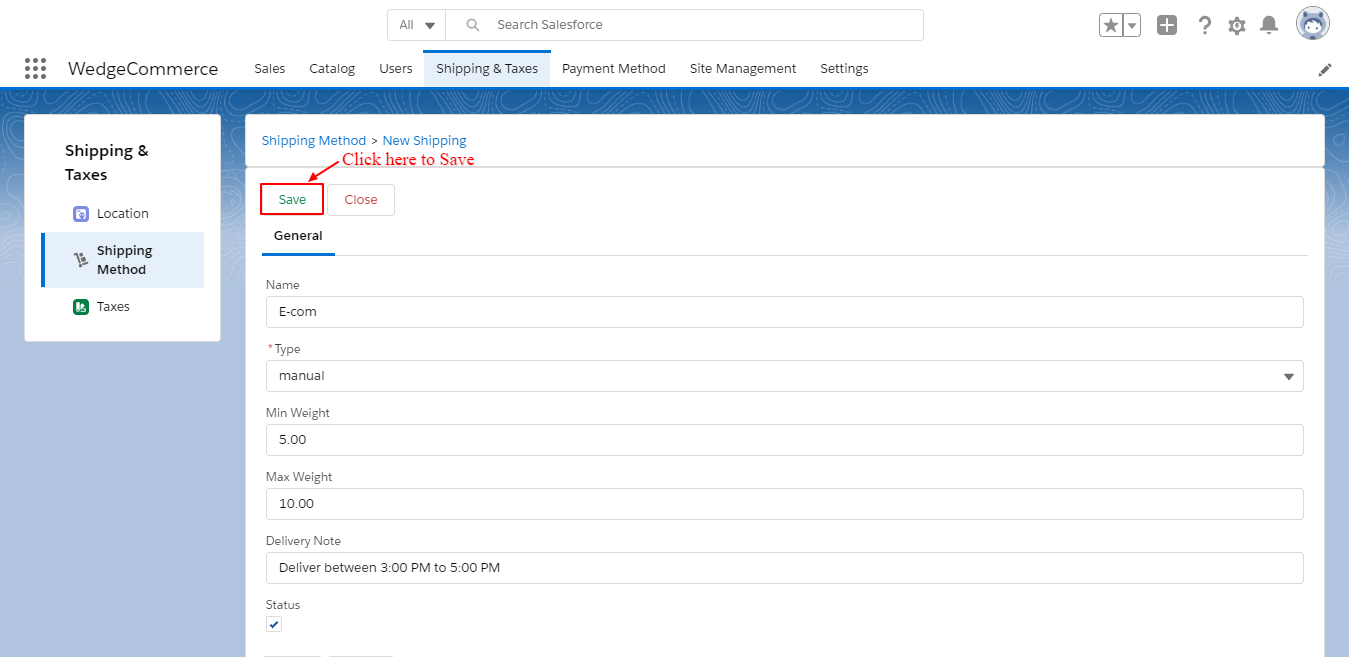
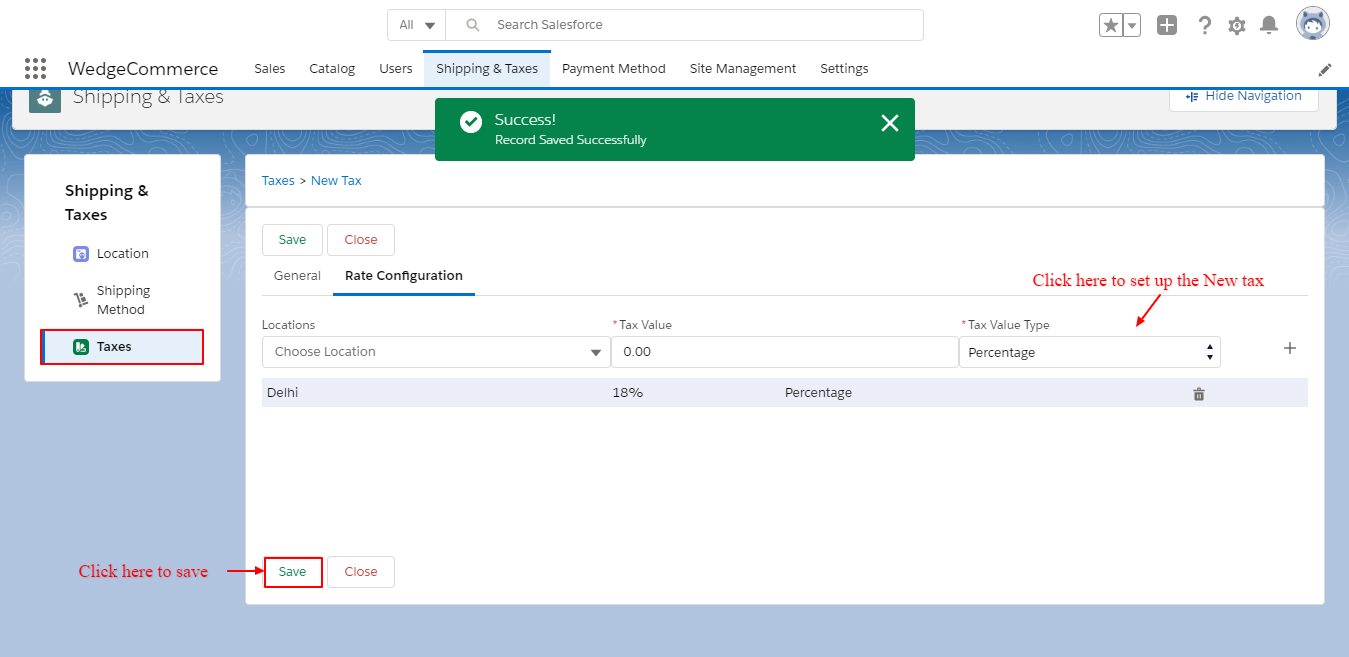
SHIPPING & TAXES
Add USERS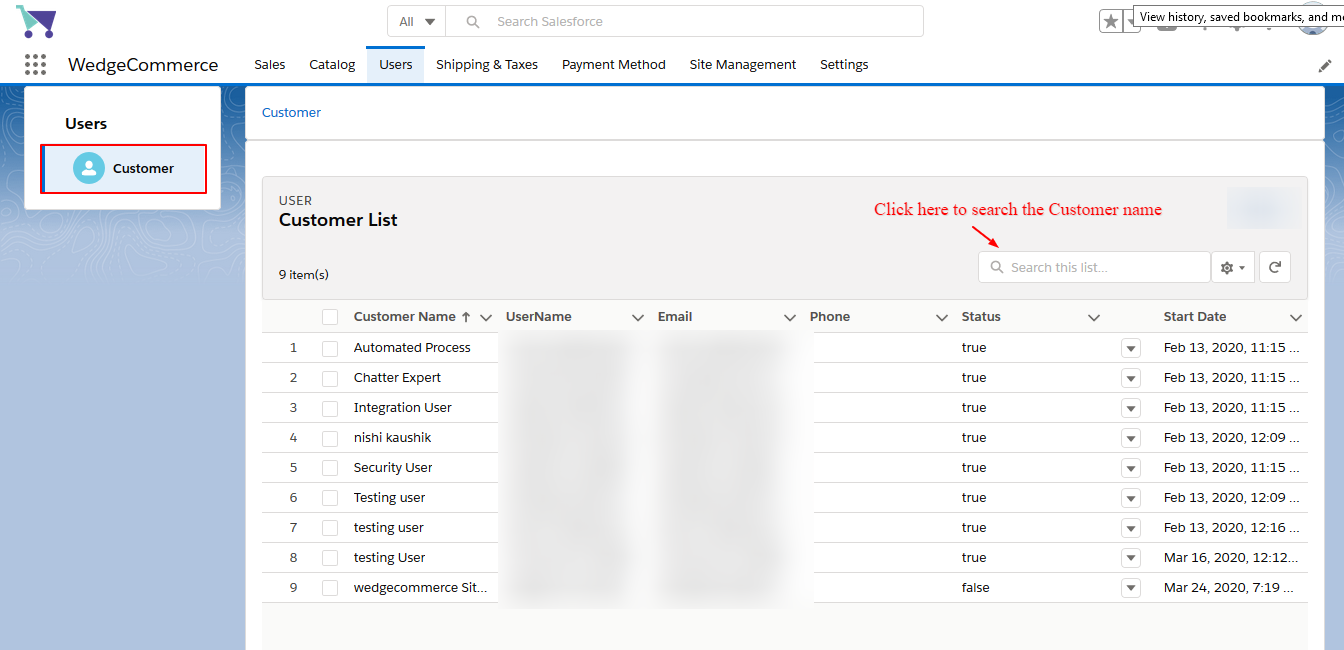

CATALOG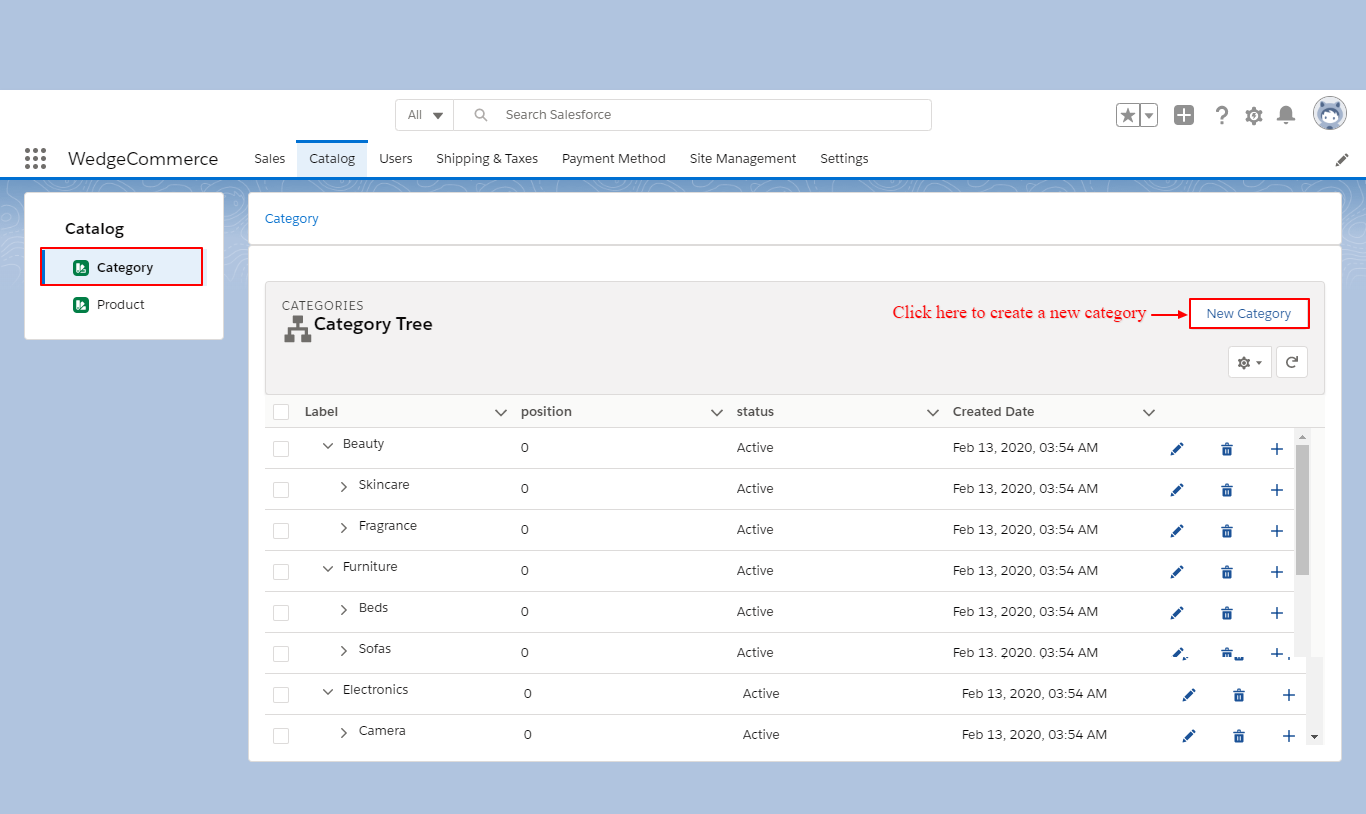

SALES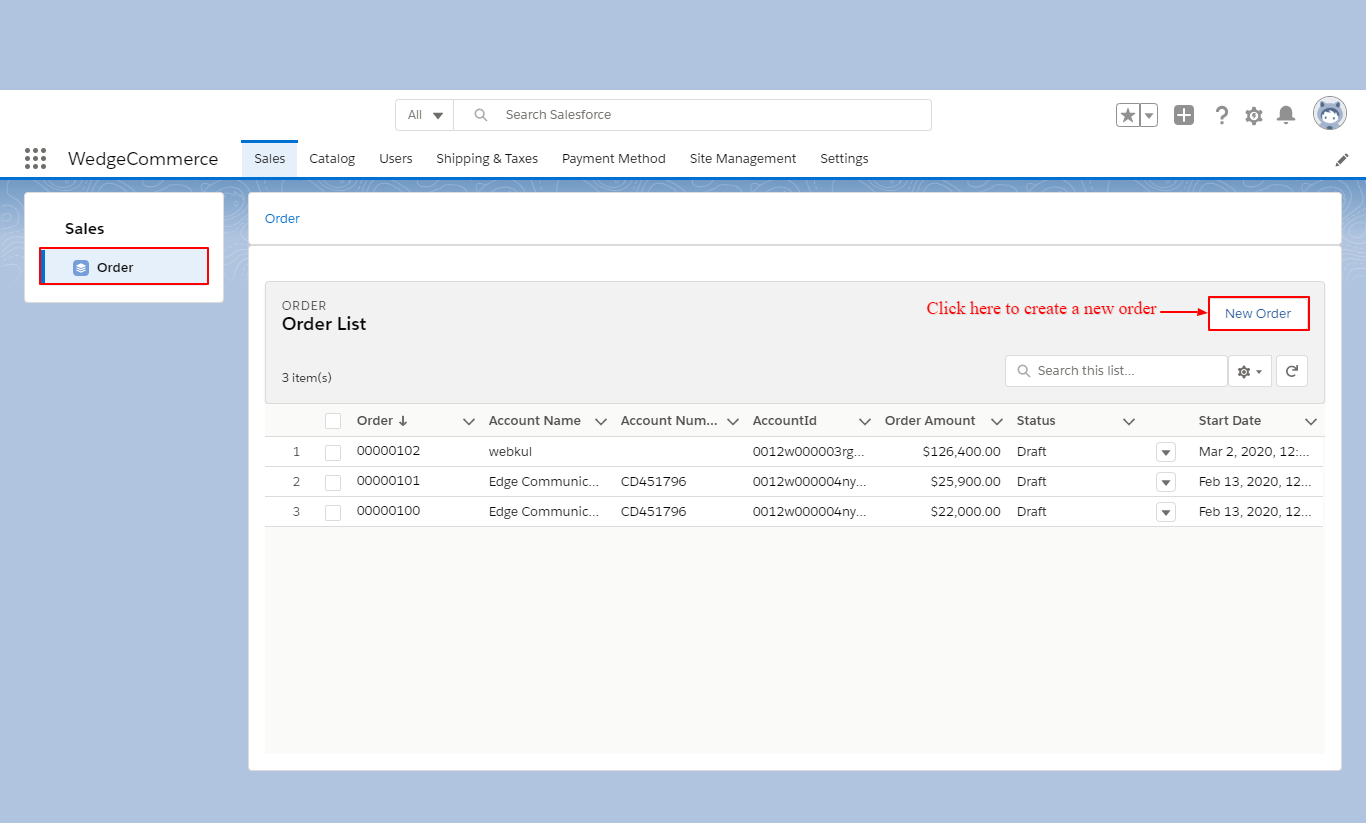

SUPPORT
- To view the applications in Appexchange, go to Webkul Appexchange Applications .
- For further any query: Create Ticket Now