


Wedgecommerce templates configuration lets you manage front end of the store. From the back end, it provides you an option to choose multiple designs based on different panels available in template.
CONFIGURATION
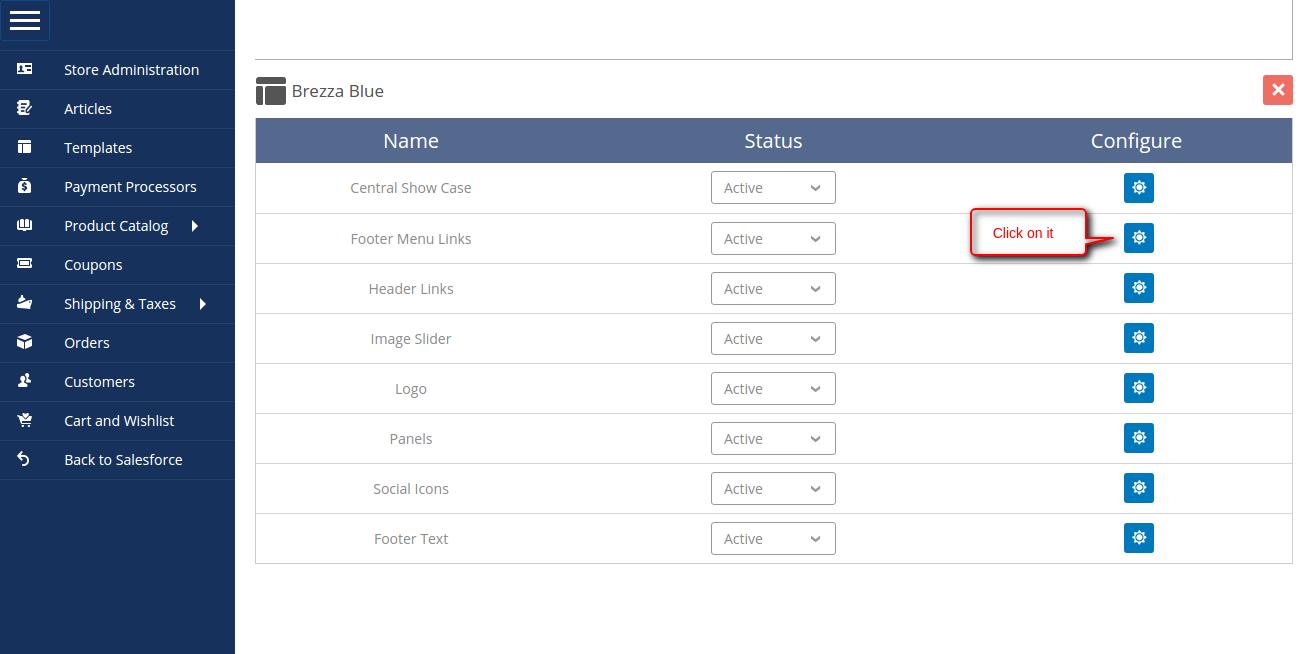
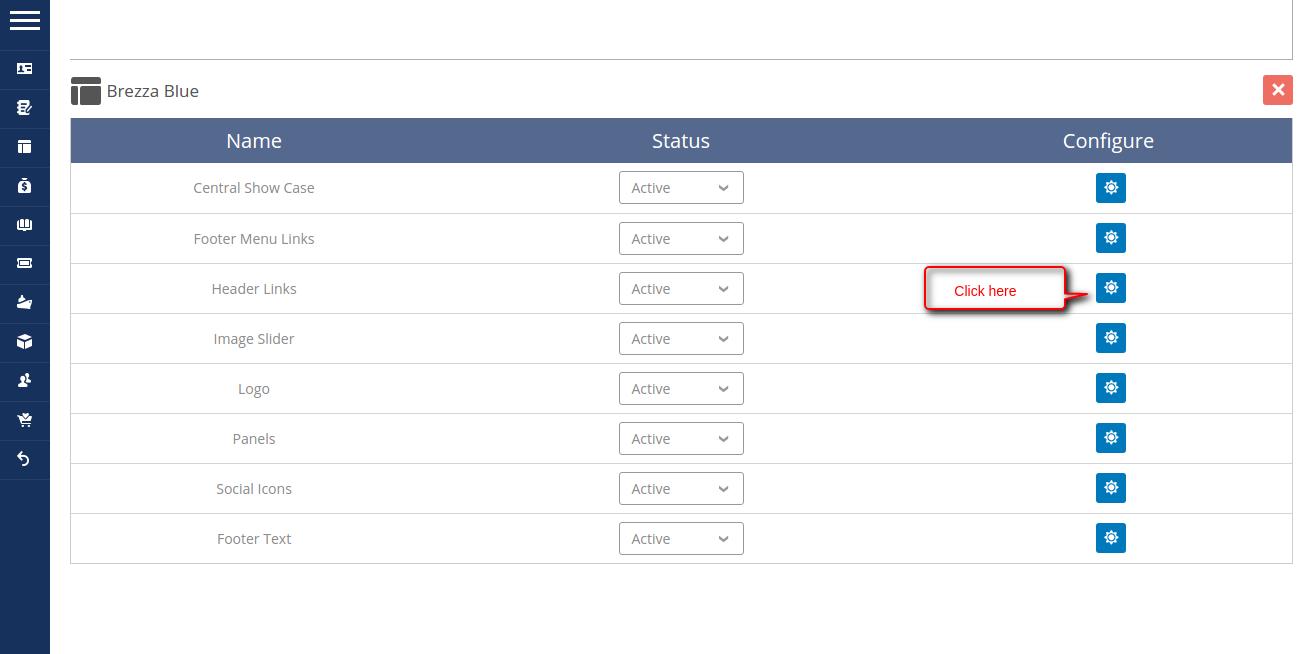
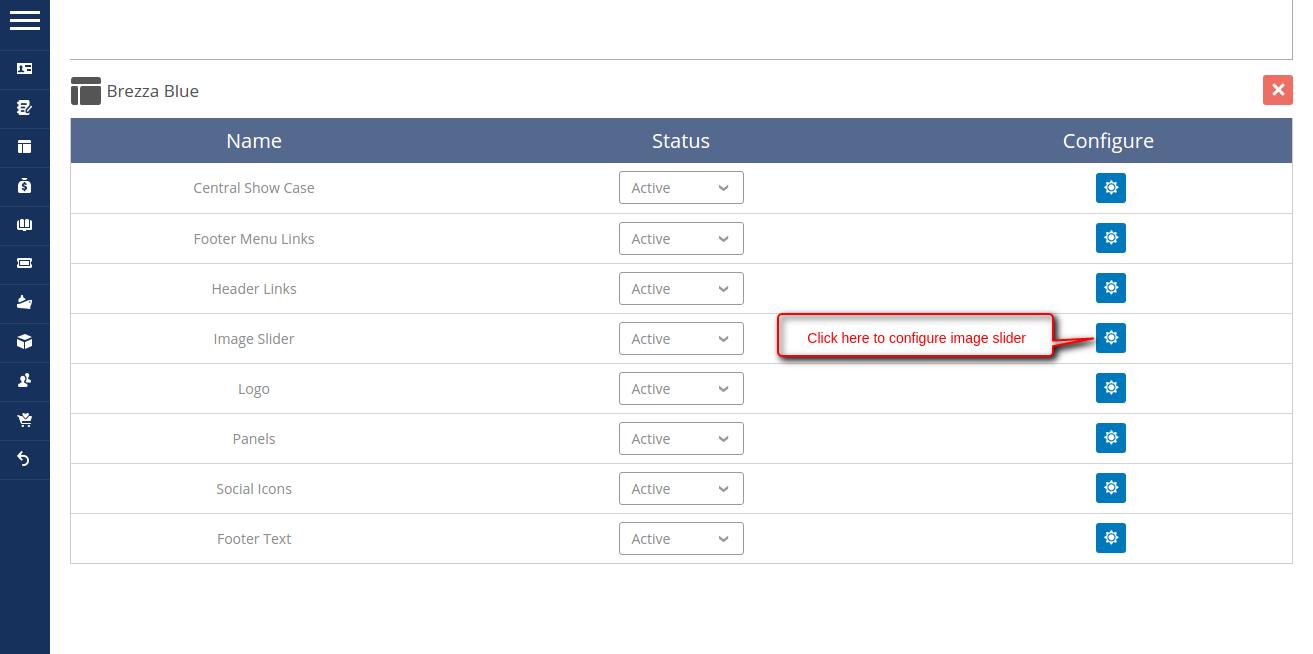
- Go to Templates section, click on gear icon to configure template.
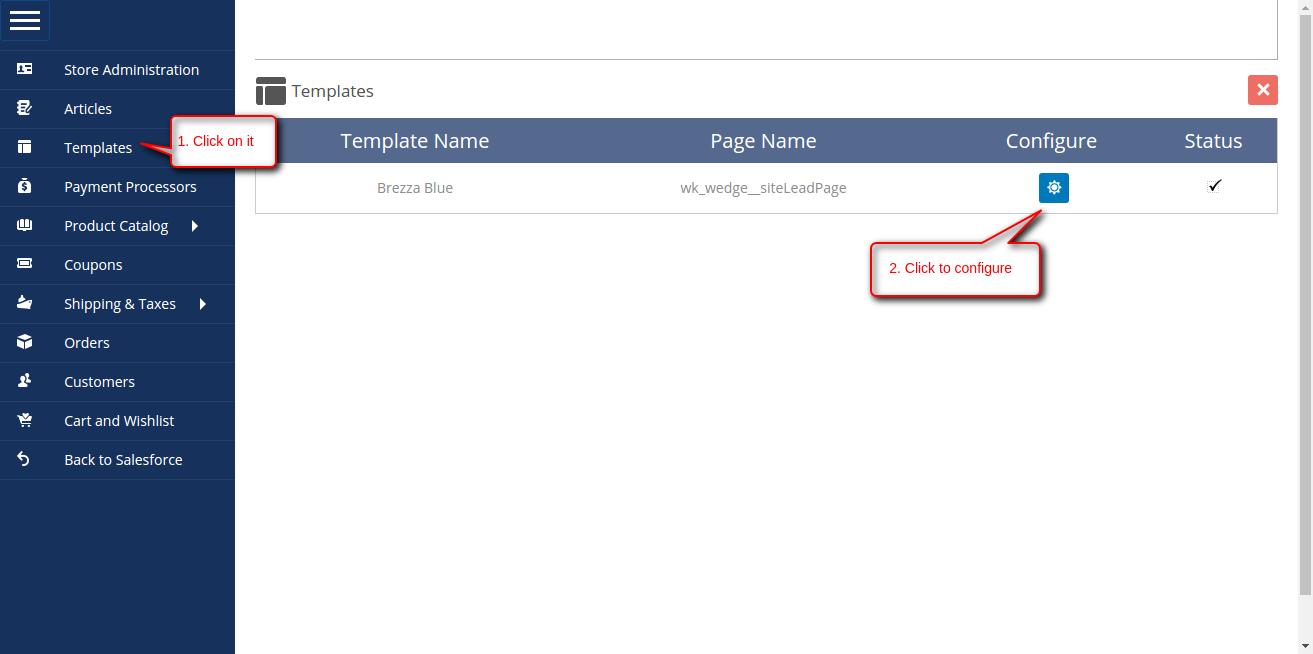

- List of template components.
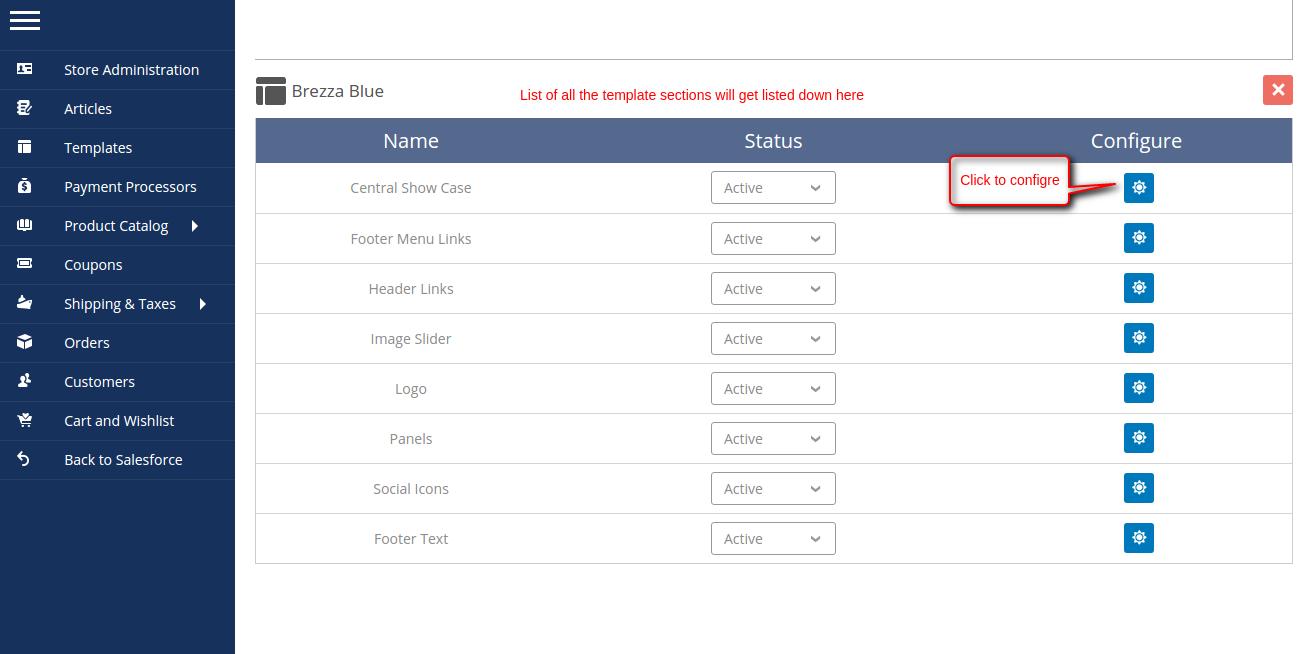
- Central Show Case : It has multiple section such as Top Left, Top Right, Middle left, Middle right, Middle Center, Bottom Left and Bottom right. Click on ‘ + ‘ icon to setup as shown below.


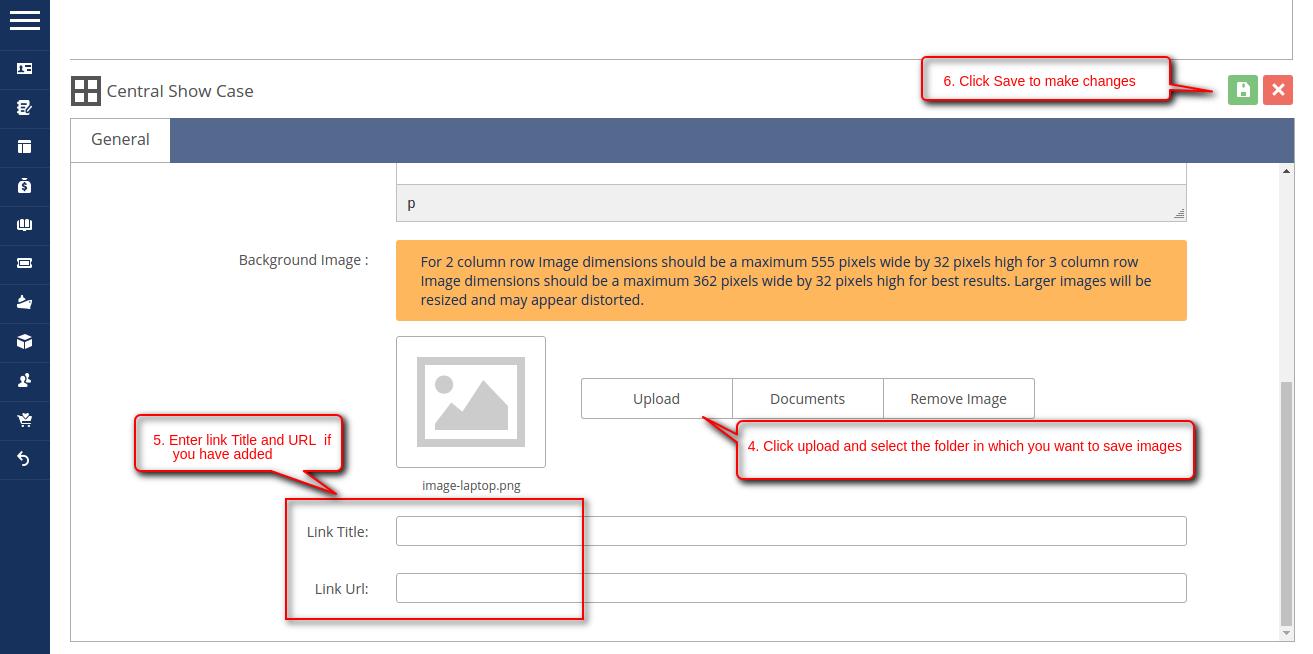
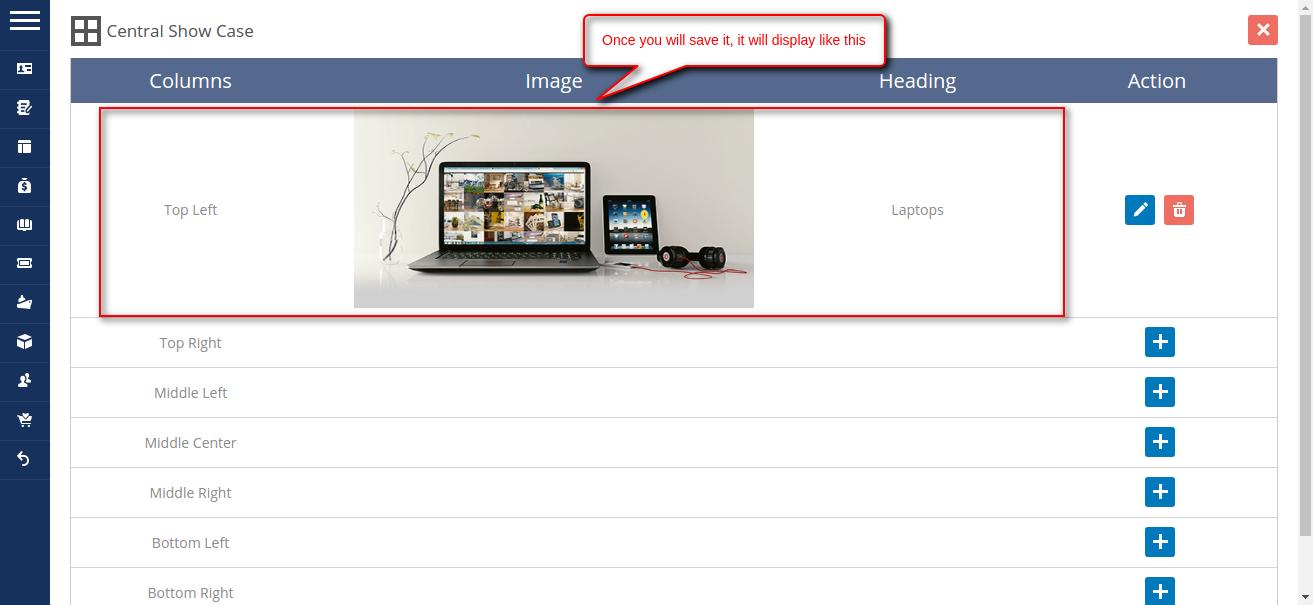

Follow same steps for rest Central Show case columns.
- Footer Menu Links : With the help of this option, you can create Links, Button, Text Block, Contact Us and Article to be used in Footer section. Go through the screen shots below to setup.
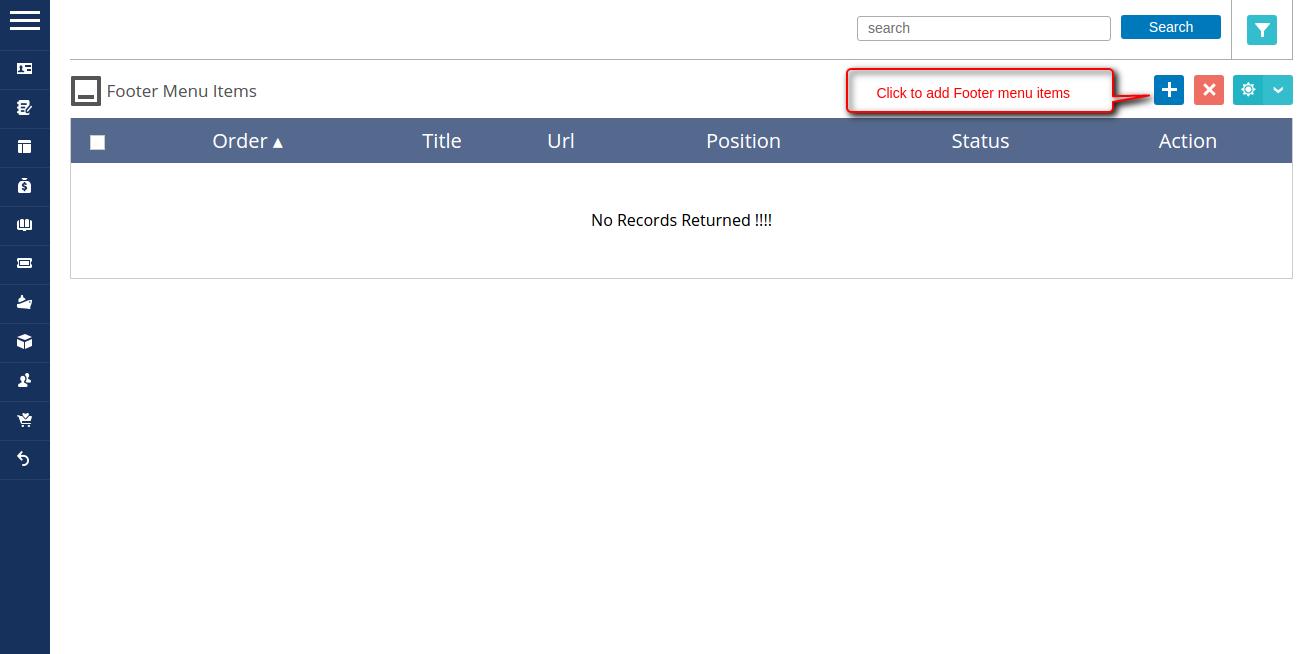
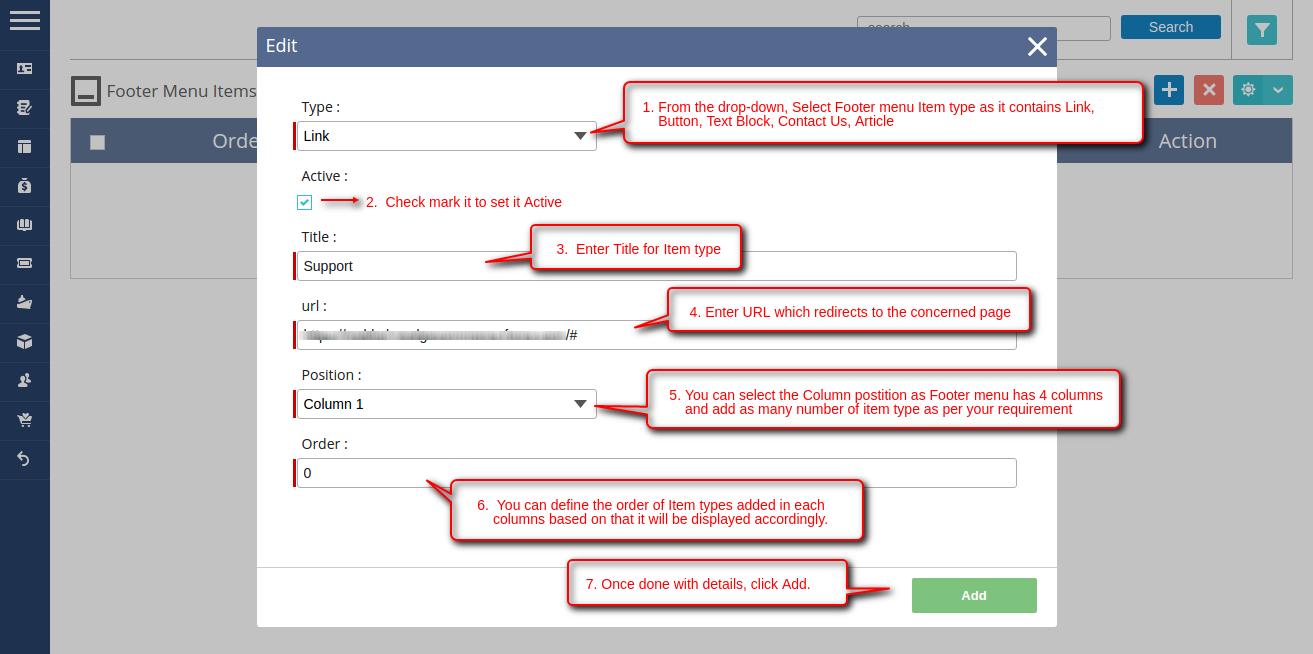
Proceed in the same way to add more Footer Menu Items as per your requirements.
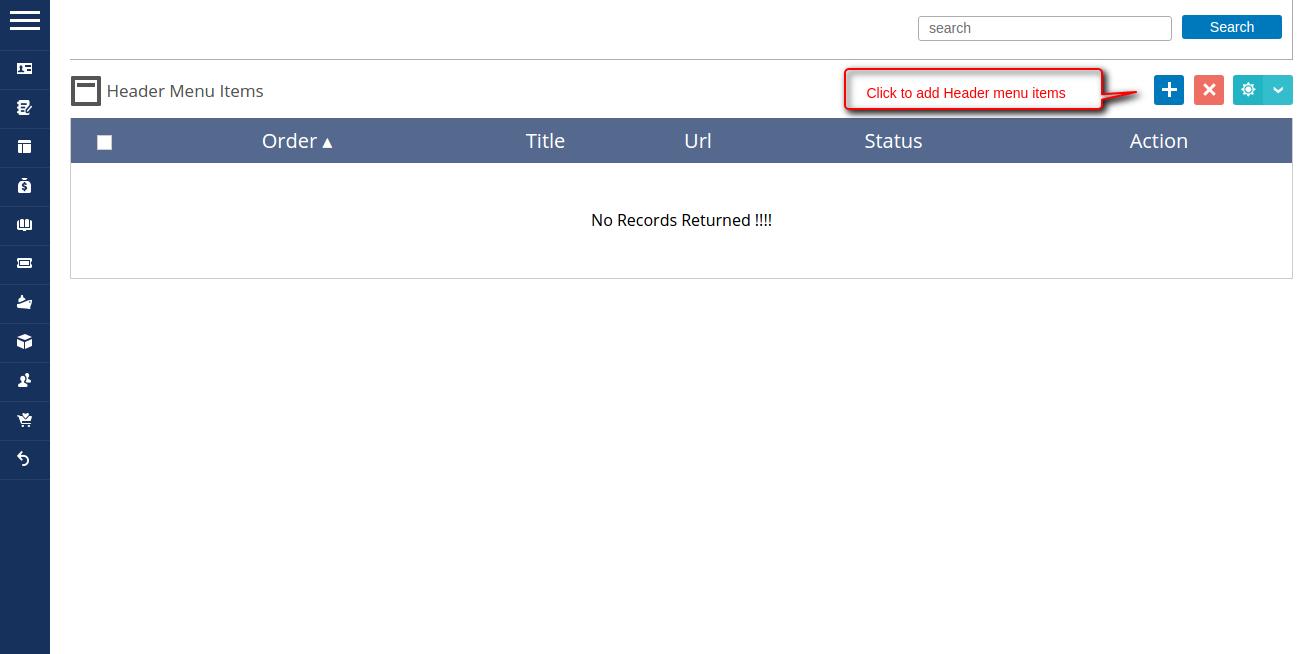
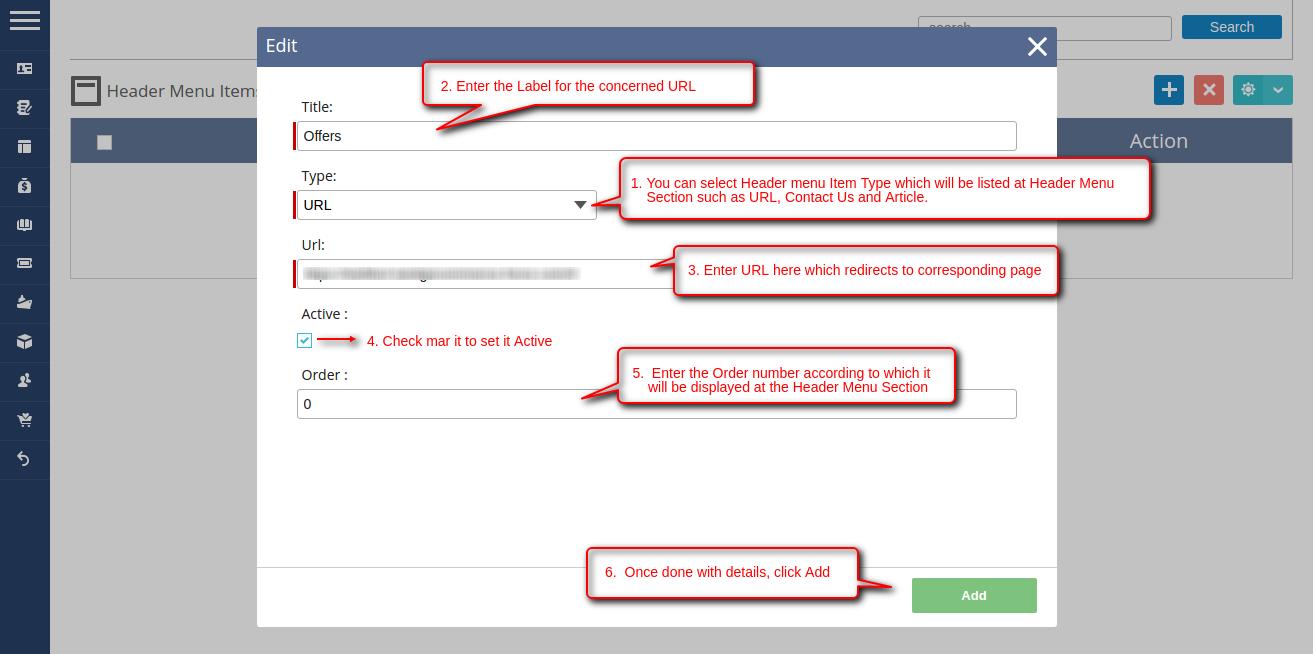
- Header Links : It has options to create URL, Contact Us and Article. You can customize the available positions as shown in the screen shot.
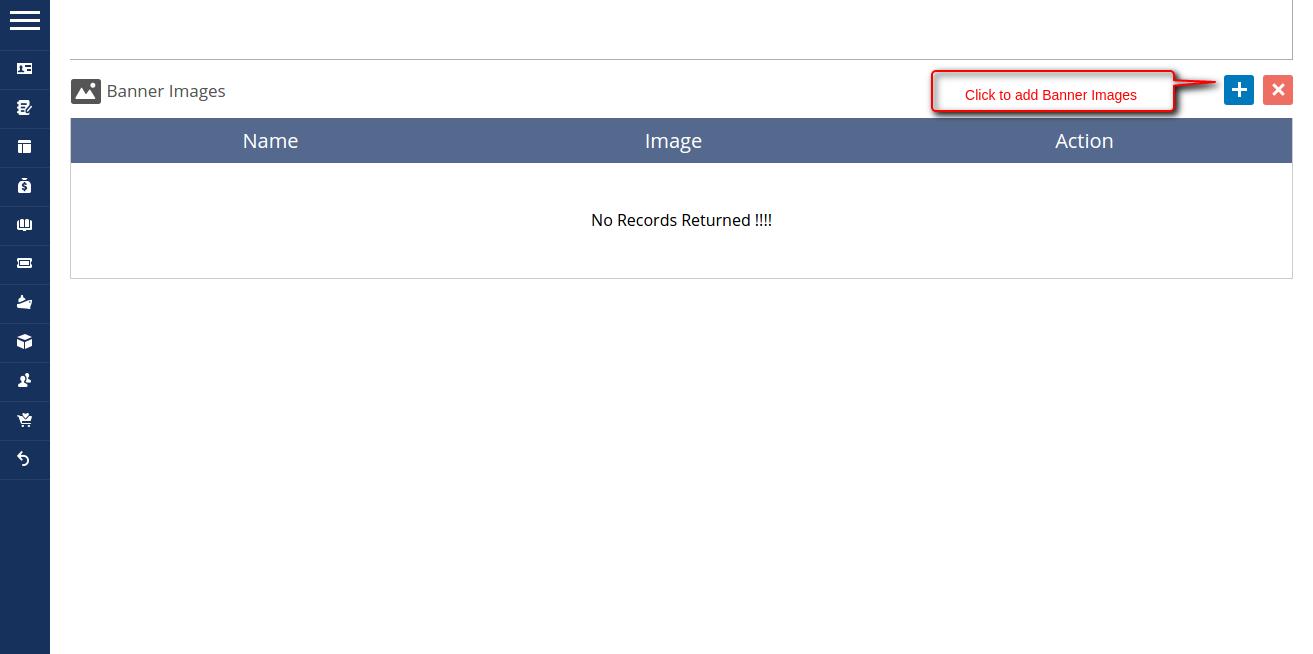
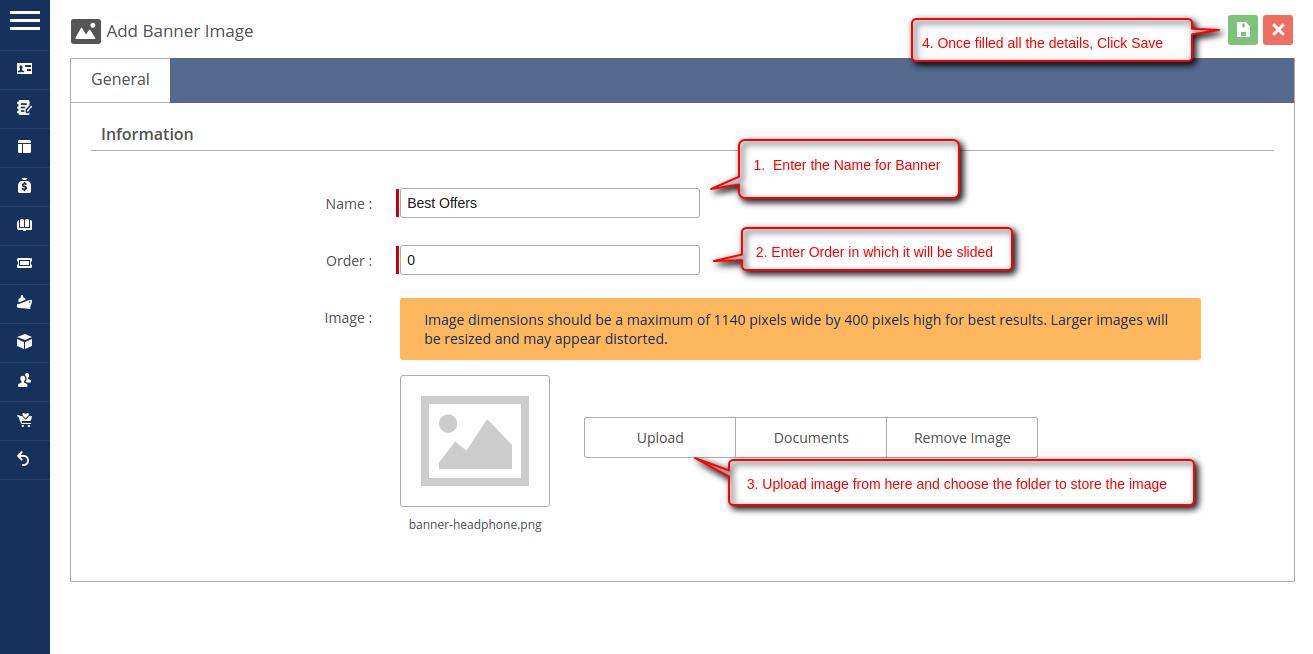
- Image Slider : You can set banner images as per your requirement that displays trending products and also you can set order so that it slides at an specific time interval.

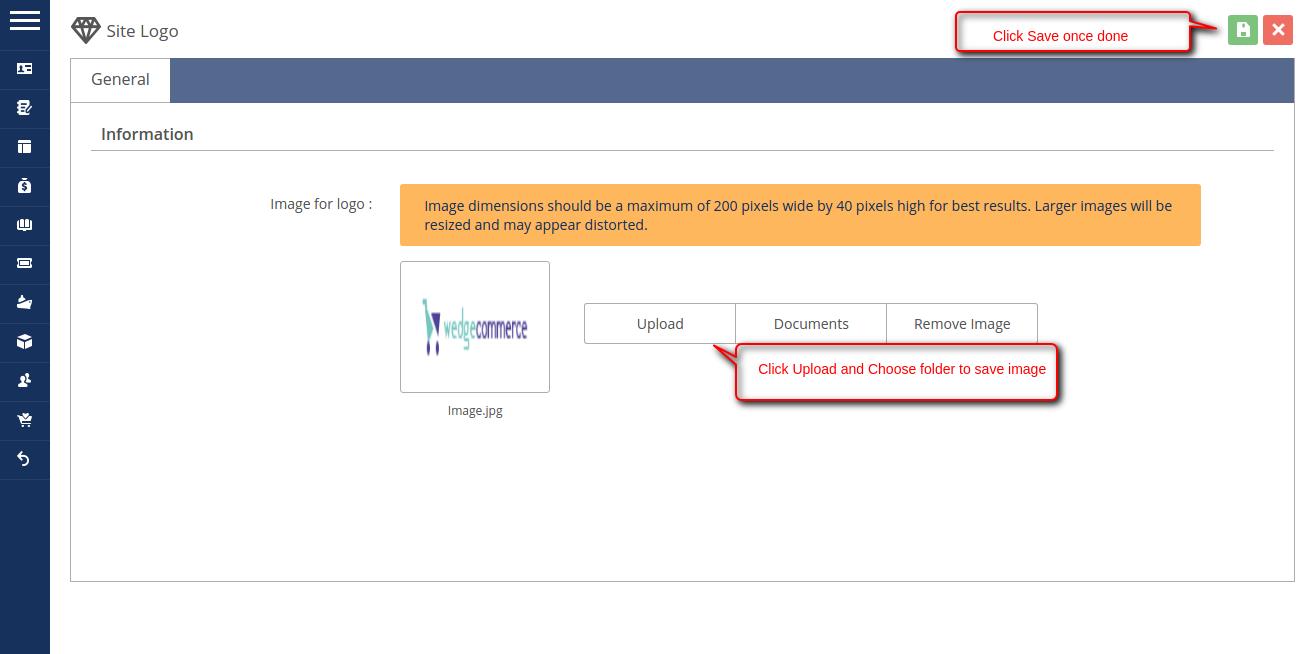
- Logos : You can website logo that will be displayed at the top left as shown below.
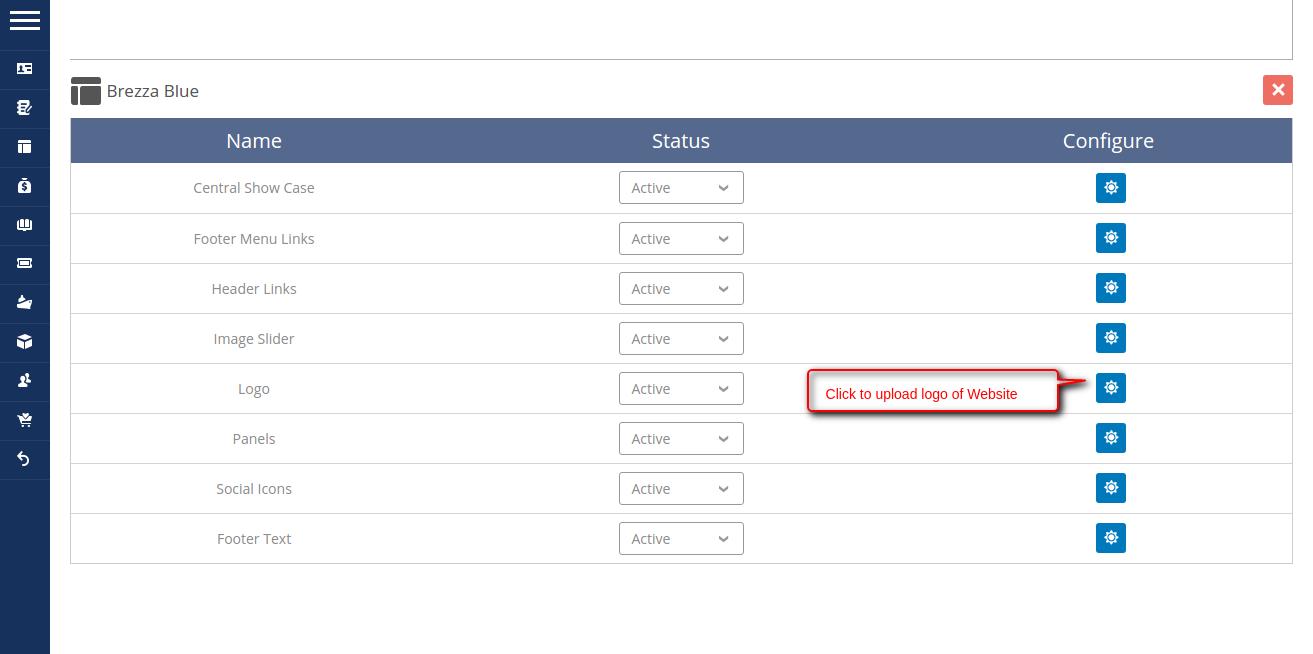
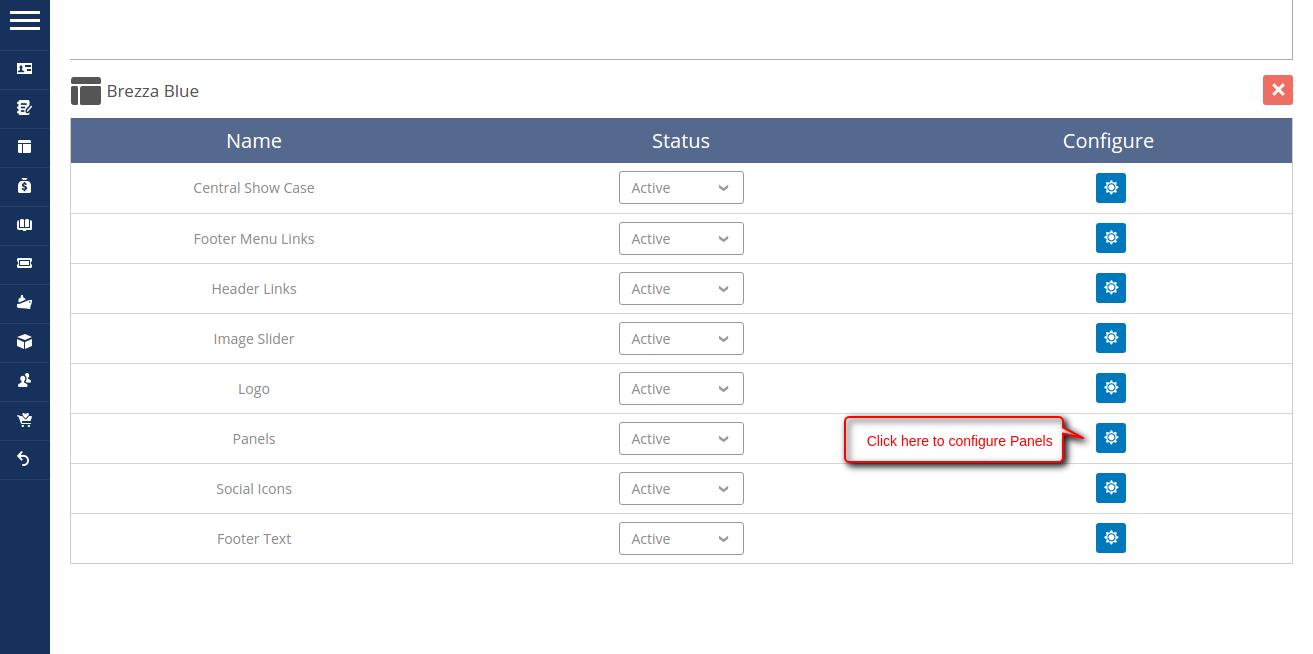
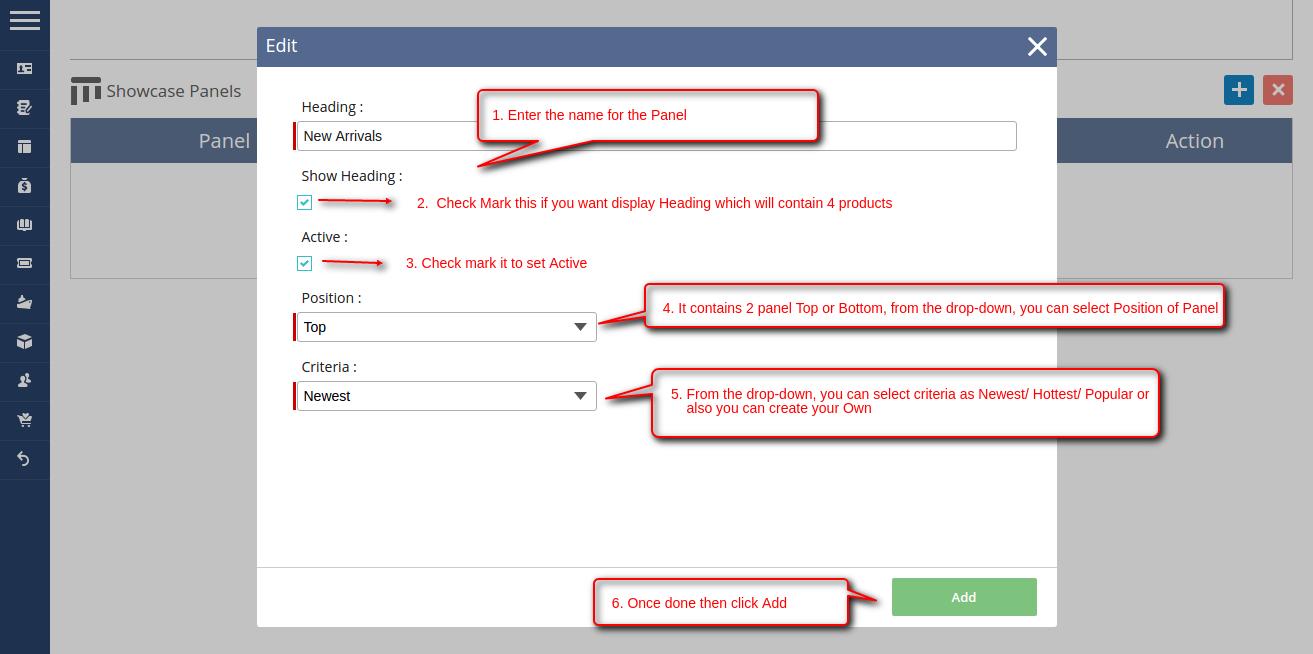
- Panels : It has two possible position as Top and Bottom Panel. You can add heading and choose position as top or bottom panel then set criteria to fetch products such as Newest/ Hottest/ Popular or also you can create one as per your requirement.

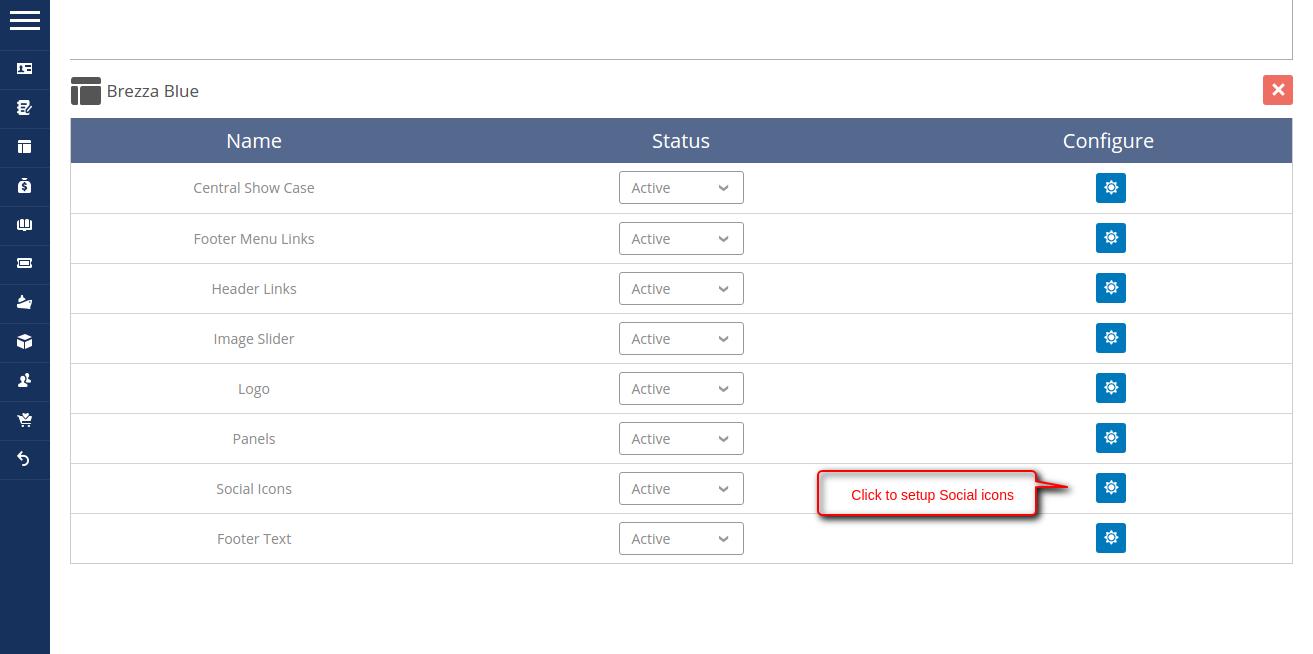
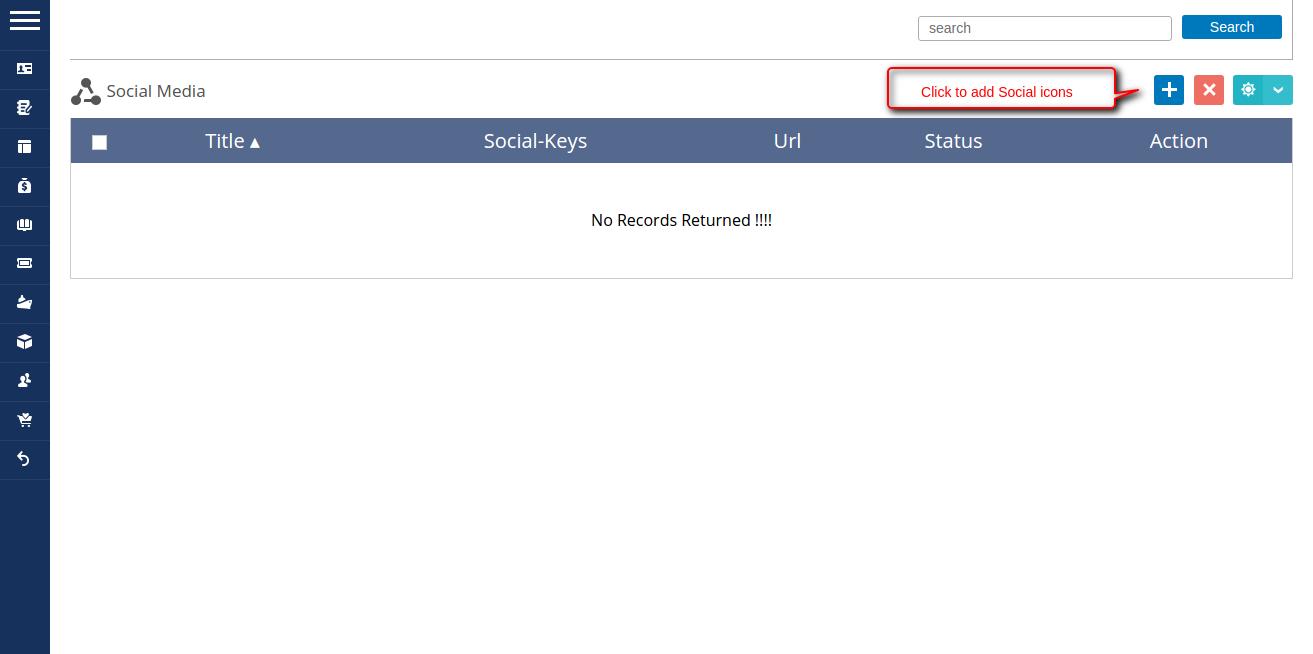
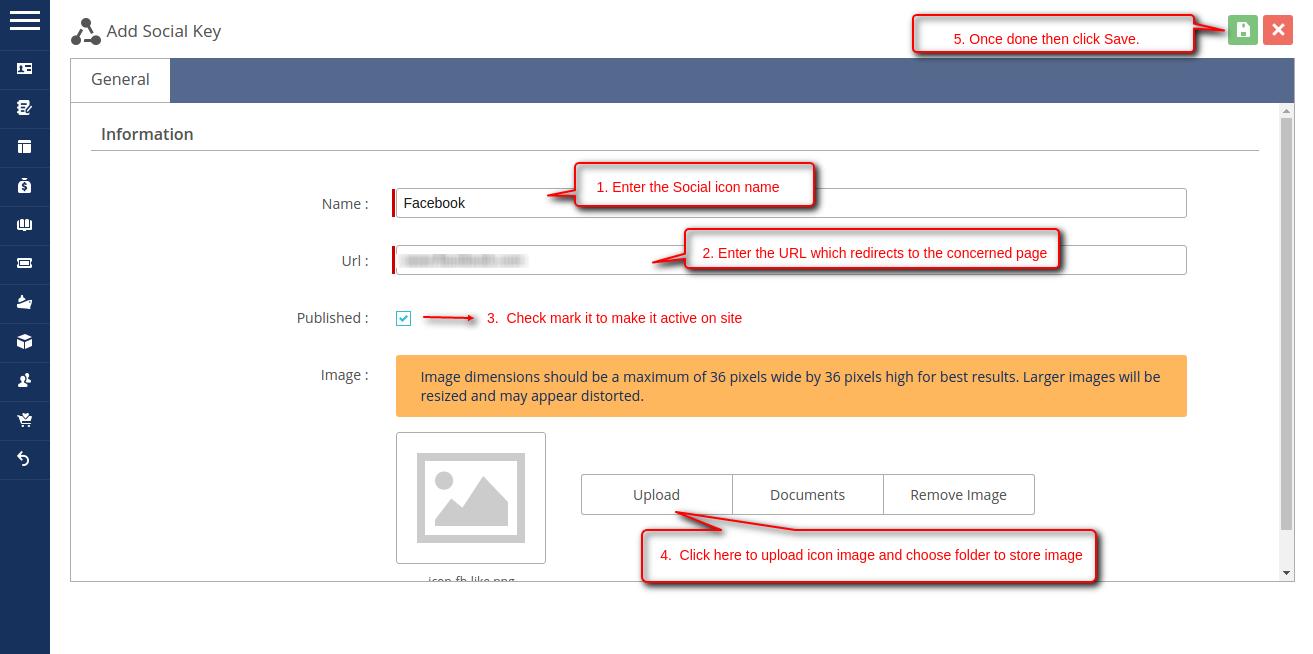
- Social Icons : You can add social icons like Facebook, Twitter, etc in the footer section linked to your site as shown below.
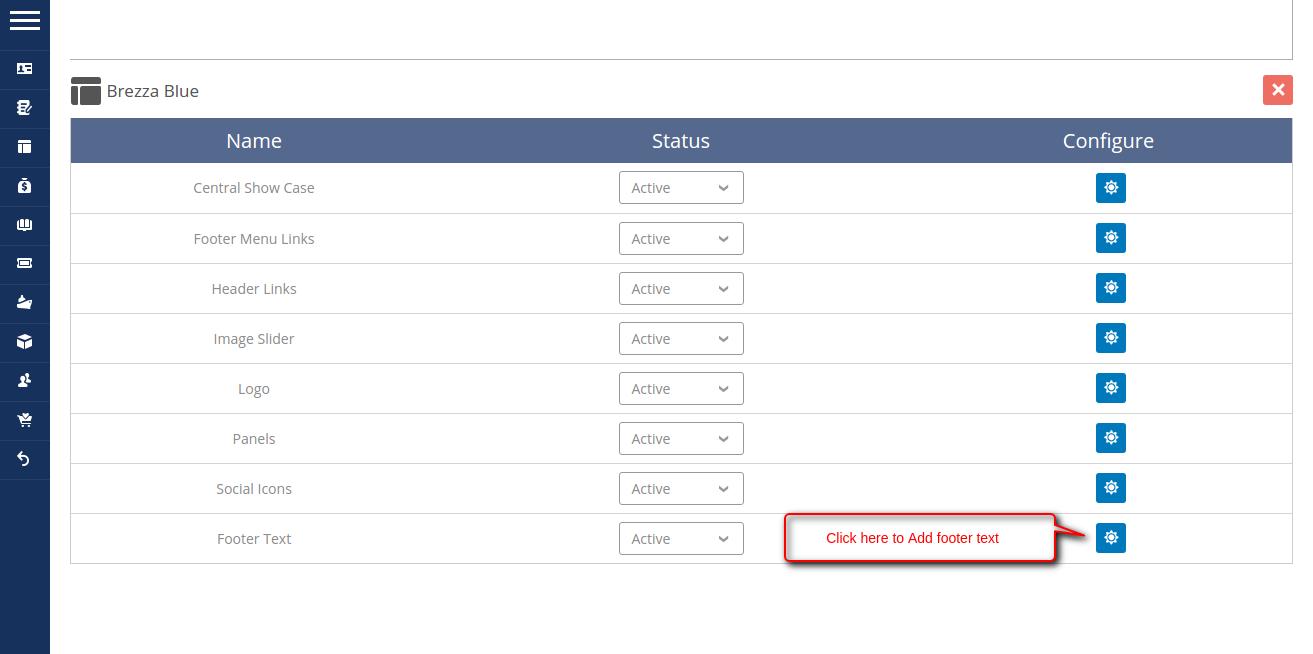
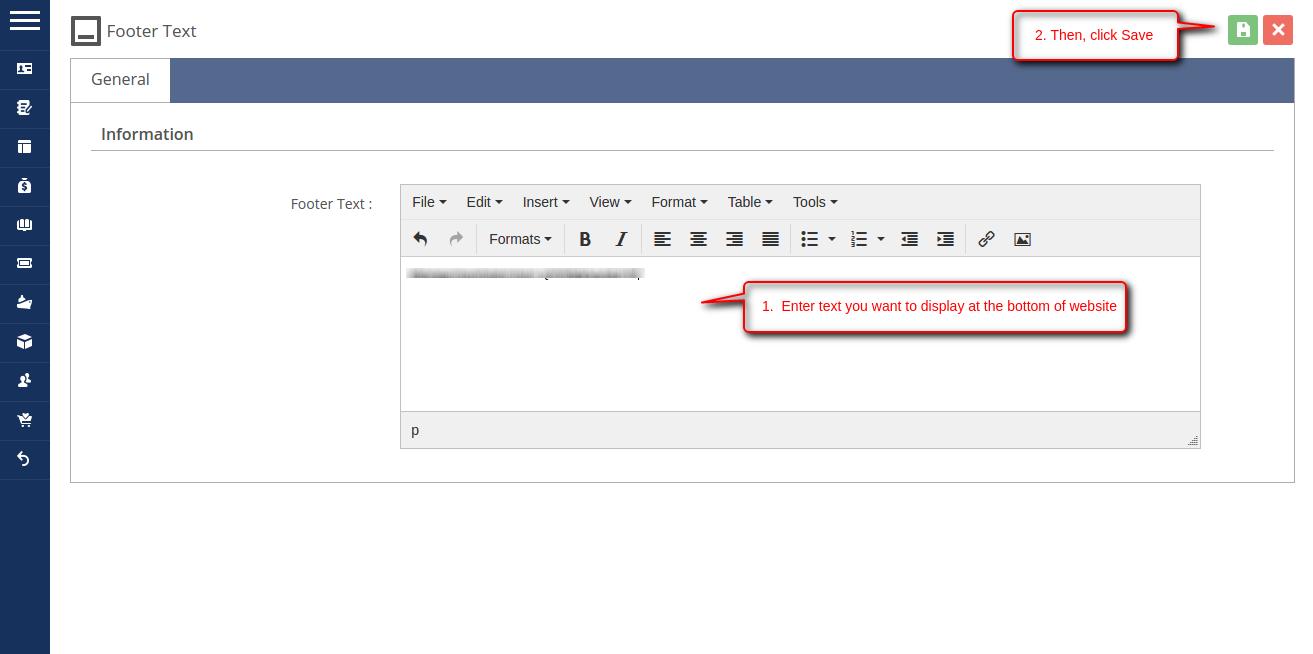
- Footer Text : In this section, you can add any statement based on your requirement that will be displayed at the bottom most of the website.
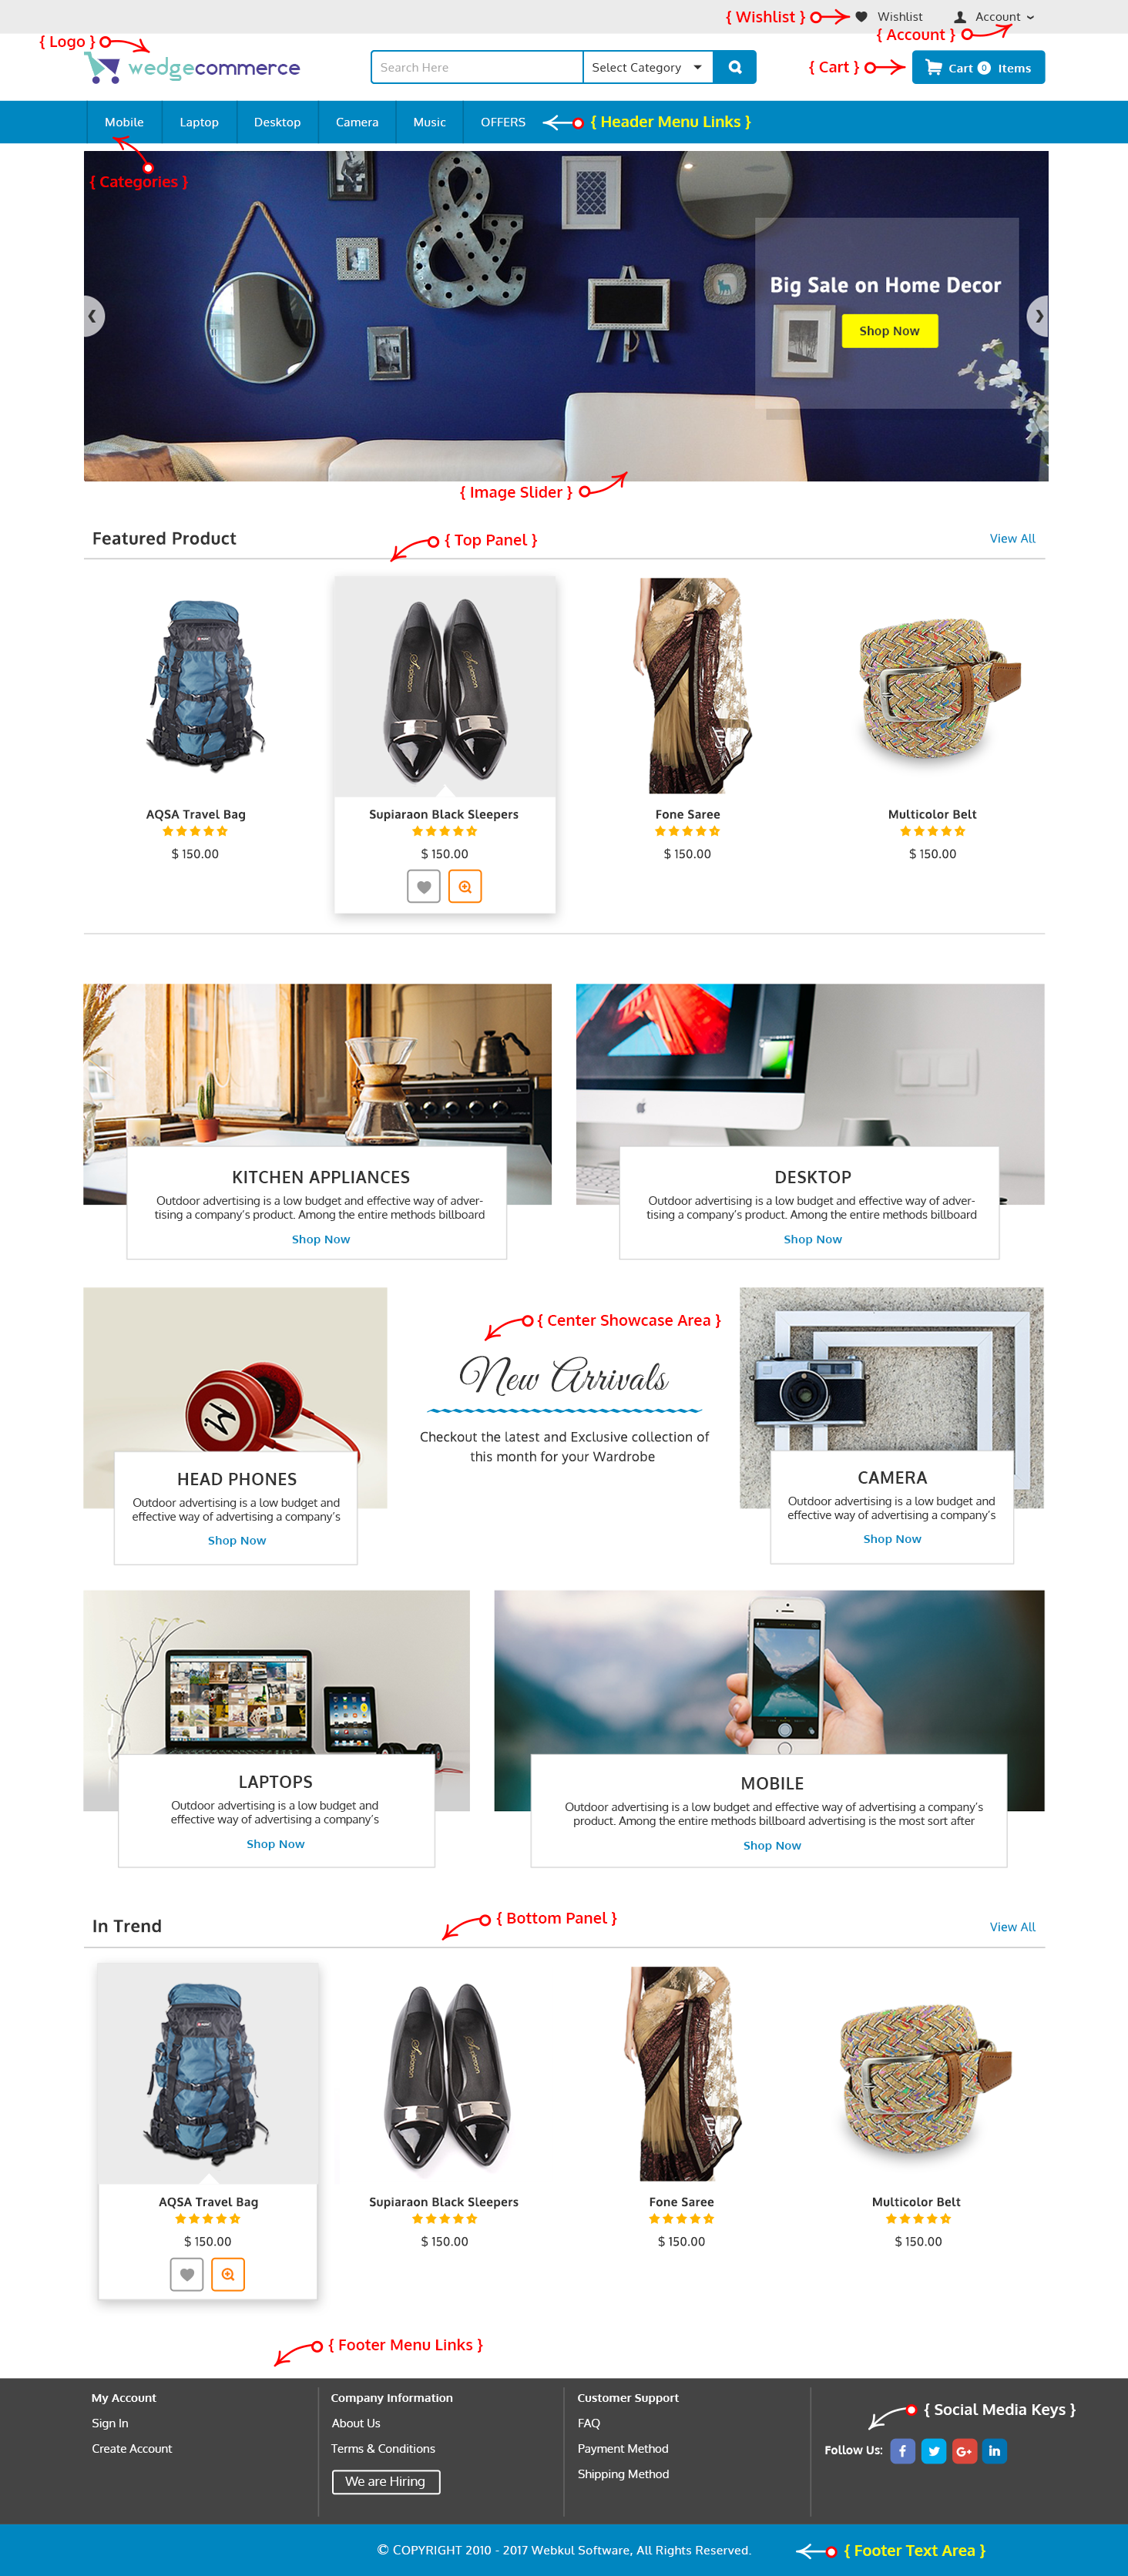
- Upon successful configuration, Front End will be displayed as shown in screen shot below.

SUPPORT
- To view the applications in Appexchange, go to Webkul Appexchnage Applications .
- For further any query : Create Ticket Now