


In this blog we will learn how to implement apex enhanced lists. The apex:enhancedList tag shows the view of the standard list view of sObjects. Let us study about the tag in detail.
apex:enhancedList Attributes
customizable : The value for this attribute is boolean, it states whether the list can be customised by the current user, the default value is set to true.
height : The height of the list.
width : The width of the list.
listId : It represents the database id of the list. This attribute is required when the sObject type is not defined.
type : It represents the salesforce object of the list content.
rowsPerPage : It represents the number of rows present in per page.
Implement apex enhanced lists
Write the following code in a visualforce page:
<apex:page >
<!--
/**
* Webkul Software.
*
* @category Webkul
* @author Webkul
* @copyright Copyright (c) 2010-2016 Webkul Software Private Limited (https://webkul.com)
* @license https://store.webkul.com/license.html
*/
-->
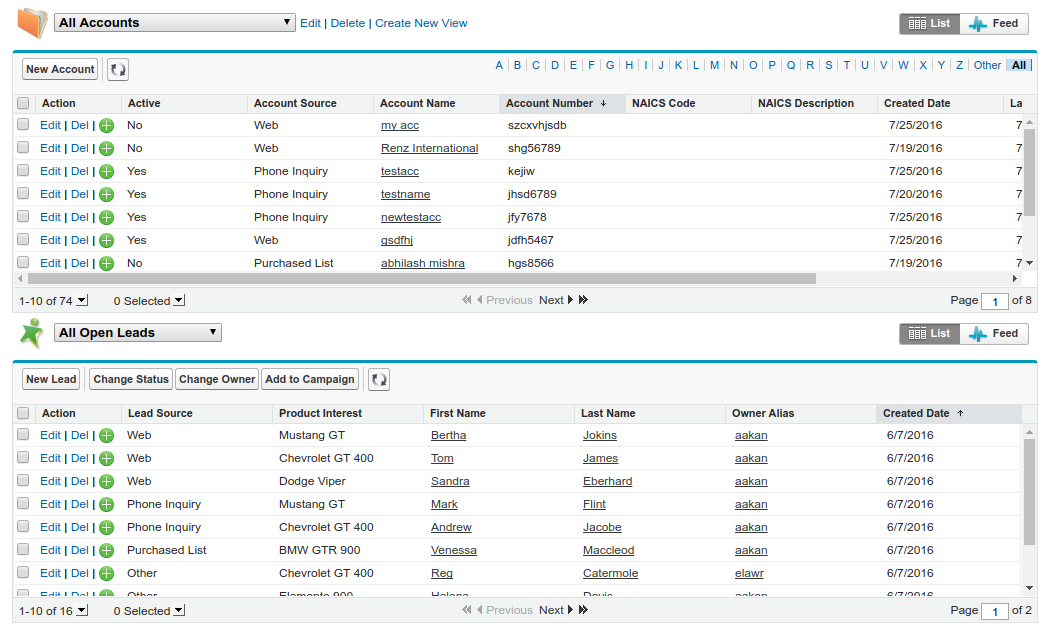
<apex:enhancedList type="Account" height="300" rowsPerPage="10" id="AccountList" />
<apex:enhancedList type="Lead" height="300" rowsPerPage="10" id="LeadList" customizable="False" />
</apex:page>
Output
The output would look like following:
Support
That’s all about how to implement apex enhanced lists, for any further queries feel free to contact us at:
https://wedgecommerce.com/contact-us/
Or let us know your views on how to make this code better, in the comments section below.